*My posts may contain affiliate links, which means I may receive a small commission, at no cost to you, if you make a purchase through a link! Thank you for supporting my website!*
Last updated on February 29th, 2024 at 05:23 pm
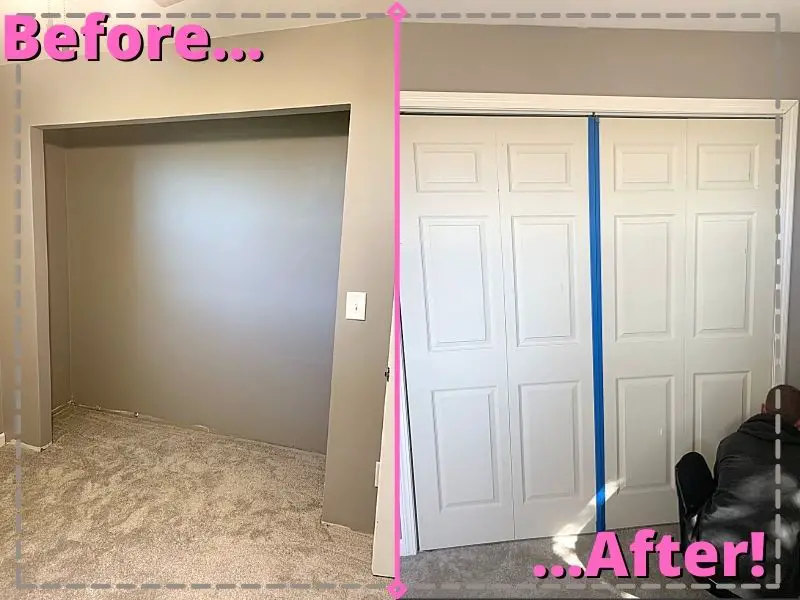
Having trouble fitting your new bifold door into the rough opening and wondering if you can cut the width of a bifold door to fit better?
You certainly can! Here’s how to cut the bifold door width:
The width of a bifold door can be cut up to ¼ inch on each side to fit better into a door rough opening. Tape off the side to be cut with painter’s tape then use a circular saw or planer to trim the width of the bifold door. Lightly sand the edges to remove burrs and paint the sides to reseal the door.
It’s pretty straightforward, but there are some mistakes you’ll want to avoid while you’re trimming your bifold door.
Read through this before you cut, and you’ll save yourself some heartache (and money). Then you will be able to cut the width of a bifold door with confidence!
Let’s dive on in!
Quick Navigation: How To Cut A Bifold Door To Fit The Opening Width
- Measure The Rough Opening & Bifold Door Width
- Tape Off The Bifold Door With Painter’s Tape
- Trim The Bifold Door To Width
- Paint The Trimmed Bifold Doors
- Other FAQs About Cutting The Width Of A Bifold Door
- Final Thoughts
| Level Of Difficulty | Time To Complete |
|---|---|
| Easy | 15 Minutes |
| Material List | Tool List |
|---|---|
| Painter’s tape | Circular saw |
| Contractor pencil | Square tool |
| Straight edge (yardstick, etc) |
Step One: Measure The Rough Opening & Bifold Door Width
The first step to trim a bifold door to width is to get some measurements.
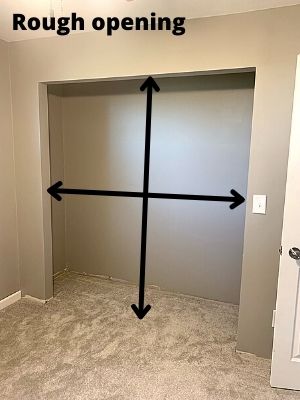
First, measure the width and height of the rough opening of your doorway using a tape measure.
The standard finished rough opening dimensions for bifold doors are as follows:
| Single Bifold Door Finished Rough Openings | Double Bifold Door Finished Rough Openings |
|---|---|
| 24” x 80-¾” | 48” x 80-¾” |
| 30” x 80-¾” | 60” x 80-¾” |
| 32” x 80-¾” | 64” x 80-¾” |
| 36” x 80-¾” | 72” x 80-¾” |
Your doorway rough opening should equal one of these dimensions. If either dimension is a little bigger, then you will need to frame out the doorway with wood.
For example, if your finished rough opening is 73” x 80-¾”, then an extra piece of wood that is 1 inch thick will need to be added to one side of the opening.
However, if either dimension is more than ½” smaller, then you’ll need to cut back the rough opening to fit a standard door.
For example, if your finished rough opening is 71” x 80-¾”, then ½” to 1 inch will need to be cut back. (Be sure to do the same if the height dimension is off as well.
Like I prefaced in the beginning, bifold doors can be cut, but it is recommended that ¼” or less be cut off of each side. This is because you run the risk of weakening or cutting out the block inside the door (hollow core bifold doors).
To see what the inside of a hollow-core bifold door looks like when you cut too much off during the trimming process and how much damage you can cause to the door, check out my article here.
How Much Smaller Should A Bifold Door Be Than The Opening?
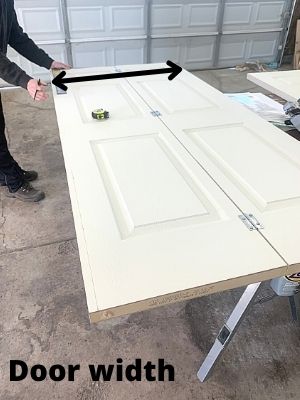
Once the rough opening is confirmed or fixed, it’s time to measure the width of the bifold door.
The width of a bifold door should be ½” smaller than the rough opening (¼” gap on each side). For a double bifold door installation, the total width should be ½” inch smaller than the rough opening (¼” on each side of the total width).
For example, if your closet rough opening is 72 inches wide, then the total width of your two bifold doors combined should be 71-½ inches.
If your closet rough opening is 24 inches wide, then the width of your single bifold door should be 23-½ inches.
Once you have all of your dimensions figured out, it’s time to move onto the next step!
Step Two: Tape Off The Bifold Door With Painter’s Tape
The next step to trim a bifold door to width is to tape off the bifold door with painter’s tape.
This step is important because the painter’s tape protects the door from chip-outs created by a circular saw while cutting.
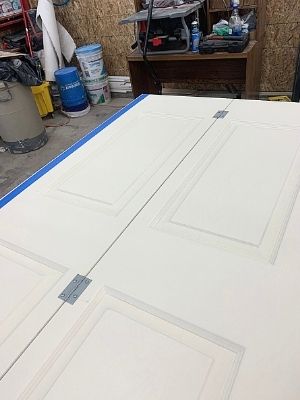
If you tape around the door before marking your measurements and cutting, you’ll have a much nicer finish on your door.
It’s a cheap way to get a professional, clean finish in my opinion haha.
Just remember to tape off the door THEN mark your measurements with a pencil. After installing 8 bifold closet doors in our house, I’m sad to say that we accidentally marked the door before taping on at least 4 of them.
Talk about a waste of time haha! It doesn’t damage the door, but it does make you have to re-measure and mark everything for a second time on top of the tape.
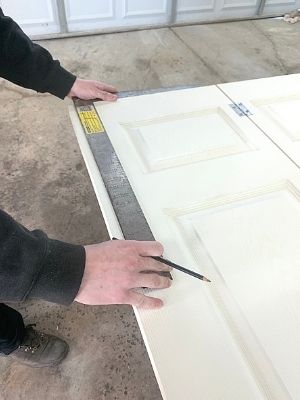
Use a square and a yardstick to make a straight line down the entire length of the door. This is the line you will be cutting with a circular saw.
Once the door is taped and the measurements are marked, it’s time to move onto the next step!
Step Three: Cut The Bifold Door
The next step to trim a bifold door to width is to actually cut the door.
It’s time to take your circular saw and cut that line! Take your time to keep a straight line.
Or you can build your own guide using a 2×4 and strong clamps to run the circular saw along with it.
We just took our time and cut as straight as possible, but the cutting guide is an excellent way to do it as well.
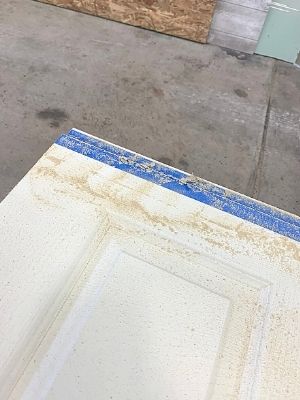
After the door is cut, I recommend test fitting it into the rough opening to confirm you’ve trimmed enough off.
Don’t even take the painter’s tape off yet until you confirm. If it’s still a little tight, then go back and re-cut or use a planer to shave a few layers off.
Here are the recommended gap sizes around each side of a bifold door:
- Each side – ¼” gap
- Top – ⅛” gap
- Bottom – ¼” to ⅜” gap
Then, when the door fits nicely, I recommend lightly sanding the edges of the side of the door that you just cut. If you don’t, then the edges will look like this and be kinda sharp to grab.
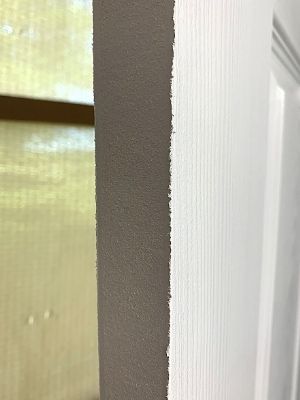
We forgot to do it on this door, so now I have to go back and sand it inside my house. It’s just an unnecessary mess because I forgot haha.
How To Fix A Hollow Core Bifold Door That Is Cut Too Short
If you accidentally cut more than ¼” off each side and suddenly realize you can see the hollow part of your bifold door, no need to stress.
We accidentally did that to one of our closet doors because the rough opening was smaller than we realized.
The door block was completely cut out and caused the door to be flimsy. I thought we had just wasted $100 on a brand new door that we ruined. Needless to say, I was disappointed in our mistake!
That was until I realized we could fix it by inserting a new block into the door and resealing it. If you happen to find yourself in this stressful situation too, then you need to check out my article on how to fix it.
It’s really rather simple, but that’s what makes it so great!
Once you have your door cut, it’s time to move onto the last step!
Step Four: Paint The Trimmed Bifold Doors
The last step to trim a bifold door to width is to paint the cut edges.
I know this step seems kind of annoying, but it is a necessary evil to protect your door for years to come.
Without the paint, moisture can warp the door over time. And if you happen to read the door warranties, they claim that the warranty is void if you don’t repaint it after you cut it.
Use that little tidbit as you wish.
I wanted to avoid the potential moisture damage, and I had to paint the entire door anyways because we got the pre-primed ones to save $30 per door. That adds up quickly when you’re buying 14 doors… but it’s also A LOT of doors to paint…
So I quickly realized I needed a solid technique to paint fast AND still achieve a professional-looking finish.
You can check out how to paint your bifold doors fast and without brushstrokes in my article here.
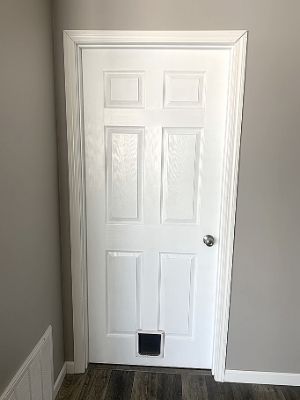
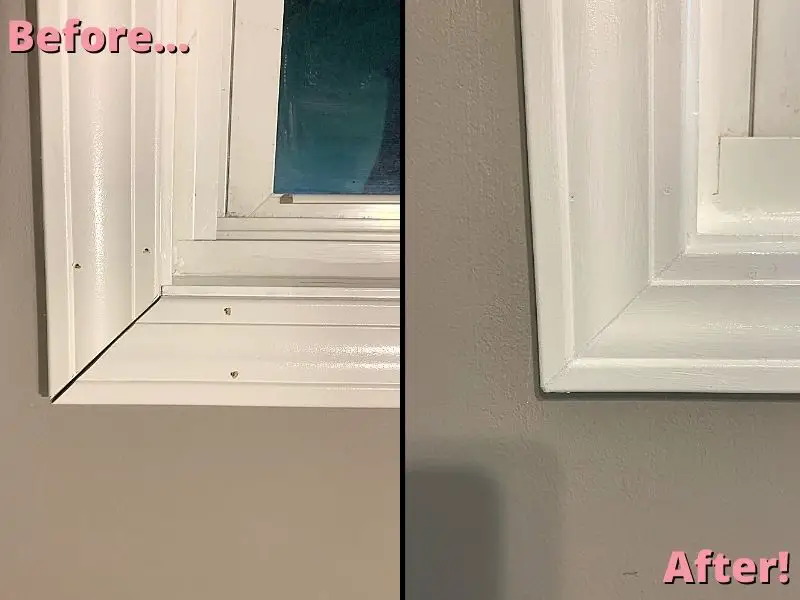
And lastly, if you’re installing new doors, you’re probably installing new trim, so I have an awesome trick for you to achieve perfectly mitered corners in your door trim.
You can check out my article here where I explain how this one CHEAP product can help turn your poorly cut mitered corners into flawless mitered corners.
I did it to all of my window trim in my house, and it made a huge difference in the quality of the trim work.
Other FAQs About Cutting The Width Of A Bifold Door
Here are some other frequently asked questions about cutting the width of a bifold door, so that you can install your bifold doors with ease!
How Do You Cut The Bifold Door Track?
To cut the bifold door track, use a fine-tooth hacksaw or a band saw. The bifold door track should be ⅛” less than the finished rough opening dimensions.
This video does a good job of showing how to use a hacksaw. Luckily, bifold door tracks are MUCH lighter and easier to cut than the piece of metal that’s being cut in the video.
In fact, you can just hold the door track in one hand and cut it with a hacksaw in the other.
Final Thoughts On How To Trim A Bifold Door To Width
There you have it! Trimming a bifold door to width is rather easy when you have all of the standard dimensions in one easy place for reference.
You can bookmark this page and come back to it whenever you have to install another bifold door so that you can have easy access to the standard dimensions!
I’m always a big fan of anything that makes my life easier, so hopefully, this tutorial made your life easier as well.
Catch you in my next post!


By Christine
Christine is a blogger and DIYer who tackles home renovation and decorating projects alongside her husband, Adam, for their personal residence and rental properties. Although she successfully tackles large renovation projects to avoid expensive contractor fees and bring her vision to life now, her path to success was not easy.
Go here to read her story, “From a Clueless First-Time Homebuyer To A Confident DIYer Creating Her Dream Home One Project At A Time“.
Popular Posts
DIY With Christine is a participant in the Amazon Services LLC Associates Program, an affiliate advertising program designed to provide a means for sites to earn advertising fees by advertising and linking to Amazon.com.

