*My posts may contain affiliate links, which means I may receive a small commission, at no cost to you, if you make a purchase through a link! Thank you for supporting my website!*
Last updated on September 11th, 2024 at 09:15 am
How To Paint Interior Doors Fast For Beginner DIYers
Part of our whole-house renovation involved learning how to paint interior 6-panel doors fast and professionally!
Unfortunately, some of the doors we needed to order were out of stock on the pre-finished white painted ones… so that forced us to buy the primed ones and paint them ourselves.
(Also, if you’re looking for a MAJOR way to save money on new doors – primed ones that you paint yourself are around $30 CHEAPER than the pre-finished ones… for eleven doors, that’s a $330 savings!!)
Luckily, we figured out a speedy way to get through the painting of the doors as fast as possible, and I want to share what we learned with you!
Let’s dive on in!
| Level Of Difficulty | Time To Complete |
|---|---|
| Easy | 2-3 Hours |
| Materials | Tools |
|---|---|
| 1 quart of semi-gloss paint | 2” angled paintbrush |
| Optional: Primer | 2” foam roller |
| Optional: 150 grit sanding block | Paint tray |
| Optional: Wood filler | Drop cloth |
| Painter’s tape | Screwdriver |
| Utility knife |
How To Paint Interior 6-Panel Doors
- Prep The Area And The Interior 6-Panel Door
- Fix Any Knicks Or Damage With Wood Filler And Sand
- Prime & Paint The Interior 6-Panel Door
- Other Frequently Asked Questions About How To Paint Interior 6-Panel Doors
- Final Thoughts
Step One: Prep The Area And The Interior 6-Panel Door
The first step to painting an interior 6-panel door is to prep your work area and your door for painting.
First, decide where you are going to paint your door.
Can you paint doors while hung?
Yes, you can paint doors while hung. Or you can take them off the wall and paint them in another location. There are a few pros and cons to either scenario.
| Pros | Cons | |
|---|---|---|
| Leave Door Hung To Paint | – Don’t have to worry about losing pieces of the door hinges or knobs – Don’t have to worry about re-installing hinges and knobs correctly – Can paint both sides of the door easier because it’s suspended in the air | – Easier to make a mess in the house – Harder/more time-consuming to paint around hinges and knobs – Time-consuming to tape off hinges and knobs – Can’t paint the bottom and top of the door as easily (Must be done if the door is cut to fit the opening) |
| Take Door Down To Paint | – Can paint easier/quicker because fewer obstacles in the way – Can move the door outside so no mess is made in the house – Don’t have to tape off anything – Can reach all sides of the door easier to paint | – Can only paint one side of the door at a time (if on sawhorses) – Time-consuming to remove and re-install hinges and knobs |
If your door is already installed and has been painted or prefinished before, then I would paint the door in place because it’s quicker and easier to paint both sides at the same time. And since you don’t need to paint the top and bottom of the door, it’s not necessary to take the entire door down to paint. (That’s how we painted our doors.)
However, if you are installing new doors that need cut to fit the opening, then oftentimes the warranty requires you to paint all edges of the door. In that case, I would take the door down to make painting all sides (including the top and bottom) easier.
Either way, you can’t go wrong. It’s ultimately up to your preference!
How To Prep The Area And Interior 6-Panel Door For Painting While Hung
To prep the door for painting while hung, you need to:
- Lay down a drop cloth to protect your floor
- Wipe down the entire door with a degreaser and a paper towel to clean it
- Remove or tape off all of the hinges and the doorknob with painter’s tape
How To Prep The Area And Interior 6-Panel Door For Painting Off The Wall
To prep the door for painting off the wall, you need to:
- Remove the door from the hinges on the wall
- Set the door on sawhorses (with a drop cloth underneath if you are still painting in your house)
- Remove all doorknobs and hinges from the door
- Wipe down the entire door with a degreaser and a paper towel to clean it
The Best Way To Tape Off Door Hinges For Painting
To easily put painter’s tape over the door hinges, cover the entire hinge with painter’s tape. Then trace the edge of the hinge (where it meets the wood of the door) with a utility knife and peel away the excess painter’s tape.
This video does an excellent job of showing exactly how to tape off a door hinge with painter’s tape.
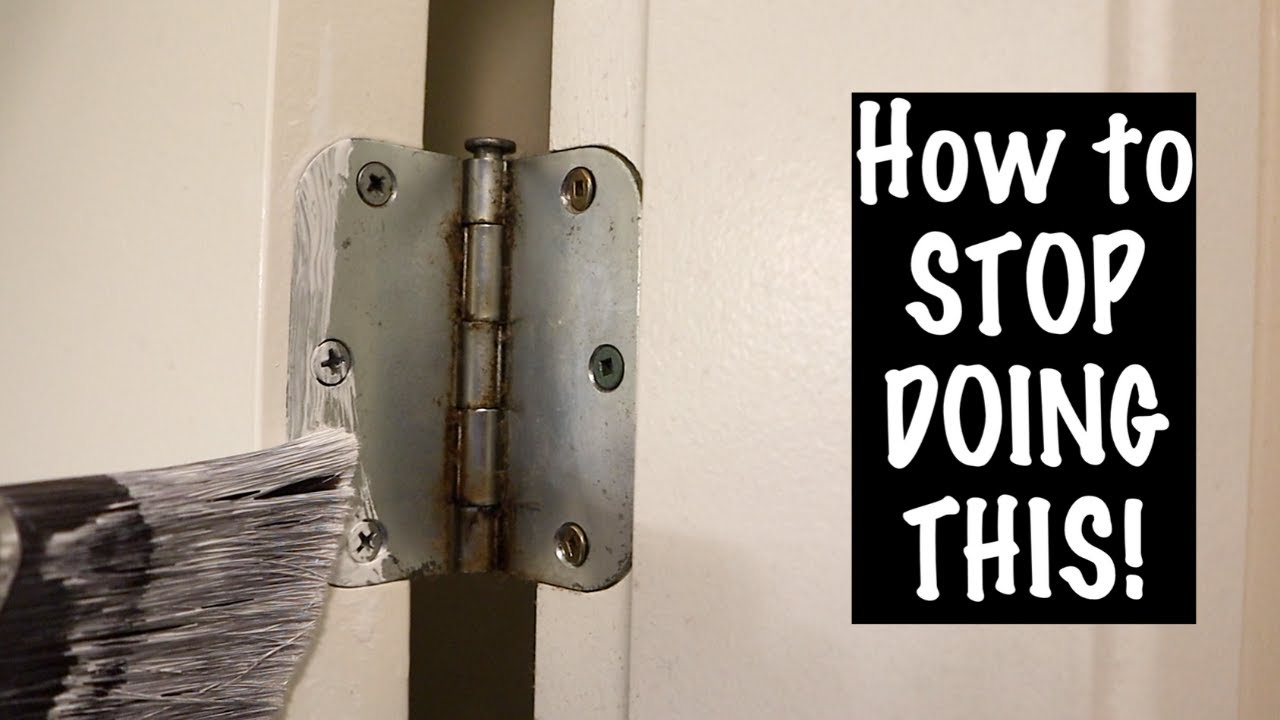
That leaves only the hinge covered by tape and the wood of the door uncovered for painting.
Once your area and door are prepped, it’s time to move onto the next step!
Step Two: Fix Any Knicks Or Damage With Wood Filler And Sand
The next step to painting an interior 6-panel door is to fix any damage on the door and/or sand it.
First, survey your door for any damage. If there is any, then you want to fill the damage with wood filler before painting.
Pro tip: If you are painting your doors white, or a light color, then I recommend using this white wood filler found at Amazon. Since white paint (or lighter paints) are thinner and don’t cover as well as darker tinted-paints, it usually takes several coats to fully cover a door.
To avoid having to paint several more coats of white, use white wood filler instead of the regular tan color. However, if you are priming your door before painting, then the color of the wood filler matters less because the primer will help cover a darker wood filler color!
How To Fix Damage In Interior 6-Panel Doors
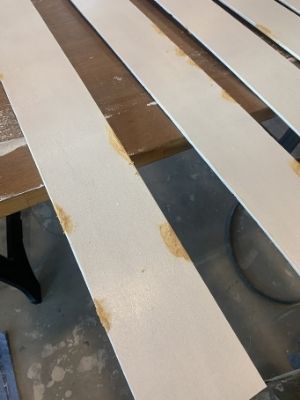
Wherever you have damage on your door, take some wood filler on your finger and wipe it across the knick or scrape.
Leave a little bit of excess wood filler over top of the damaged area, so that when you sand, you don’t sand it all away.
If the knick or scrape isn’t deep enough for the wood filler to stay in it, then just a little buffing to smooth out the scratched paint should do the trick.
Once the wood filler has dried, take a 150 grit sanding block and sand the wood filler until it is flush with the surrounding area.
Do you have to sand interior doors before painting?
I know sanding anything is annoying and time-consuming, so whenever we get the chance, we want to skip over this step.
Here’s how to decide whether your interior door needs to be sanded before painting:
- Is your door unpainted?
- No, you do not need to sand before painting. The door is ready for primer or paints as-is.
- Is your door primed from the store?
- No, you do not need to sand before painting. The door is ready for paint as-is.
- Is your door pre-painted?
- Yes, you should sand your door before painting to remove/scuff the glossy finish. Scuffing up the pre-painted interior door will help a coat of primer or paint stick to the door properly.
- Is your door stained?
- Yes, you should sand your door before painting to remove/scuff the glossy surface so paint or primer can stick to the door properly.
For our doors, they were new and primed from the store, so we did not have to sand anything. Hopefully, you won’t have to sand your door either, but if you do, an angled sanding block will help you get into the corners of the door much more easily!
Once your door is repaired (and sanded if necessary), you can move onto the next step!
Step Three: Prime & Paint The Interior 6-Panel Door
The last step to painting an interior 6-panel door is to prime and/or paint the door.
Should I use a brush or roller to paint a door?
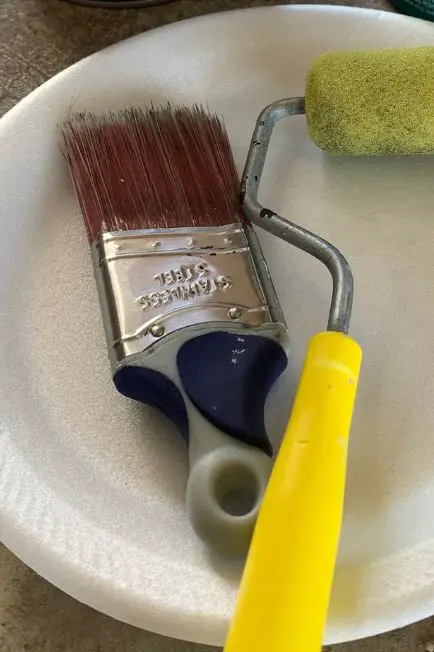
To paint an interior 6-panel door like a professional, you need to use a brush AND a roller. Use a 2-inch angled paintbrush like this one found at Amazon on the detailed work of the panels and around the doorknob and hinges.
After you brush an area of the door, however, you should take a 2-inch fine texture foam roller found at Amazon and roll out the paint. Doing this will help smooth out any drip marks or brush strokes from the paintbrush.
Also, this will make sure the texture left behind is the same texture as what will be on the rest of the door (because we will be rolling the majority of the door!)
Do I need to prime interior doors before painting?
If you are painting over a pre-painted interior door or if you are switching the color of the door from a darker color to a lighter color, then you should prime your door before painting.
First, primer is more opaque than regular paint, so it can help you use fewer coats of paint to switch a door from a darker color to a lighter color.
Second, the primer adheres to different surfaces much better than regular paint, so it can help your paint adhere to a pre-painted or pre-stained door better.
Third, it blocks stains from bleeding through your new paint job (especially if you sanded down to bare wood or if there were sharpie drawings all over the old door) by providing a protective barrier.
Fourth, it’s significantly cheaper than regular paint, so it’s more cost-effective to use a coat or two of primer before applying a coat or two of your regular paint.
(This is the Zinsser primer found at Amazon I recommend. It will give your doors a nice, smooth finish and cover up any stains or color variations. It’s perfect to give you a blank slate for painting your interior 6-panel door!)
All of that being said, if your door is new and primed from the store then you can skip this step because the store already did it for you!
However, if you determine that you do need to prime your door, here’s how to do it fast & flawlessly.
(By the way, this is the exact same way you will paint the door fast. So if you don’t need to prime your door, skip straight to the regular paint and paint in the order below!)
How To Prime/Paint Your Interior 6-Panel Door Fast & Flawlessly
The best and fastest way to prime and/or paint your interior 6-panel doors is to do it in this order:
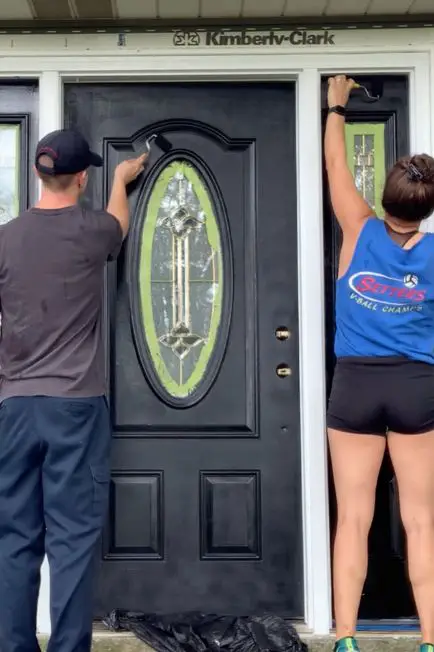
First, use your 2-inch angled paintbrush to paint around the door hinges on the edges, then roll the rest of the area with your 2-inch foam roller.
Try not to press too hard while rolling, so excess paint doesn’t create a drip mark on the faces of the door.
Also, if you have your door off of the wall, make sure to paint the top and bottom edges (especially if you had to cut the door to install it).
Second, use your paintbrush to paint all of the detailed areas of each panel in the door.
Be sure to use a small amount of paint and immediately wipe away any drips that will most likely form in the corners with your paintbrush.
Third, take the foam roller and roll the flat part of each panel.
Fourth, roll all of the horizontal sections. Make sure to roll with the grain of the wood for a flawless finish.
Last, roll all of the vertical sections (again, rolling with the grain of the wood). As you come to a door hinge or a knob, you might need to use your paintbrush to get all of the door painted before continuing to roll out the rest of the area with paint.
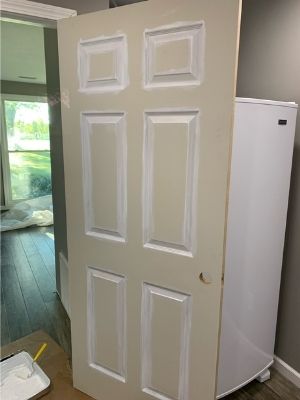
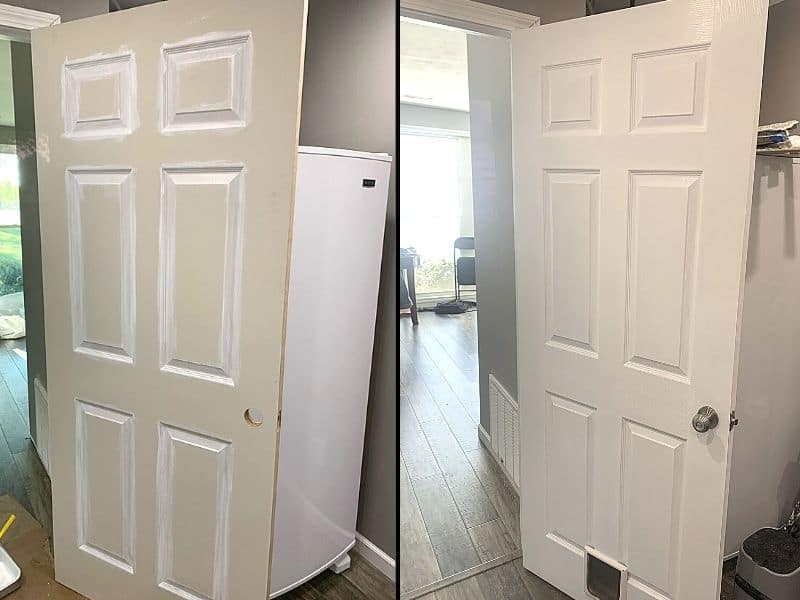
Then repeat this process for the other side of the door. Apply as many coats on each side of the door as it takes for the paint to look pristine. Like we talked about earlier, white or lighter paints will probably take more coats than darker paint!
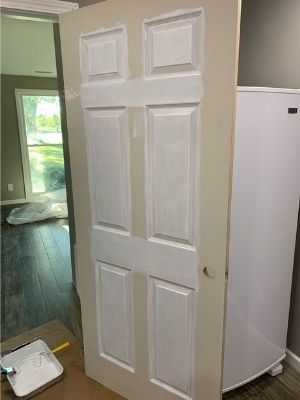
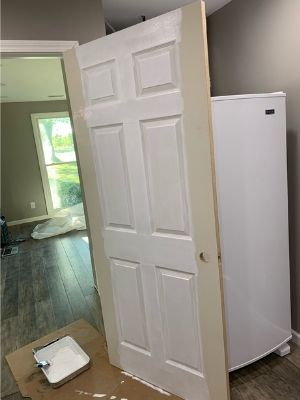
As you can see in my pictures, only one coat on already primed doors was not enough! I went through and repeated this process two more times on each side of the door to give the bright white finish I was looking for.
How do you paint interior doors without brush marks?
Besides, the detailed area of the panels, wherever you use a paintbrush, you will want to roll out that paint with your foam roller to give the door a uniform, smooth texture (and avoid brush marks).
For example, if you need to use your paintbrush to get closer to the doorknob and hinges because you are painting the door while hung, try to roll the paint as close as you can to those areas so you can’t see any brush marks.
Do I need a topcoat on 6-panel doors?
I did not use a topcoat on our 6-panel doors because I used a high-gloss cabinet, door, and trim paint that is a little more durable than different sheens of paint. Also, I painted our doors white, and the primer underneath is also off-white, so if any scratches do occur, they aren’t noticeable.
However, if you are painting your door a darker color, then a topcoat might be worth it. I have heard others who painted their doors black having issues with scratches because the white primer underneath was more prominent against the black.
This article does a fantastic job explaining the different types of topcoats and what they are used for. It also states that high-gloss paint is durable enough that it doesn’t need a top coat, so I really wouldn’t worry about adding one to your 6-panel doors!
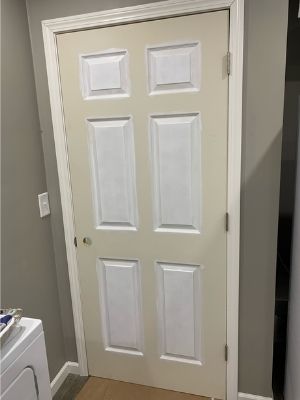
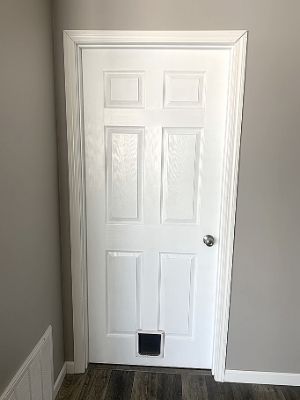
Here is how our finished doors look with 3 coats of white high-gloss paint and no topcoat. It’s been 6 months since I painted them, and I have no issues of scratches at all!
Other Frequently Asked Questions About How To Paint Interior 6-Panel Doors
Here are some other frequently asked questions about painting interior 6-panel doors. Some of these answers might help you on your door painting DIY journey better!
What is the best paint finish for trim and doors?
The best paint finish for trim and doors is high-gloss. Not only is a gloss finish easier to clean, but it’s also more durable.
Which is exactly what you want on a door (that tends to see some use abuse over time). Also, gloss hides dirt and dust much better than other paint finishes.
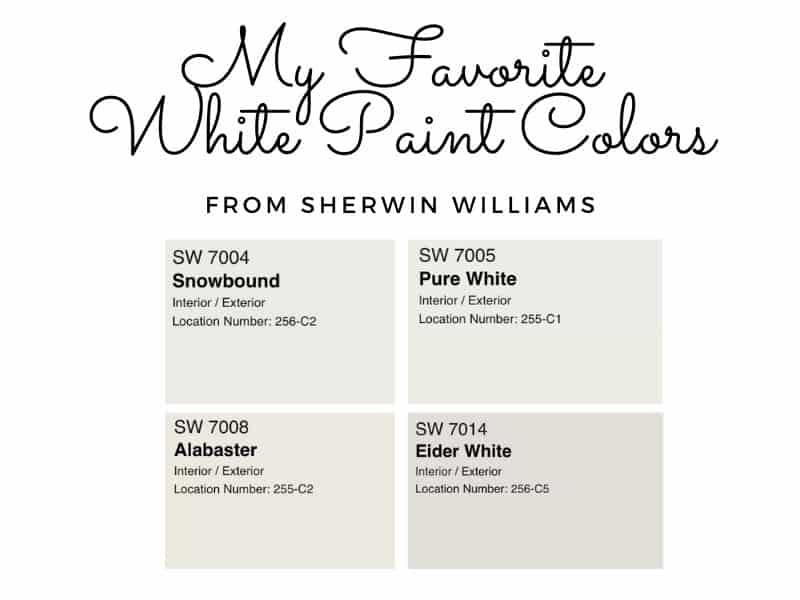
What is the best white paint for interior doors?
There are a few white paint colors that I think are the best for interior doors. Here are my top picks!
What is the best black paint for interior doors?
There are a few black paint colors that I think are the best for interior doors. Here are my top picks!
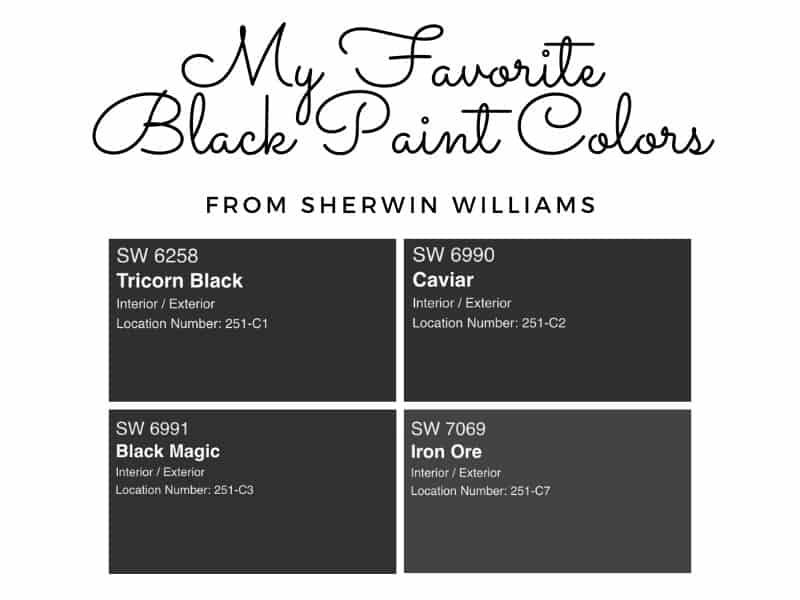
Not sure what color to pick? Order a few samples from Samplize to help solidify your color choice! These easy-to-move-around paint sample stickers will help you better visualize what paint color will work best for your door (or room)!
Final Thoughts On How To Paint Interior 6-Panel Doors
There you have it! Painting interior 6-panel doors is an easy and awesome way to completely change the look and feel of your house.
Although, I will admit it’s not for the faint of heart if you are planning on repainting ALL of the doors in your house… I had to paint FIVE already primed doors with 3 coats of white paint on each side…
And I still have SIX more to do… hahaha, just being real with you. Plan to tackle one door a weekend, and you’ll slowly, but surely, make a huge difference in your house.
And who knows. Maybe starting with this simple DIY project will lead to a whole house makeover! DIY is such a cool world like that. 🙂
Catch you in my next post!
The Best Paint Supplies I’ve Used
Wooster Shortcut Angle Sash Paintbrush (2-Inch)
This is my all-time favorite paintbrush because it is so lightweight! The short handle takes the pressure off your wrist and creates an extremely comfortable grip, so you can paint longer without feeling the weight on your wrist. I use this paintbrush on 99% of my paint projects. You can find this paintbrush here on Amazon.
FoamPRO 164 Fine Finish Roller (4-Inch)
If you want the least amount of paint texture left from a roller (such as on metal or furniture), then this is the best roller you can use. The fine finish in the foam leaves the tiniest bit of texture that can easily be sanded between coats to get a finish almost as good as a sprayed finish. You can find this awesome foam roller here on Amazon.
If you’ve been curious about how we are decorating our 1950s Ranch, you should check out our “Shop Our Home” page. You can find products that we’ve personally bought to decorate our home.

By Christine
Christine is a blogger and DIYer who tackles home renovation and decorating projects alongside her husband, Adam, for their personal residence and rental properties. Although she successfully tackles large renovation projects to avoid expensive contractor fees and bring her vision to life now, her path to success was not easy.
Go here to read her story, “From a Clueless First-Time Homebuyer To A Confident DIYer Creating Her Dream Home One Project At A Time“.
Popular Posts


DIY With Christine is a participant in the Amazon Services LLC Associates Program, an affiliate advertising program designed to provide a means for sites to earn advertising fees by advertising and linking to Amazon.com.