Hey there!
Welcome to my world of DIY!
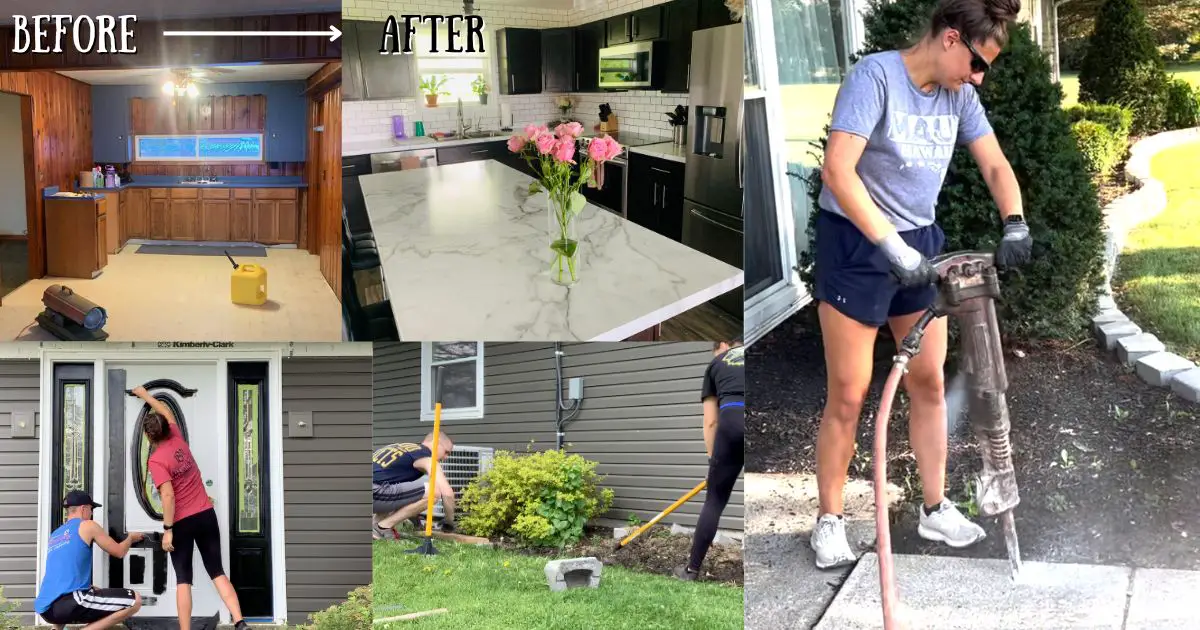
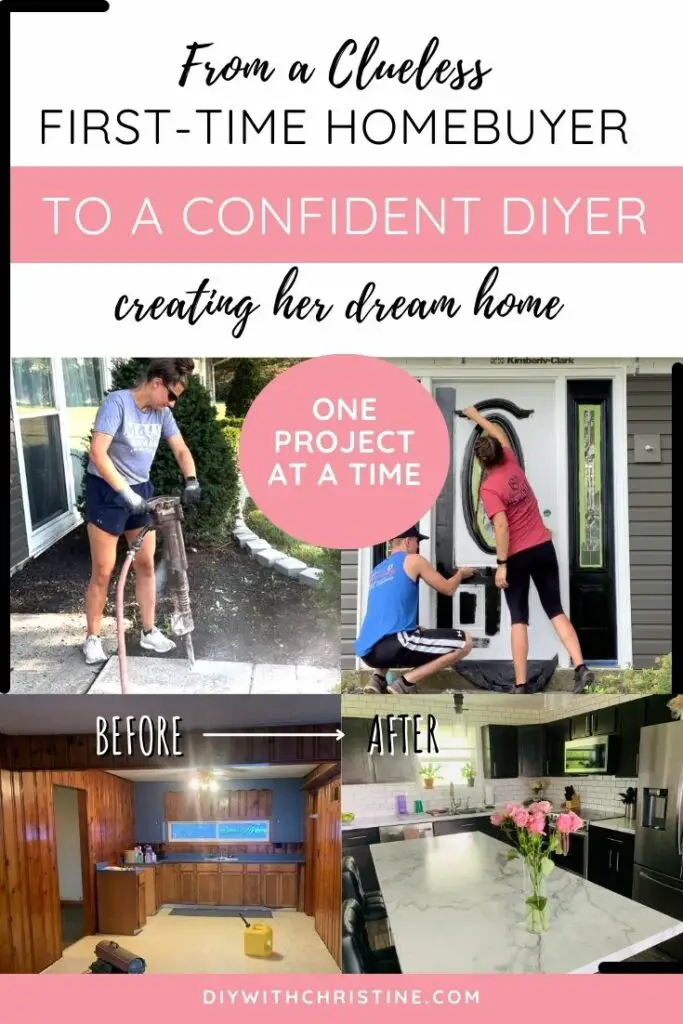
My name is Christine, and I started this blog, DIY With Christine, to document my husband, Adam, and I’s journey while we renovate our first home together (a 1950s ranch that needed a full revamp!).

When we started this journey, we had no clue what we were doing (which is a scary feeling) or what we were getting into. We made all of the classic mistakes:
- Tearing down too much and having to rebuild back more than we originally planned
- Guesstimating wrong on our renovation project budget
- Learning how to complete DIY projects as we went and having to redo projects because we messed up or did things out of order
- Overall, getting thrown into a world of power tools and measurements that we did not have the base knowledge to prepare us for
Over time, and by learning through trial and error, we found ways to complete our home renovation projects to the same level as a professional. This ultimately saved us tens of thousands of dollars and helped us build a home we love living in.
Starting As A House-Hacker
If you’ve ever heard of “House Hacking” then you’ll know what I’m talking about in this section. But in case you don’t know, this is what Forbes has to say about House Hacking:
“House Hacking is a strategy that involves renting out portions of your primary residence to generate income that is used to offset the cost of your mortgage and other expenses associated with owning a home.”
– Forbes
I mention this because when I was a sophomore in college in 2015, my parents and I went in on a duplex together. The deal was that if I helped fix it up, I got to live rent-free on one side, and the rent from the other side would pay the mortgage.
Crazy enough, I was house hacking before I had ever heard the term. (This strategy is something I’d HIGHLY recommend if you ever get the chance.)
The Duplex
When we bought the duplex, we bought it as a HUD foreclosure. There was old, crackling plaster, hardwood flooring missing in the bathroom, and animal feces all over the basement. Most people would probably wonder what we ever saw in the house! I’ll tell ya – it was a good deal, the bones were good, and the rent potential was worth it!
I spent that entire summer working alongside my family renovating the duplex, so it could be ready before college started again. In that time, I painted walls, sanded and refinished hardwood floors, and installed new door trim and baseboard, on top of a myriad of other things. We also hired a few contractors to do some of the larger projects like fixing drywall and installing the bathtub and kitchen cabinets.
After 3 short months, I got a small taste of how satisfying it is to take something ugly and make it beautiful again. I also learned that contractors are super expensive and don’t always do the best work.
I lived there for 4 more years taking care of the property (both my side and our renter’s side) and adding unique touches (like new cabinet handles and kitchen backsplash) to make the rental better when my husband and I moved out in 2019.
Check out my other blog, DIY Rental Manager, to learn all about how we self-manage the Duplex and our other rental properties for only 5-10 hours a month! (We manage them better than a professional property management company would AND we get to pocket the management fees! Win-win!)
The 1950s Ranch
After college, things started to move quickly. My husband, Adam, and I got married, we lived in the Duplex for a year, and then I became fully obsessed with real estate.
We knew we wanted to move out soon, so the hunt for the perfect fixer-upper was on. We searched for the better part of 6 months and put offers on several homes only to get beat out by higher offers.
I was determined to get a good deal on our first home and have enough wiggle room to put some sweat equity into it. Finally, after a lot of luck and time spent touring properties, we came across our (hideous) 1950s Ranch we now call home at the end of 2019.
Our 1950s ranch needed EVERYTHING replaced in it. You might be wondering, what did we see in this house?? Oh yeah, that’s right! We saw a great-priced estate sale in the perfect location, and I wanted to flip a house haha! Luckily, Adam was all-in on this project with me, so we made it happen!
We spent almost all of 2020 gutting and renovating every single aspect of this house. I’m not kidding when I say this – it might be a 1950s house, but almost none of it is left from the 1950s. (The only sections that are still original to the house are parts of the foundation and the exterior structure – but we redid a good portion of that as well).
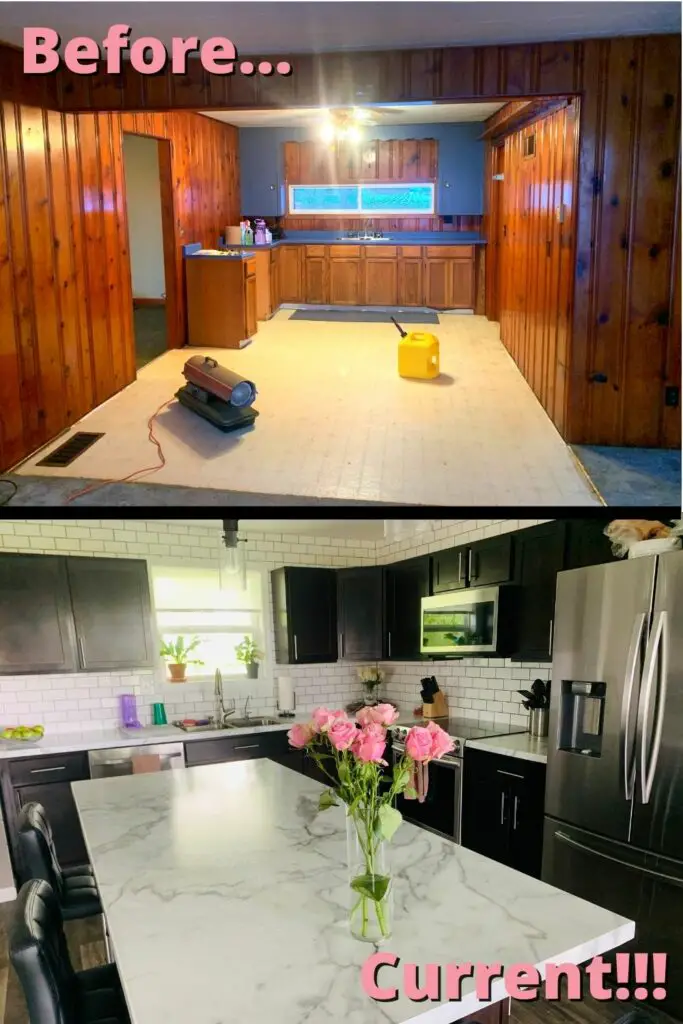
Here’s a before and current picture of the kitchen:
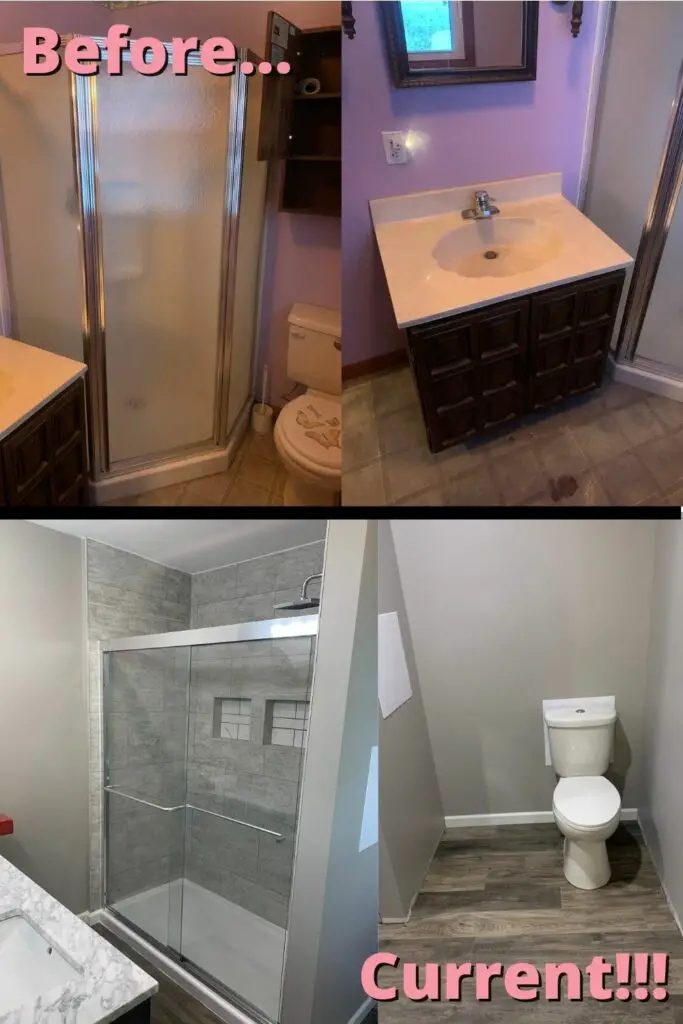
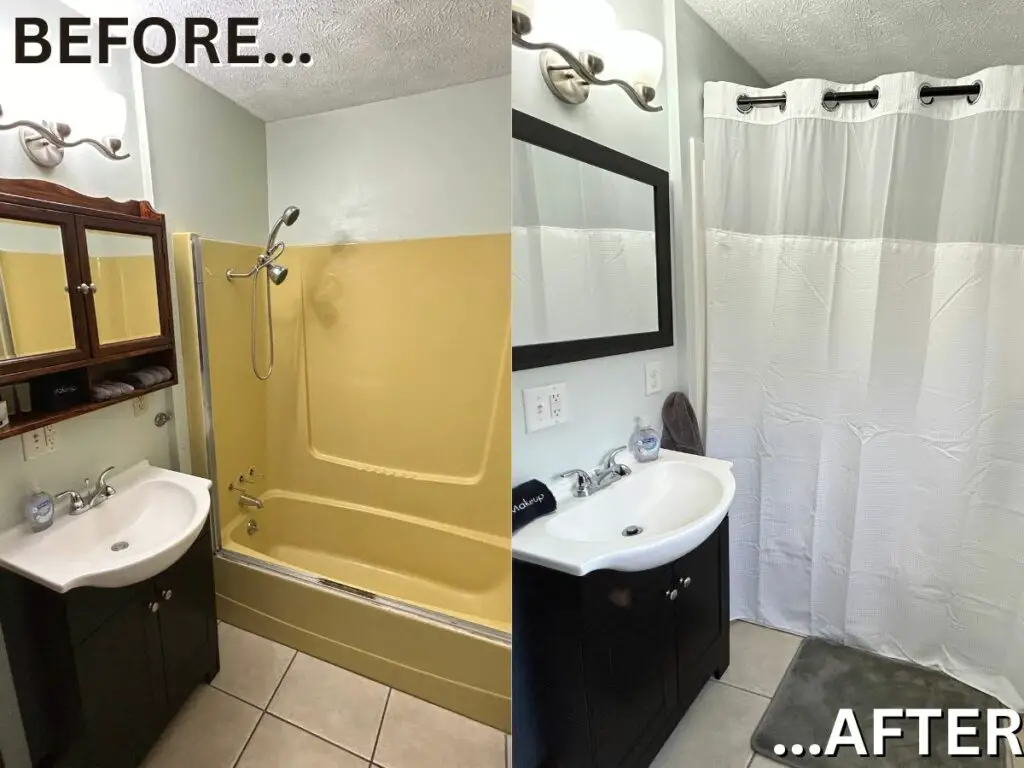
Here’s a before and current picture of the master bathroom:
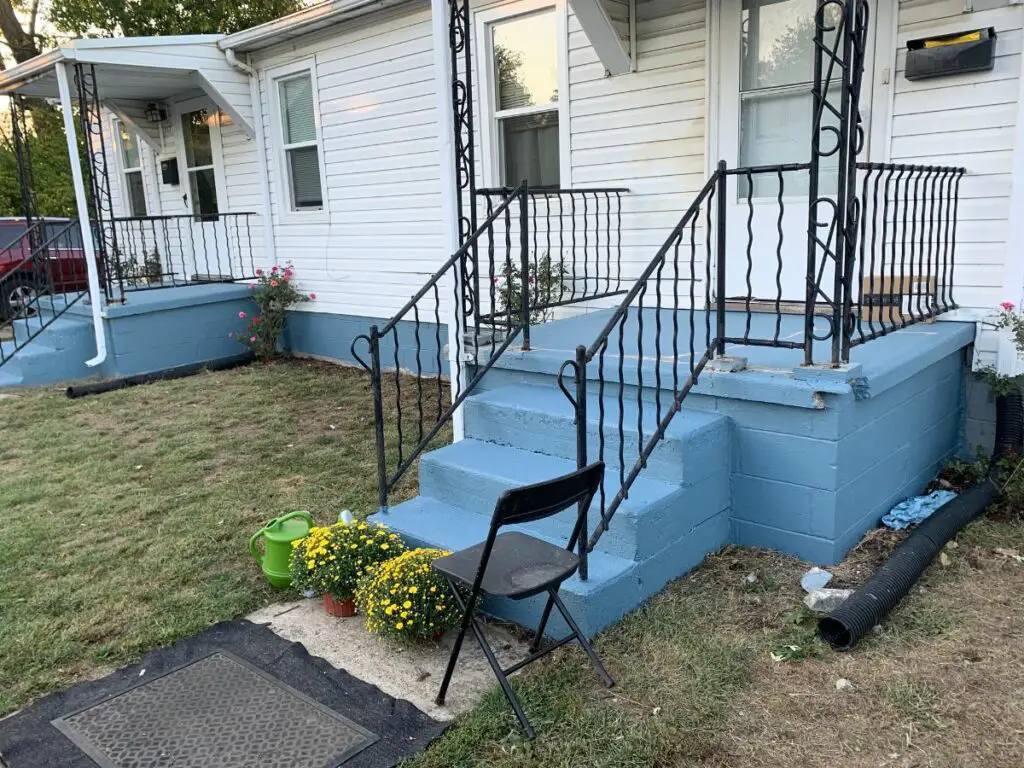
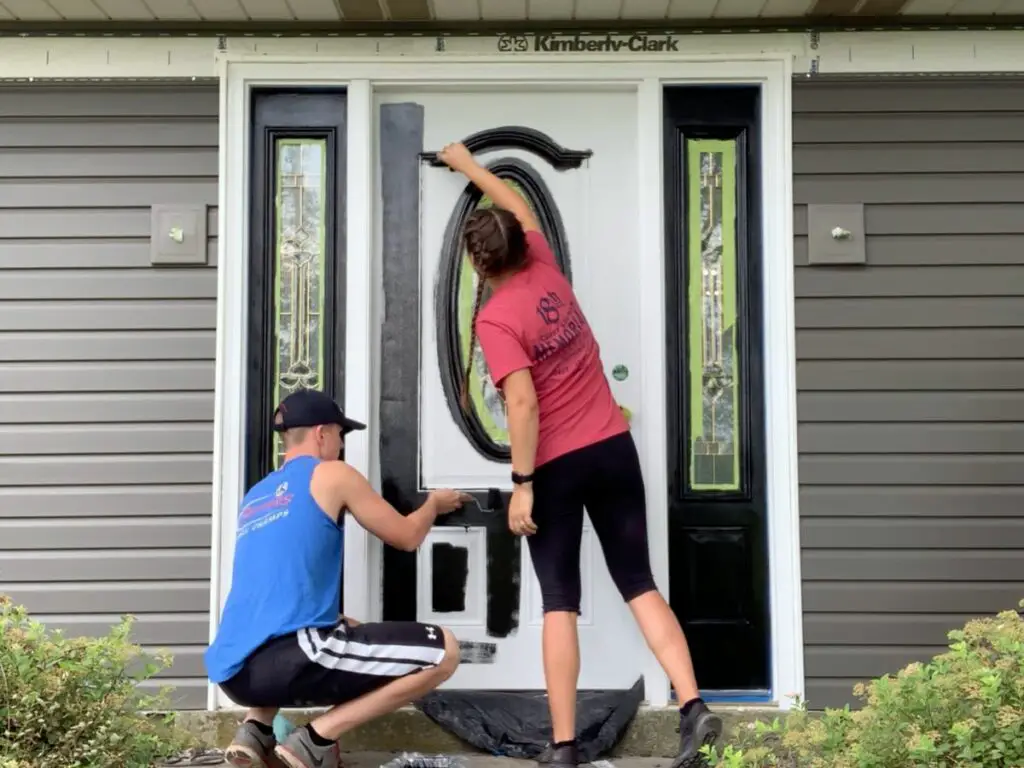
And finally, here’s a before and current picture of the exterior of the house:
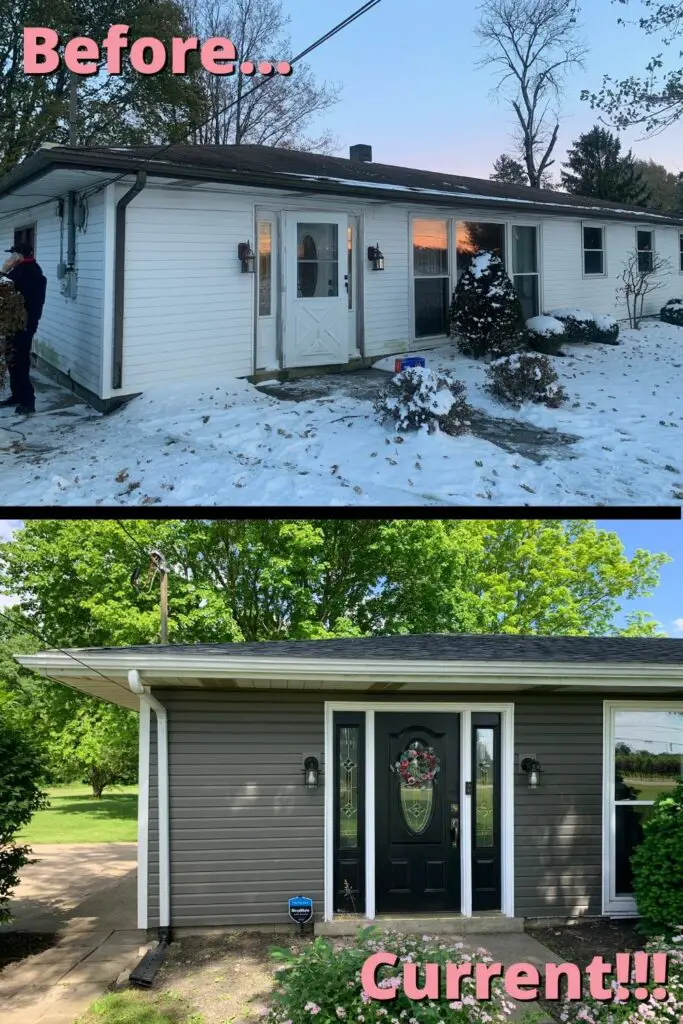
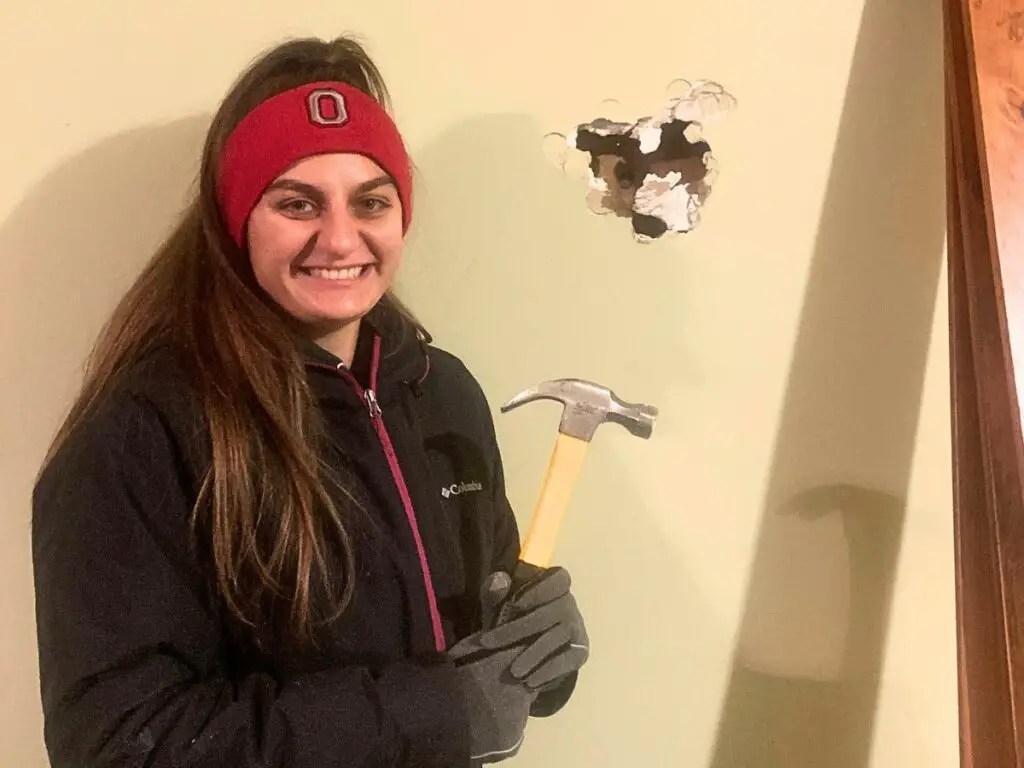
Do you see what I mean? I mean look at that WOOD PANELING!
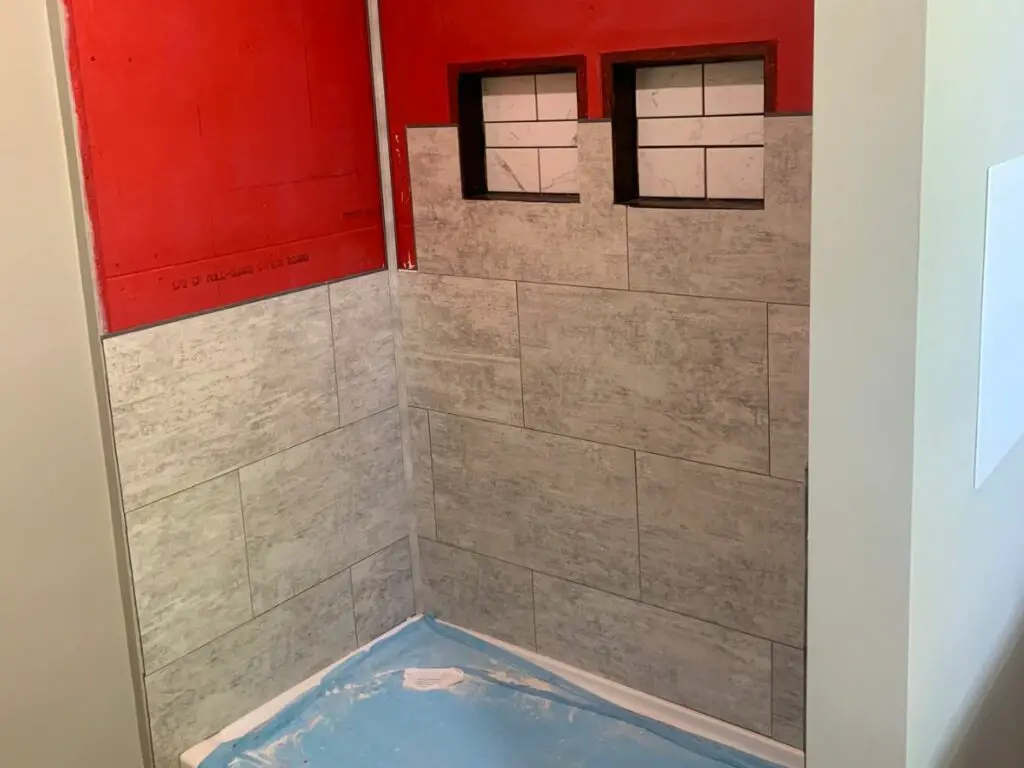
It was very satisfying to remove that stuff. During this project, I went from performing basic home maintenance and home improvement projects to building walls, running plumbing through bathrooms, drywalling entire rooms, tiling showers, and more.
Not all of it went smoothly though. We had to learn the hard way how much work a full renovation is and how costly it can become.
From Tearing Down Too Much & Not Realizing The Consequences Of Too Much Demolition To Being Able To Understand How Much Effort Will Be Required If We Start A New Project
When we originally purchased the 1950s Ranch, I was envisioning walls being torn down and kitchens being reconfigured. I also envisioned us living in the home throughout the renovation.
The jokes were on me though because, at the time, I couldn’t fully comprehend how much was going to need to demo to achieve my vision and how long that meant it would take to rebuild everything back.
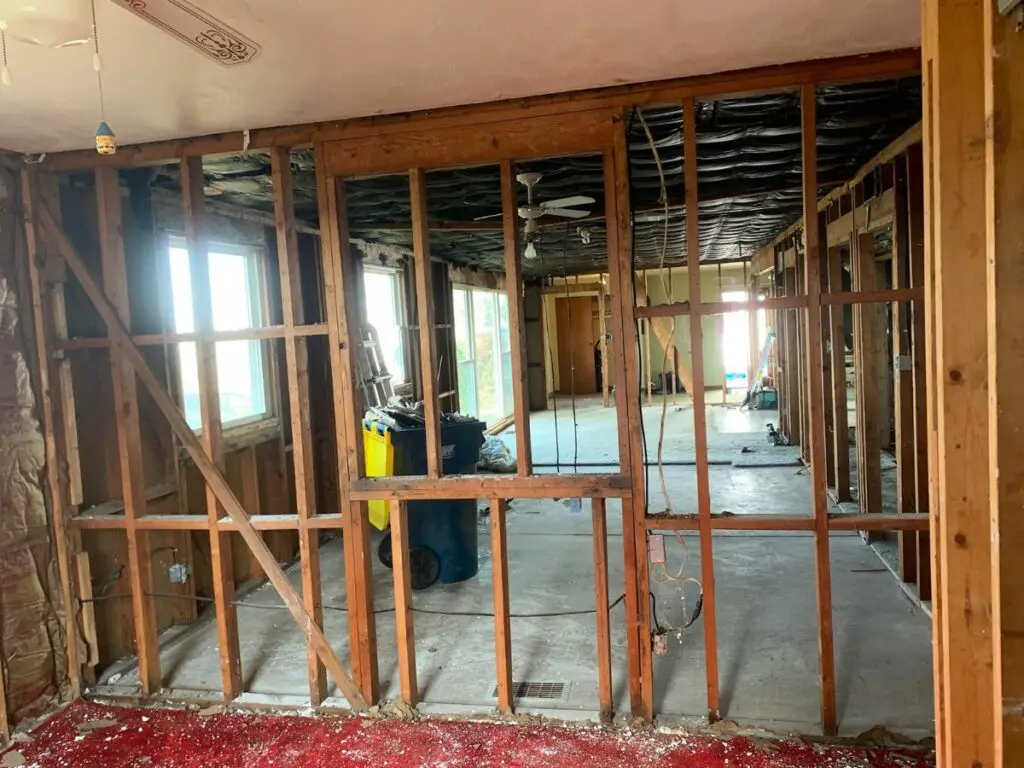
When I envisioned walls being moved, I didn’t realize that meant months of drywall work would need to be done. At one point, we could see from one end of the house to the other end because there was no drywall, only studs.
And if you’ve ever worked with drywall, that means EVERYTHING is COVERED in dust. It also means the house is freezing because there are no walls to keep the heat in. During the heart of the winter, we would be bundled up in snow gear with a space heater on, and I’d still be freezing because all of the heat would immediately go out through the uncovered walls.
Looking back, we had to do the renovation this way because of the amount of work that needed to be done. Piecemealing the projects while we attempted to live in it would have made projects so much more difficult, and more time-consuming, and the house wouldn’t look quite as good as it does today.
Thankfully, my parents live 8 minutes away so we were blessed to stay with them for the 9 months it took us to make the home liveable again. (You heard that right, it only took us 4 weeks to demo the house, but it took us ANOTHER EIGHT FULL MONTHS to put the house back together again.
During those 9 months total, we worked so much on the house, that we had created full-time second jobs for ourselves. That’s just another thing I couldn’t have understood before diving into a project as big as this.
But now that we’ve done it once, I know we will end up doing it again because there is nothing as satisfying as being able to fully configure your home the way you want and to be able to say that you are the reason the house looks as beautiful as it does.
It’s a satisfying feeling that made the long 9 months completely worth it! I now know that home renovation projects take at least 2 times as long as you think they will. It’s just a part of the process.
From Completely Under-Estimating Our Initial Renovation Project To Confidently Being Able To Plan Out The Cost Of New DIY Projects
When we started the renovation, I had a spreadsheet with a budget of all of the estimated costs I was expecting us to have to pay out. Boy, was I sorely mistaken about how much renovation projects cost haha!
I quickly learned that there will ALWAYS be miscellaneous costs that you just can’t know what they will be until they happen. That’s why it’s best practice to estimate 10-20% more on top of the estimated renovation cost as a miscellaneous category.
We also learned that we had to get good at making decisions fast. If you take too long to choose a paint color or the kitchen cabinets, you might end up delaying the project by weeks for no reason other than your inability to make quick decisions.
It was a job in itself to manage all of the supplies we needed to complete projects and to run to the hardware store 100 times a month to get “the one plumbing fitting you forgot”. (Don’t get me started on how obnoxious it is that you need 50 different pieces of plumbing to complete one project lol.)
I also learned that some items are worth upgrading, while others are just not worth the extra money. Most things are not worth upgrading:
- Drywall
- Interior doors
- Baseboard and trim
- Light switches/outlets & covers
- Shower bases
- Sinks and faucets (kitchen and bathroom)
- Towel racks/holders
- Kitchen cabinets/bathroom vanities
- Paint
- Light fixtures
- Carpet/laminate flooring (we didn’t go the cheapest route, but we didn’t go super expensive either and it’s all been fine/still looks brand new)
- Etc
The above items are fine to get the middle-of-the-road versions (not the cheapest, but also not the most expensive). We were able to save a little money on these items by keeping the finishes simple.
For other items, I wish we would have upgraded a little bit:
- Lever door knobs instead of round door knobs
- Granite kitchen countertops instead of laminate kitchen countertops
- Toilets that are the next tier above the cheapest options (ours is losing flushing power after only 3 years)
- Bathtub bases that are comfortable to lay in (ours is not)
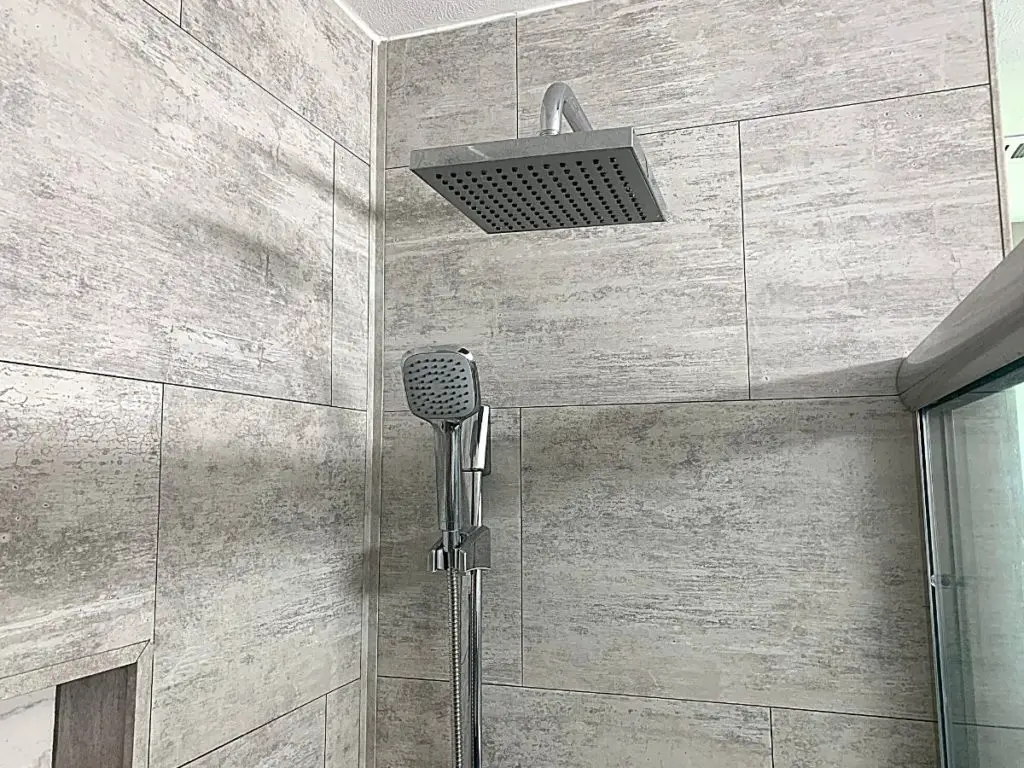
- Shower heads (our rain shower head is 100% worth every penny – I wish we would have put one in the guest bathroom too)
While we did struggle with the renovation budget a little bit, we saved so much more money by doing 90% of the work ourselves (the only work we didn’t do ourselves was installing the fireplace chimney liner, replacing the roof, and installing the drywall).
Paying contractors would have easily doubled our renovation budget, and we would not have been able to do all of the projects that we did in the timeframe that we did.
Knowing what we do now, I can more confidently estimate our renovation budget. I regularly estimate and plan out the renovation plans for our rentals whenever a tenant moves out. So this initial experience is still paying dividends to us!
Original: Our official out-of-pocket repair expenses were $52,000, and we bought the house for $108,000. After repairs, the house was appraised for $195,000 in 2021. That means we created $35,000 worth of equity!! It’s so exciting to see your hard work pay off!
Update: Years later, our home is most likely worth way more than the $195,000 it originally appraised for back in 2021. That’s what makes all of these DIY home renovation projects worth it!
From Having No Clue How A House (Or Anything In It) Works To Confidently Figuring Out How To Repair/Build Anything (Saving Us Thousands In Contractor Fees)
When we first dove into the demo and renovation for the 1950s Ranch, we only had basic knowledge – painting, sanding, and refinishing existing hardwood floors, installing peel-and-stick backsplash, and installing baseboard and trim – from our experience at the Duplex.
All of the bigger items were taken care of by a contractor at the Duplex. So needless to say, we were greener than green and completely clueless as to what we were getting into.
Thankfully, my dad (who has done a renovation project to this extent on his own home) helped us throughout the entire project. We were forced to learn on the fly how to tear down and rebuild walls safely, plan a new kitchen and bathroom layout, run new electric and plumbing lines, install laminate flooring and Palisade tile, and so much more. (YouTube and blogs like this are a magical thing.)
Now that we’ve done almost every home renovation project in the book, we regularly use that knowledge to fix up our rentals during tenant turnovers and save thousands of dollars in contractor fees.
We also have continued to complete DIY projects around our home since we moved in because we have the knowledge and the drive to tackle anything. That newfound knowledge and confidence is such an underrated skill that we will have for the rest of our lives.
I highly recommend everyone learn some basic DIY skills – it is such a freeing way to live your life. You’re no longer dependent on contractors or others who charge you an exorbitant fee to do something as simple as installing a toilet (yes, this is way simpler than I originally thought!).
Today We Confidently Tackle All DIY Projects & Home Repairs Without Needing To Rely On Others Or Pay Outrageous Contractor Fees
After our first home renovation at the 1950s Ranch, we’ve completed several more projects at my brother’s home, my parent’s home, and several of our rentals. We’ve saved tens of thousands of dollars and have gotten the projects done in the timeframe that we wanted and to the quality of workmanship that we would expect from a professional.
It has been an incredible journey we’ve been on throughout the years. If we can do it, then you can too!
I’ve made my fair share of mistakes, but I’ll never trade those mistakes because every mistake has made me better and stronger. Lucky for you, you can learn from my mistakes and avoid making them yourself!
How I Started Blogging About DIY & Home Improvement
Towards the end of our 1950s home renovation, I started to think about how much I had learned over the past year and how much money that knowledge had saved us (and hopefully how much it will make us when we sell it later!).
I realized that it is not normal anymore for people to learn the skills I learned. (And if you were taught them, kudos to whoever taught you! They’re helping you have a better life!) I just feel that it shouldn’t be that way though! Everyone is just as capable of renovating their homes on a budget as a professional (and oftentimes better because you care more about the outcome).
There’s no reason to wait YEARS to have your dream house when you can create your dream TODAY with your own two hands. I just think that is so cool, and I want to help more people feel the same empowerment I felt on this journey.
As I’ve said before, DIYing your home is one of the fastest ways to learn new skills, get a major feeling of accomplishment and empowerment, and save some major money (while also adding more value to your home!)

We want to show other homeowners that you CAN create your dream home WITHOUT relying on others or paying expensive contractor fees.
If you’ve ever wanted to:
- Learn the best way to remodel big portions of your home like a pro
- Successfully estimate the costs and materials needed for each DIY project, and
- Gain a ton of confidence knowing you are capable of building anything you can imagine
Then this blog will be your go-to resource to help you do that without feeling overwhelmed!
My goal is to help you learn some fool-proof DIY tips and tricks I’ve learned along the way that you can implement into your home TODAY that will give you an immediate boost of confidence and save you real money.
I LOVE empowering homeowners with tools and resources that make their lives easier and let them create a home they love. I don’t know about you, but that sounds like a win-win to me!
I hope I’ve inspired you to try your first DIY or home improvement project!
For more DIY inspo, check out DIY With Christine on YouTube and Pinterest:
About DIY With Christine Blog
DIY With Christine’s main focus is helping you renovate and decorate your dream home without relying on others or paying a contractor outrageous fees.
This blog also covers topics about DIY, home improvement, & home decor.
Disclaimer: Please note that this is a personal blog where I share my personal experience, tips, and tricks about DIY & home improvement. All opinions are mine. You should not take anything from this blog as professional advice. You can read more about the privacy policy here.
Popular Posts


DIY With Christine is a participant in the Amazon Services LLC Associates Program, an affiliate advertising program designed to provide a means for sites to earn advertising fees by advertising and linking to Amazon.com.