*My posts may contain affiliate links, which means I may receive a small commission, at no cost to you, if you make a purchase through a link! Thank you for supporting my website!*
Last updated on March 16th, 2024 at 12:44 pm
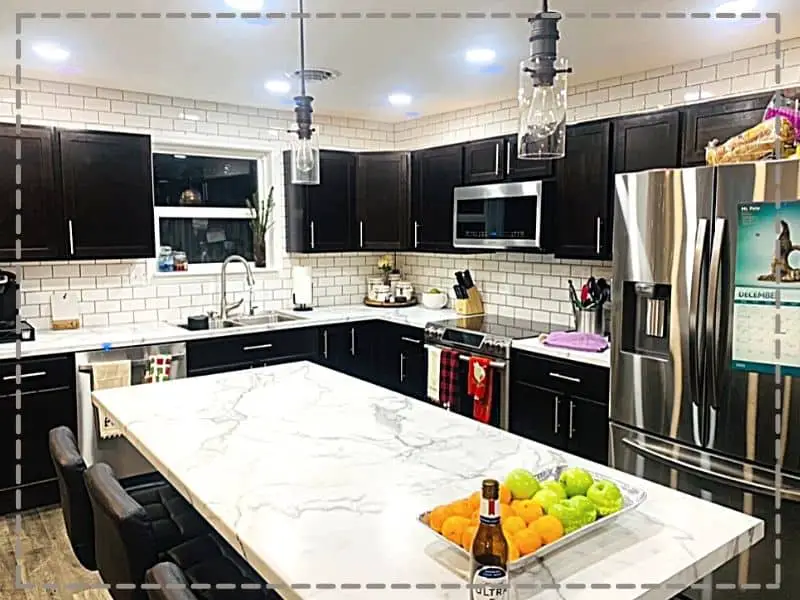
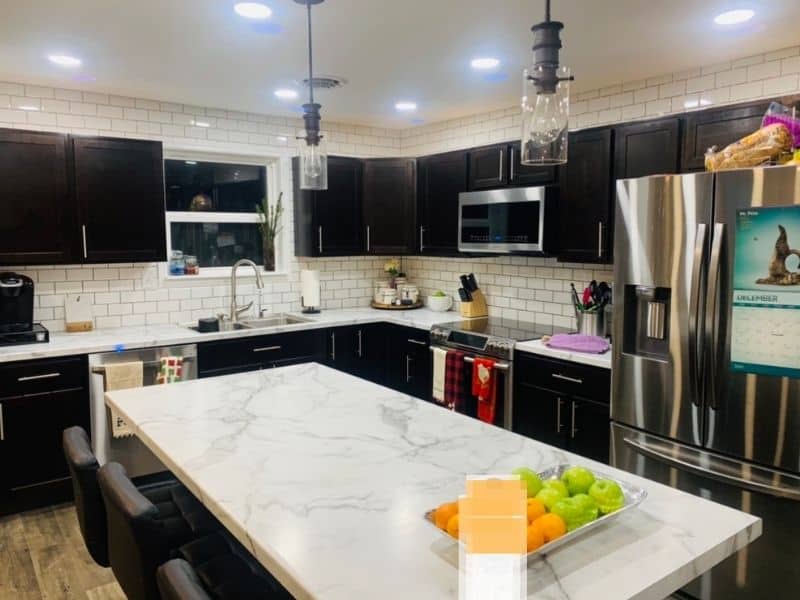
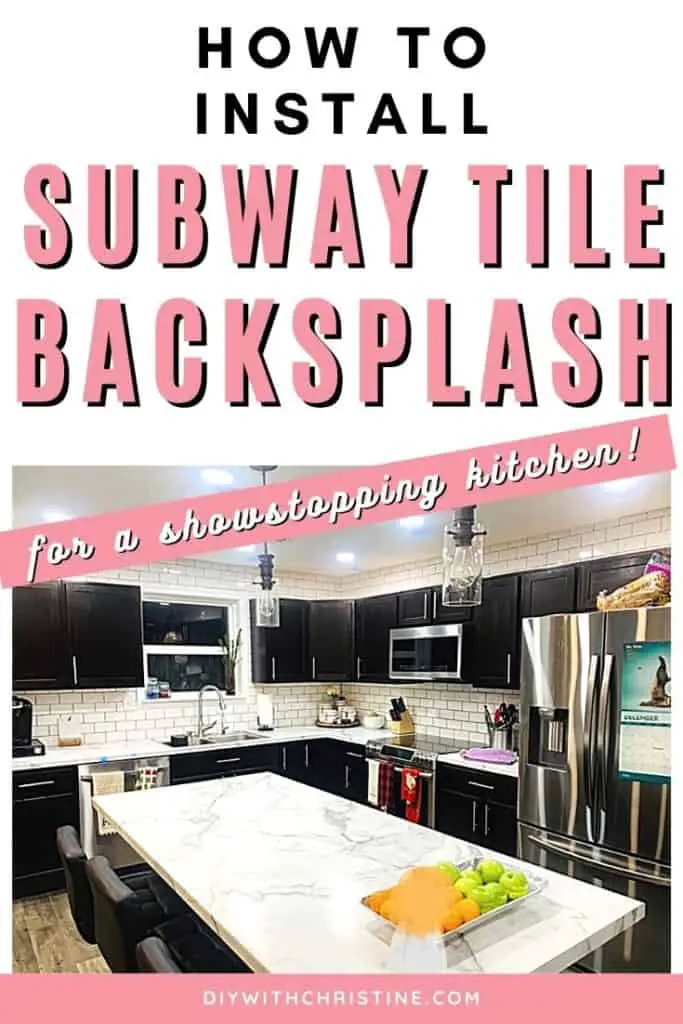
When I started to plan how I wanted our kitchen renovation to look, I fell in love with every picture that had a counter-to-ceiling subway tile backsplash.
I immediately told my husband and father that the kitchen would look stunning with tile that went to the ceiling… On the other hand, they thought I was a little insane because it was more work than just a simple tile backsplash.
What can I say? Hard work doesn’t scare me haha! And with this detailed guide to walk you through the entire subway tile backsplash installation process, you shouldn’t be either!
In my opinion, the 3” x 6” subway tile is the perfect tile for beginners because of its simple (but timeless) design and small (but not too small) size.
(Contrary to popular belief, mosaic subway tile is much harder to use! So I’d opt for the individual 3” x 6” pieces that are elegant AND easier to work with.)
If you’ve been dying to makeover your kitchen with a gorgeous, high-end-looking, timeless subway tile backsplash, then follow this tutorial to create the look of your dreams!
Let’s dive in!
Level Of Difficulty To Install Subway Tile Backsplash
Medium
I would consider subway tile backsplash as an intermediate-level DIY project. To be successful with subway tile backsplash installation, you need patience and an eye for detail.
Grouting, in particular, is not hard, but it is a little frustrating and messy until you get the technique down. Stay patient and work in small sections as you work.
Beginner DIYers can complete this project as I was a beginner tiler myself. After reading this tutorial, you’ll know all of the do’s and don’t of subway tile backsplash installation, so you can tackle this project with success!
Time To Complete Subway Tile Backsplash Installation
2 days
Depending on the square footage of the walls being tiled, a subway tile backsplash can be installed in as little as two days. In general, one day will be for installing tile, and one day will be for grouting.
Subway Tile Backsplash Materials
- 3” x 6” Bright White Subway Tiles (we used 506 pieces for our 13 ft x 12 ft kitchen)
- 2” x 6” Bullnose Trim Tile (we used 17 pieces total – 15 pieces took us from the ceiling to the 3-¼” baseboard)
- 2-¼ gallons of AcrylPro tile adhesive (1 gallon would have completed a normal backsplash below the counters only)
- 1 – 25 lb bag of sanded grout (Delorean Gray)
- 2 – 27 oz bottles of Grout Boost
- ⅛” spacers (500 pack)
- 1-2 tubes of white caulk
Subway Tile Backsplash Tools
- Wet tile saw
- ¼” x ¼” Square-notch trowel
- Putty knife
- Grout float
- 5-gallon bucket
- Sponge(s)
- Tape measure
- Marker (a Sharpie works better to mark on the tile than a pencil and yes, it wipes off!)
- Contractor pencil
- 4-ft level
- Drop cloth(s)
- Painter’s tape
- Caulk gun
- Paint and Mud Mixer For Drill
How To Install Subway Tile Backsplash
- Prep The Wall & Area For Subway Tile Backsplash
- Draw A Level Line On The Wall
- Use Tile Adhesive & Spacers To Install The First Row Of Subway Tile Backsplash
- Use Tile Adhesive & Spacers To Install The Rest Of The Rows Of Subway Tile Backsplash
- Remove Spacers & Excess Tile Adhesive From Grout Lines & Tile
- Prepare Grout For Subway Tile Backsplash
- Press Grout Firmly Into Grout Lines Of Subway Tile Backsplash
- Wipe Away Grout On Subway Tile Backsplash
- Polish Subway Tile Backsplash
- Caulk Along With Countertop & Subway Tile Backsplash
Other Frequently Asked Questions About Installing Subway Tile Backsplash
- Does backsplash add value?
- How much does it cost to install a subway tile backsplash?
- What size subway tile is best for kitchen backsplash?
- What color grout is best with white subway tile?
Step One: Prep The Wall & Area For Subway Tile Backsplash
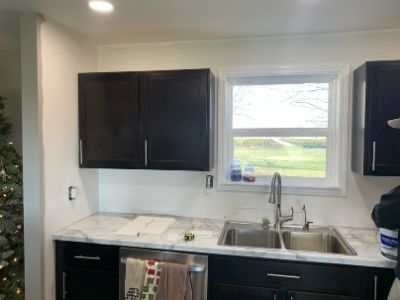
The first step to installing a subway tile backsplash is to prep the walls and area.
How To Prep A Wall For Backsplash
To successfully prep any wall for backsplash, it just needs to be free of any oil, grease, dirt, or other contaminants that might keep the AcrylPro tile adhesive from bonding.
If you are installing tile on new drywall, simply wipe the walls down with a clean rag to clear off the drywall dust. Sealing the fresh drywall with primer will also help to minimize the dust and help prep the wall for a backsplash.
However, if you are installing a tile backsplash over glossy painted drywall, some light sanding is required followed by a thorough wipe-down with a clean rag, so the adhesive can bond.
Lastly, you can install new tile over existing tile, again by making sure the wall is free of contaminants and wiped down with a clean rag.
However, adding to the existing tile will add extra weight to the wall and extra thickness that might not be desired.
If the existing tile needs to be removed, make sure all adhesive, dirt, and other contaminants are removed and the wall is wiped down with a clean rag before installing the new tile backsplash.
PRO TIP: If there is grease or oil, use Easy-Off Kitchen Degreaser found at Amazon to wipe down the walls. This product is fantastic for removing the grease on other items in the kitchen as well, so it’s a nice cleaning product to keep around for general use!
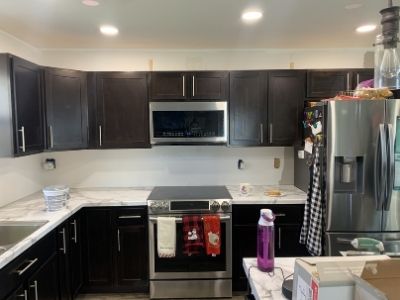
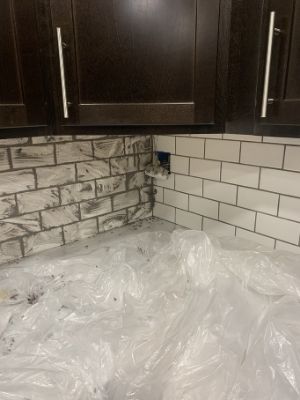
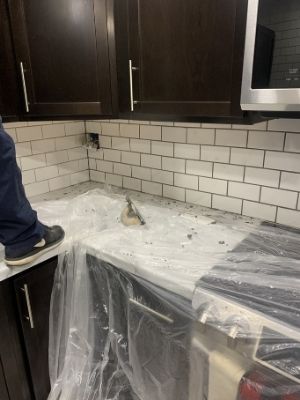
How To Prep The Area For Backsplash
It’s also time to prep the rest of the area for backsplash. A drop cloth and some painter’s tape will help minimize the mess you have to clean up later as you work.
(Trust me, this part is especially important during the grouting process! That part is just messy!)
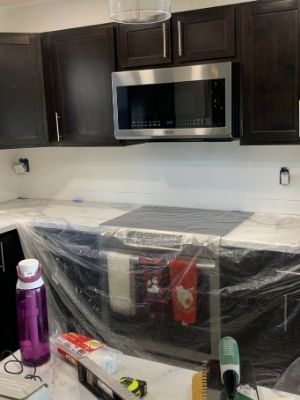
Layout the drop cloth across the counter, and tape it in place. Once that’s done, you can move onto the next step!
Step Two: Draw A Level Line On The Wall
The next step to installing a subway tile backsplash is to draw your level guideline on the wall.
The most important part of installing subway tile is making sure your grout lines are as straight and level as possible.
As long as you put in the time to make sure the first row is level, the rest of the rows should be a breeze!
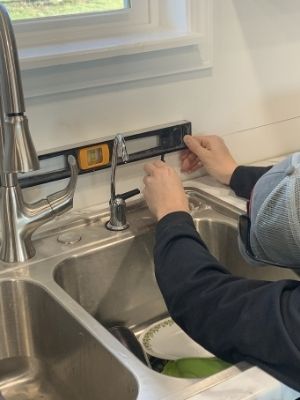
To do this, you need to use a pencil to draw a leveled line that’s a ¼” or so above the top of a tile sitting on the counter. The height above isn’t that important. It just needs to be a little higher so you can still see it as you start to glue tile in place!
A 4-foot level would be more helpful than a smaller level.
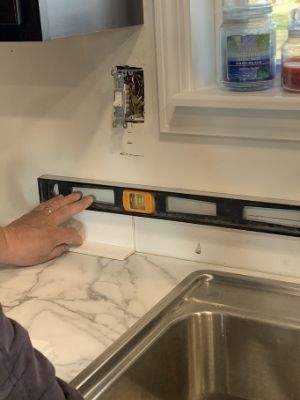
Our countertop was level (yours likely will be close to level as well), so we could put a single ⅛” spacer down and build the first row straight off the counter.
However, if your countertop is slightly out of whack, use additional spacers along the bottom to shim the tile to follow your level guideline as you install.
You might have to find that sweet spot where your tile is level, but the gap between it and the countertop isn’t more than ¼”.
Once you have your level guideline drawn, you can move onto the next step!
Step Three: Use Tile Adhesive & Spacers To Install The First Row Of Subway Tile Backsplash
The next step to installing subway tile backsplash is to install the first row.
Where To Start Tiling A Backsplash
You must determine where you are going to start tiling the backsplash. In most cases, it is recommended to start the first piece in the center of your wall.
This starting point is ideal for two reasons. First, this guarantees the “showpiece of the wall” (the center), will have tile that is perfectly centered and looking beautiful.
Second, this ensures that the cut pieces on either end will be equal.
However, if your wall is the perfect measurement where you can start with a full piece and end with a full piece (or start with a half piece and end with a half piece), then you can start in the corner.
In this situation, the tile will still be perfectly centered in the “showpiece of the wall” and the cut pieces on either end will still be equal (because they will either be a full piece or a half piece).
Our wall just so happened to work out that way, so we started in the back corner. Starting in the center of the wall behind the sink would have been just as easy for us though!
How To Apply Tile Adhesive For Backsplash
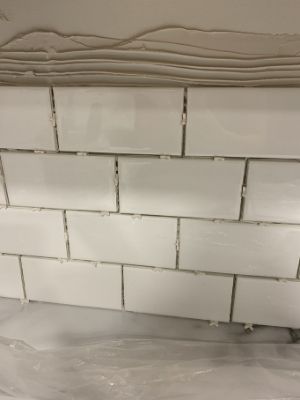
When you have the center of the wall and the center of your tile marked, it’s time to apply the tile adhesive to the wall with a putty knife.
Do this by slathering a thick layer of adhesive on the small area just where the first row will be installed to start.
Next, use your ¼” square-notch tile trowel and comb through the adhesive in one direction while holding the trowel at a 45-degree angle. The more uniform the rows in your adhesive are, the easier it is for the tile to sit evenly as you push it into place.
Install Subway Tiles Using Spacers
You will want to use spacers when tiling a backsplash because you want the grout lines to be uniform throughout.
To accomplish this, set a spacer on the counter for the tile to sit on (or multiple if the tile needs to be shimmed up to keep the row more level). Then press your first full piece of tile into the glue making sure to rock the tile into place so all four corners get plenty of glue.
Then, take another spacer and stick it into the gap between the first tile and the next tile before pressing the next tile into place. (Don’t forget to add spacers along with the countertop as you add tiles to the first row.
Pro tip: This process will go the fastest if you have one person applying adhesive and another person installing tile. This specific adhesive has a 30 minute working time, so don’t feel rushed as you press the tile into place.
If the glue ever begins to skin over and feel less sticky before you can apply the tile, just scrape it off and reapply fresh glue.
How To Cut Subway Tile Backsplash
Most likely, you’ll have to cut the pieces on either end of the first row. There are two ways to do this; using a manual tile cutter or a wet tile saw.
A manual tile cutter scores the tile so you can snap it along the scored line to cut the tile. The wet tile saw uses water and a blade to cut tile much like a table saw cuts wood.
While both ways let you cut ceramic subway tile, only one way lets you cut tile with more accuracy and speed. That’s the wet tile saw.
Because of this, I highly recommend buying, borrowing, or renting this wet tile saw found at Amazon. I’ve seen horror stories of people trying to make intricate cuts around outlets, cabinets, and windows using a manual tile cutter, but cannot cut such small pieces without breaking the tile.
Because of this, they chose to leave huge gaps around the obstacles since they couldn’t cut small enough pieces.
Ultimately, it looked like an amateur completed the tile job, which is the OPPOSITE of what we are going for. Shoddy workmanship could hurt the value of your home!
Save yourself the time and headache and just start with a wet tile saw. We could make accurate cuts around all of the obstacles, so there were no fears that an outlet cover wouldn’t cover the gaps.
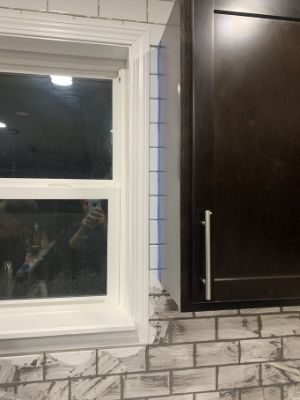
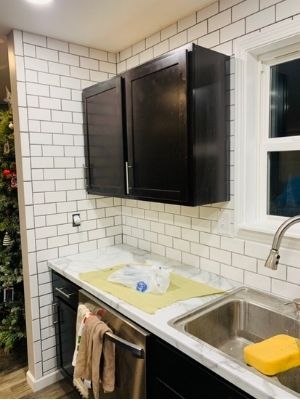
We even had to install small ¾” pieces between our window and cabinets that would not have been possible without the wet tile saw.
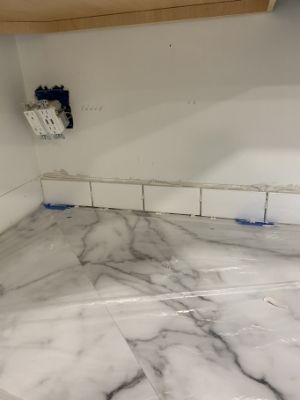
Install The Entire First Row
Install the entire first row so it can start to set up before you begin adding more rows (and weight). We did the first row on both walls before starting the next rows.
Once you have the first row of subway tile installed, you can move onto the next step!
Step Four: Use Tile Adhesive & Spacers To Install The Rest Of The Rows Of Subway Tile Backsplash
The next step to installing a subway tile backsplash is to install the rest of the rows. Just as we discussed in the last step, you’ll want to:
- Apply a thick layer of adhesive
- Comb the trowel through it
- Add the spacers
- Rock the tile into place
- Repeat!
The Most Popular Subway Tile Backsplash Pattern
Now I’m going to pause for a minute and discuss the tile offset percentage. This is the percentage of the second tile row that is set off the first row. Traditionally, subway tile is installed with a 50% offset.
You can also use a 33% offset, a 0% offset, or whatever other crazy patterns that exist out there. However, if you want a classic, elegant, and simple subway tile pattern, I recommend using a 50% offset.
Not only is that the classic pattern, but it is also the easiest to install. It is easy to eyeball that the grout lines are falling in the center of the tile below it.
A 33% offset is a little harder to eyeball. A 0% offset (or stacked pattern) is hard to keep looking perfect throughout the entire pattern. And any other patterns such as herringbone, step ladder, or basketweave take way more planning and double-checking the angles as you install to make it look perfect.
If you are curious about the other pattern types, you can check them out here. I had no clue this many subway tile patterns existed!
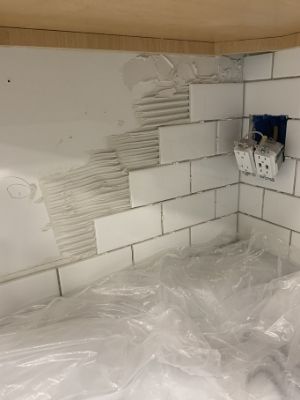
How To Install Subway Tile Backsplash Fast
The awesome part now is that you can start to install multiple rows at a time, which is a much quicker and easier way to install subway tile!
Install 3-4 pieces in the second row, 2-3 pieces in the third row, and 1-2 pieces in the fourth row. Then apply more glue. This way, you can keep all the tools and tile near you to quickly finish one area before sliding down the wall and working on the next area.
Very quickly, you’ll be a tile installing machine!
Also, as we talked about earlier, having one person applying adhesive and another person installing tile is a fast way to get the job done. If you can have a third person to cut the tile pieces for you (as I did), then you can fly through the installation process!
Pro tip: Try to wipe away as much excess glue from the tiles and in the grout lines as you can while you work. Trust me, it will make the grouting process 10x easier if you remove most of the excess glue before it dries!
However, if you miss some, don’t fret. The glue gets a little soft as you add grout, so you can always pick it out as you come across it. (This is just more frustrating and a little harder!)
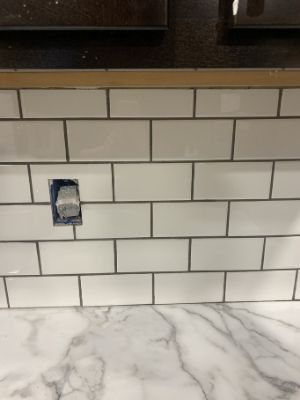
How To Finish The End Of Tile
You want to finish the end of your tile, so it looks nice and clean. 2” x 6” bullnose tile that matches your subway tile is a perfect way to finish the end of the tile.
For the parts of our tile that met the end of a wall, we used the bullnose tile and installed it just as we installed the normal subway tile (except it’s installed vertically).
The grout lines don’t match up perfectly with the grout lines of the normal subway tile, but we cheated them slightly so they are less noticeable. The other option was to start the bullnose tile in the middle of one row of subway tile and end it in the middle of another row.

For the rows that end in a corner (and the other wall is going to be tiled), you want to leave a ⅛” gap, so you can grout the seam. However, if the other wall isn’t going to be tiled, then you can just butt the tile up against the other wall without leaving a gap to be grouted.
How Long To Wait After Installing Backsplash Before Grouting
Once you have all of the tile installed, you should wait 24 hours after installing the backsplash to grout. AcrylPro tile adhesive takes 24-72 hours to dry before grouting, but since subway tile is small and it is typically installed in a controlled environment (inside the house), 24 hours should be long enough.
If you use a different type of tile adhesive or mortar, then read the instructions for the dry-time.
Once you have all tiles installed and the adhesive is dry, it’s time to move onto the next step!
Step Five: Remove Spacers & Excess Tile Adhesive From Grout Lines & Tile
The next step to installing subway tile backsplash is to remove the spacers and excess tile adhesive.
As I was adding spacers, I found it easier to stick them into the glue, so they held in place while I was wiggling each tile around. For the most part, the spacers came out fairly easy after the glue dried.
But occasionally, one did get stuck in the glue pretty well. We just used some needlenose pliers to work them out of the dried glue.
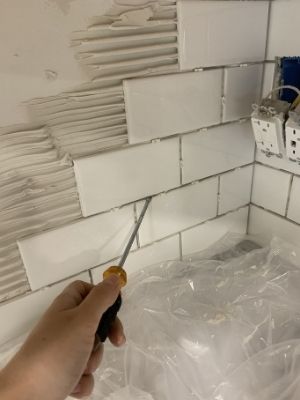
After the spacers are removed, it is pretty important to take the time now to remove the excess glue from the tiles and in the grout lines.
Of course, as I mentioned before, it’s not the end of the world if you miss some spots. However, it will look BAD if you don’t get the extra glue out before the grout dries.
Just take the 15 minutes or so now to run a screwdriver through the grout lines.
I didn’t do this on the first wall and ended up spending twice as long picking out glue bits that were visible and re-grouting.
I learned my lesson or the next wall haha! Once the spacers and excess glue are removed from the subway tile backsplash, you can move onto the next step.
Step Six: Prepare Grout For Subway Tile Backsplash
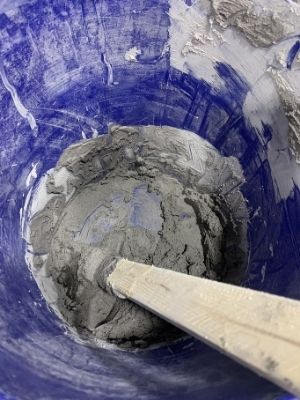
The next step to installing a subway tile backsplash is to prepare the grout! The consistency of the grout is the most important factor when preparing it.
I gotta be honest, when it was time to grout, I got a little nervous. I have grouted before, but it was a tiny section in the shadow box in our master bathroom shower makeover.
There was so little to grout, I felt I had plenty of time to mess with it. Our kitchen backsplash, however, are both whole walls in our main living area! You could say it was a little nerve-wracking.
However, I did what any self-respected DIYer would do. I put on my big girl pants and read the directions on the back of the bag haha!
Except I didn’t follow the directions because I wanted to use Grout Boost instead of water, so I had to read those directions as well and do some figurin’. (Grout Boost is what I used to seal the grout!)
The Consistency Grout Should Be
Take a clean 5-gallon bucket and add Grout Boost according to the instructions. Then add the grout. (Adding the liquid first makes it easier to stir! I recommend using this Paint and Mud Mixer attachment found at Amazon on your drill to mix quicker. It gets tiresome mixing by hand!)
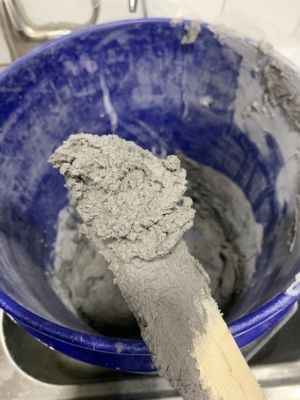
Grout should be a pretty thick consistency. If it is too runny then you run the risk of it falling out of the grout lines.
To test the thickness of your grout, scoop some of the grout onto your stirring stick, or the grout float and flip it upside down. If the grout stays on it, then it’s a good consistency.
The nice thing is that if your grout is too runny, you can always add more grout. Or conversely, if it’s too thick, you can add more Grout Boost.
Just bear in mind that if you are mixing several batches of grout (for example, if you are grouting over several days), then you will want to remember the concoction of grout and Grout Boost you mixed up.
If you don’t keep similar proportions then your grout could turn into two different colors. The mixture doesn’t have to be an exact science, but a close estimate is preferable.
The best-case scenario is to do all the grouting at once. Then you won’t have to worry about color inconsistencies!
We did grout over two different days though. (My husband is impatient haha.) And the color consistency of our grout turned out fine because we kept the mixture pretty similar between the two days.
Sanded vs. Unsanded Grout
Here’s a brief explanation of the different types of grout you can use.
Use unsanded grout for grout lines that are less than ⅛” wide.
Use sanded grout for grout lines ⅛” or wider.
My spacers were ⅛” so I used sanded grout for this project!
How To Seal Grout For Subway Tile Backsplash
You will want to seal your grout to protect it from stains, mold, and mildew, and breaks from water and wear-and-tear over time.
Kitchen backsplashes don’t see as much water or use as a tile shower surround or tiles on the floor, but they do still see water, oils, food, and some wear-and-tear. Sealing the grout will help it be stronger and last longer, which is exactly what we want since we are putting in the hard work to make our home beautiful!
Grout Boost (the stuff we mixed in the grout instead of water) is what seals the grout and protects it from stains.
If you use Grout Boost instead of water, your grout will be sealed, strong, and stain-proof!
Once your grout is prepared, you can move onto the next step!
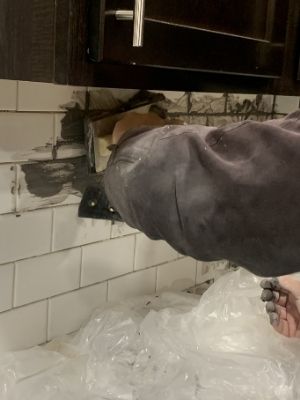
Step Seven: Press Grout Firmly Into Grout Lines Of Subway Tile Backsplash
The next step to installing a subway tile backsplash is to press the grout firmly into the grout lines.
First, scoop a hefty amount of grout onto a grout float. Then smear it into the grout lines of a small area. (See the section “How Long To Let Grout Dry Before Wiping” below for what is considered to be a small area.)
As you smear, you want to move the grout at a 45-degree angle and press it firmly into the lines. The 45-degree angle is important because it will help keep the grout from being pushed back out.
Honestly, it’s a little difficult to get the technique down at first. But you really can’t go wrong because the grout lines start to clean up when you use a sponge to wipe the excess off.
Just practice in a small area until you get the hang of it, then move on!

The Areas Of Backsplash You Want To Grout
As you grout, you want to make sure you add grout to:
- All seams where two tiles meet
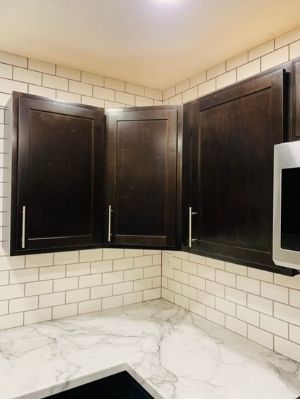
- The inside corners of two walls with tile
For those hard-to-reach areas (the tile seams near the countertop or cabinets), I recommend using your fingers to push the grout around. I found that the messier I was at smearing grout, the better the grout got pushed into place haha!
So don’t be afraid to get your hands dirty and make a mess. That’s why we put some drop cloths down!
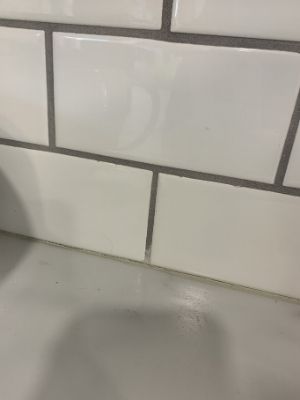
The Areas Of Backsplash You Don’t Want To Grout
There are a few areas that you don’t want to grout though. They include:
- The seam between countertop and backsplash
- Between tile and cabinets
- Any seam where the seam is touching something other than tile on one side (window sills, ceilings, other walls without tile, etc.)
To finish these other areas, you will want to caulk the gap to give it a finished, clean look and to further waterproof the area. (The waterproofing is especially important for the seam between the countertop and backsplash.)
Once you have plenty of grout in the seams of the section you are working on, you can move onto the next step!
Step Eight: Wipe Away Grout On Subway Tile Backsplash
The next step to installing a subway tile backsplash is to wipe away the grout.
How Long To Let Grout Dry Before Wiping
Grout needs to firm up a little bit before wiping so that you don’t wipe all of the grout out of the seams. Let the grout dry for 15-30 minutes before wiping.
If it seems like you keep pulling grout out as you wipe, then stop and wait another 5-10 minutes before trying again.
If you can’t grout all of your backsplashes in 15-30 minutes, then you want to focus on completing smaller sections fully (applying and wiping or having someone else wipe while you apply). This way, the grout won’t harden before you can wipe it.
One of the biggest problems I’ve seen beginners run into when grouting is letting the grout dry too much before wiping the excess off.
If the grout hardens on the tile or clumps in corners before you can wipe it off, you run the risk of having to chip it off later (or worse, settling for shoddy workmanship in the main area of your house).
It’s easy to avoid this; just work in small sections or ask for a helping hand!
Wipe Subway Tile Backsplash With A Clean Sponge And Clean Water
After the grout has been set up a bit, grab a clean sponge and a clean 5-gallon bucket of water.
First, get the sponge fully wet, then wring out as much excess water as you can. If there is too much water in the sponge, then you’ll end up wiping away more grout in the grout lines than you want.
Second, wipe the tiles in a circular motion. Just like the 45-degree movement we did with the grout float, you want to use a similar motion with the sponge so the bulk of the grout stays in the lines.
As you wipe in a circular motion, be sure to switch the direction of the circle occasionally so that the grout has a chance to settle evenly in the lines.
The tiles are easier to clean with the cleanest water. So, whenever you feel like you are struggling to remove the excess grout without a little pressure, it’s time to dump the bucket and fill it with clean water again.
We found that having two buckets made this process easier and more efficient.
As I worked, I found it was easier to get the bulk of the excess grout off the entire area I was working on. That way, most of the excess grout went into the water up front.
Then I would use another bucket or two of clean water to do the finishing cleaning. It seemed to work better for me, so hopefully, it will work better for you as well!
Lastly, clean the grout as best you can. But if there is the tiniest bit of haziness left, don’t keep wiping it. When you polish the grout later, it will clean up that last little bit of haziness you might be seeing.
You Can Touch Up Grout The Next Day
Try your best to get all of the grout lines looking as perfect as possible, but don’t fret too much about missing a small spot here or there.
You can touch up grout the next day! Just make sure to save a small baggie of grout before you clean up for the night. Seal it up and put it in your refrigerator.
Then, the next day as you are surveying your work, you can always touch up any spots that didn’t get filled quite as perfectly as you originally thought.
As I mentioned above, on our first wall, we spent a good portion of time picking out glue chunks that you could see sticking out of the grout.
Because we did that, there was a spot in the back corner that I missed the night before when I was filling in those holes with more grout.
Luckily for me, we planned and saved some grout for the next day. It took me two seconds to fix, and no one will ever know what happened! It looks perfect now!
Once all of your grout has been touched up and dried for 24 hours, you can move onto the next step.
Step Nine: Polish Subway Tile Backsplash
The next step to installing subway tile backsplash is to polish the subway tile backsplash.
To get the remainder of that hazy film that might be leftover on your subway tile backsplash, you need to take a clean, dry sponge and polish the tile once the grout is dry.
Just as we wiped the tile previously, work in a circular motion over the tile and dry grout until the tiles shine.
This should be your quickest step! So once your tiles are polished, it’s time to move onto the last step!
Step Ten: Caulk Along With Countertop & Subway Tile Backsplash
The last step to installing subway tile backsplash is to caulk along with the countertop and tile.
It is important to fill the gap between the countertop and backsplash with caulk to further waterproof the area.
If water is going to be destructive anywhere, it’s going to be between the countertop and backsplash. Plus, caulk is the easiest way to give anything a clean and finished look!
However, I do want to caution you before you caulk. I highly recommend taping the tile to exactly where you want the caulk to stop.
We did this for the area under our window, and the results look clean and crisp. For the seam along with our countertops, however, we didn’t use painter’s tape and the results aren’t as crisp.
The caulk along with the countertop smeared over the grout and didn’t wipe off as easily as I thought it would. (Plus the “matching caulk” for our countertop was yellow, NOT white like I was expecting, so overall, I was disappointed in this step haha!)
No worries though, I wiped away most of that yellow caulk and plan to tape and recaulk with clean, white caulk to fix my mistake.
I just wanted to give you that heads up because it was the only step that I was less than satisfied with how it turned out!
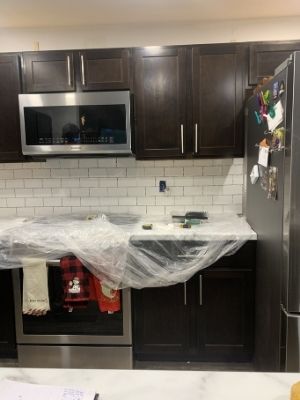
We also caulked along the seam between the top tiles and the cabinets to clean up the look of those cut tiles as well.
And at this point, I’m indecisive about whether to caulk along the seam of the tile and the ceiling. It looks good now and probably isn’t worth the headache to get up there. But who knows what motivation I’ll be feeling later haha!
Other Frequently Asked Questions About Installing Subway Tile Backsplash
Here are a few other frequently asked questions about installing a subway tile backsplash. Now you have all the knowledge you need to complete this job like a pro!
Does backsplash add value?
The kitchen is considered the “most valuable room” in a house. When people are shopping for homes, they always put more value in homes with updated kitchens, bathrooms, and exterior curb appeal.
Minor kitchen remodels on average only bring ~70%-80% return on investment. However, if you can add a major modern punch to your kitchen by installing a subway tile backsplash by yourself for less than $200, buyers will be more drawn to your updated kitchen than other homes.
Even if the dollar amount doesn’t equate to an exact dollar-for-dollar return on investment, a kitchen backsplash will help you sell your home faster. Which, in turn, will add value and bring more money into your pocket faster.
Therefore, a kitchen backsplash that you install yourself (but still looks like a professional installed it) will add more value to your home.
How much does it cost to install a subway tile backsplash?
Subway tile installed by a professional on average costs from $7-$13 per square foot. This equates to a total cost of $600-$1350 on average for professional installation.
If you decide to DIY a subway tile backsplash, the cost savings can be significant. For example, we tiled two walls of a 13-foot x 12-foot kitchen from floor to ceiling for less than $150. (This cost does not include the wet tile saw, grout float, 5-gallon bucket, or sponge. Add another $100 to include tools if you can’t borrow them from someone.)
Most people only add a backsplash to the area between the countertop and cabinets, so the cost to DIY a subway tile backsplash like that would be much closer to $80-$90. (Again, add another $100 to include tools.)
Installing a subway tile backsplash yourself is a tedious job, but could be well worth your time if you consider the cost savings.
What size subway tile is best for kitchen backsplash?
3” x 6” subway tiles with a 50% offset and ⅛” grout lines are the best size subway tile for kitchen backsplash. It is considered a classic subway tile.
What color grout is best with white subway tile?
Gray is the best grout color for white subway tile!
We chose this grout found at Home Depot in Delorean Gray for a few reasons:
- I wanted a little bit of contrast, so you could see the grout lines standing out from the subway tile
- Black grout lines were too busy-looking
- I had no desire to try to keep white grout lines clean (ya girl is lazy)
That pretty much left a light/medium gray as the color of choice. It gives a nice contrast with a clear pattern but doesn’t hurt your eyes to look at it.
Delorean gray is a warm, medium gray, which was perfect to pull out the medium grays within our countertops.
Other fantastic grays in this collection are:
- Cape gray – a cool, light gray
- Graystone – similar to Delorean gray (warm, medium) with a little taupe/brown in it
- Oyster gray – a warm, light gray with taupe/brown in it
- Platinum – a silver/gray
- Warm gray – a warm, light gray
Final Thoughts On How To Install Subway Tile Backsplash
There you have it! All the steps you need to tile a subway tile kitchen backsplash like a pro! (And save yourself some extra cash!!)
I’m not kidding – this job cost us less than $150 when it would have cost well over $600 to $1,000 to have a professional do it!


When you do math like that, it’s hard not to learn how to do something like this yourself. Plus, I promise you that you’ll feel freaking confident after you accomplish something like this that you didn’t think you could accomplish!
That’s why I wrote this article. Nothing has ever made me more confident in my ability to tackle the world until we renovated this entire house pretty much by ourselves.
You are more capable of accomplishing things than you realize. All you need is a little tutorial and someone to believe in you.
Well hello! Here’s your tutorial, and I BELIEVE IN YOU! Now go make the gorgeous kitchen you’ve always dreamed about!
Catch you in my next post!

By Christine
Christine is a blogger and DIYer who tackles home renovation and decorating projects alongside her husband, Adam, for their personal residence and rental properties. Although she successfully tackles large renovation projects to avoid expensive contractor fees and bring her vision to life now, her path to success was not easy.
Go here to read her story, “From a Clueless First-Time Homebuyer To A Confident DIYer Creating Her Dream Home One Project At A Time“.
Popular Posts


DIY With Christine is a participant in the Amazon Services LLC Associates Program, an affiliate advertising program designed to provide a means for sites to earn advertising fees by advertising and linking to Amazon.com.