*My posts may contain affiliate links, which means I may receive a small commission, at no cost to you, if you make a purchase through a link! Thank you for supporting my website!*
Last updated on February 29th, 2024 at 04:54 pm
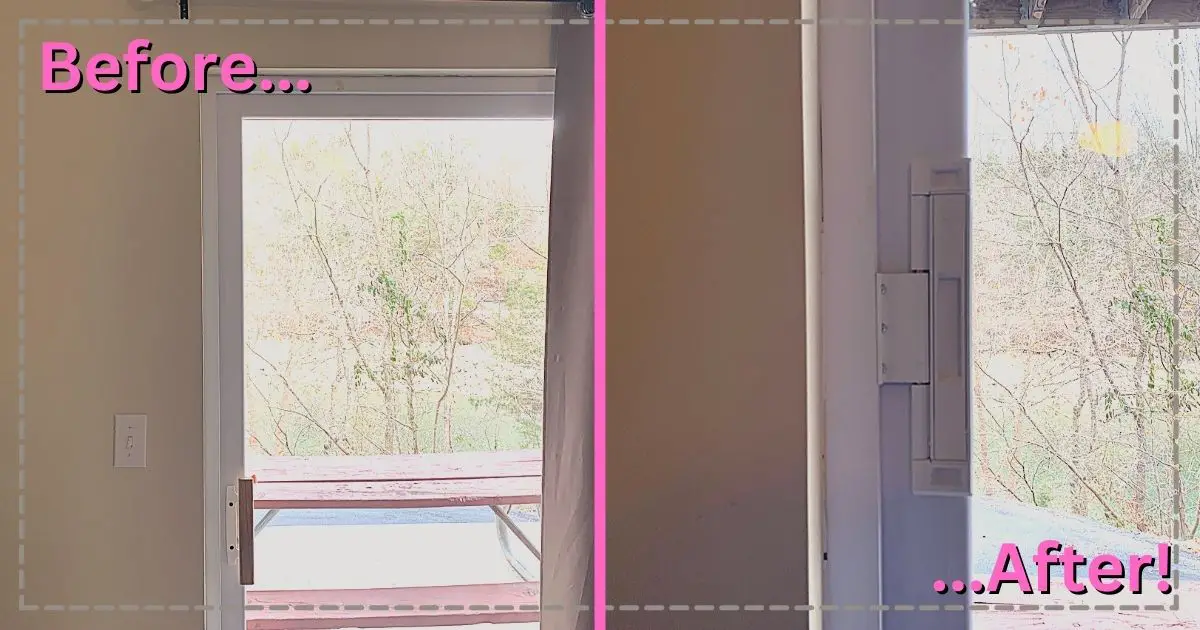
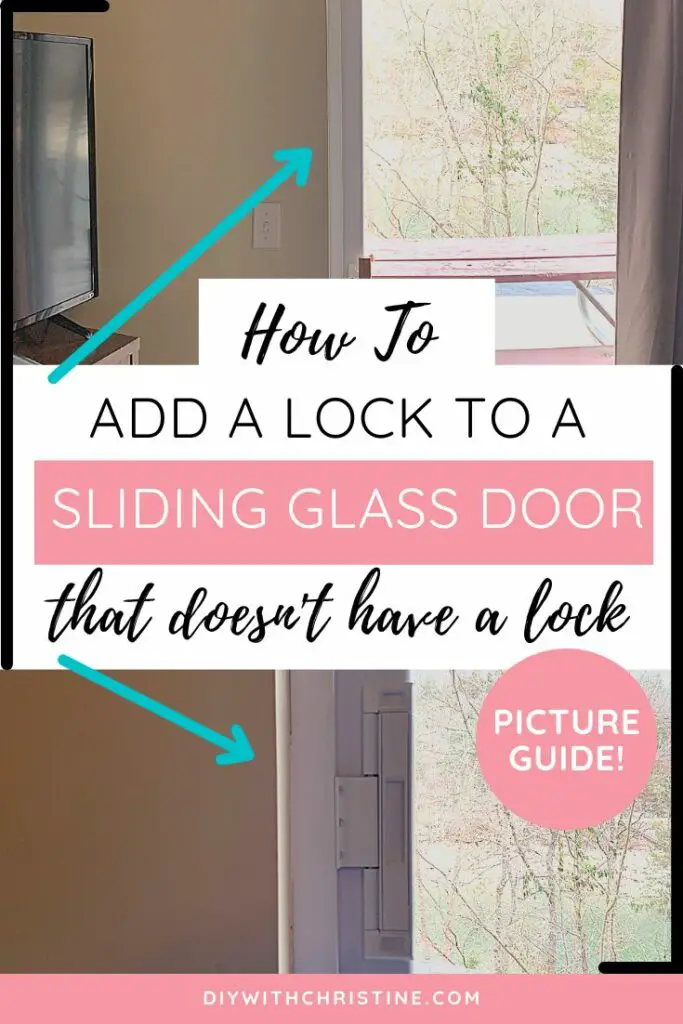
Wondering how you can add a lock to a sliding glass door that has a broken or missing handle lock? Well, look no further because I have your answer!
To lock a sliding glass door that is missing a lock from the inside, install a double-bolt sliding door lock. This sliding door lock prevents sliding doors from being opened horizontally or vertically making it the ideal lock to prevent burglary.
Now that we’ve got the basics out of the way, let’s break into the details further so you can easily secure your patio door with a new lock.
Let’s dive in!
Quick Navigation: How To Lock A Sliding Door Without A Lock
- Remove The Lock Cover With A Screwdriver
- Hold The Lock In Place On The Door & Mark The Door Frame With A Pencil
- Drill The Marked Holes In The Door Frame & Screw In Part Of The Lock
- Hold The Lock In Place On The Door Again & Mark The Door With A Pencil
- Drill The Marked Holes In The Door & Screw In The Other Part Of The Lock
- Snap The Lock Cover Back In Place & Use The Door
- Other FAQs About Sliding Door Locks
- Final Thoughts
| Level Of Difficulty | Time To Complete |
|---|---|
| Easy | 20 Minutes |
| Material List | Tool List |
|---|---|
| Contractor Pencil | LOCKiT! Double Bolt Sliding Lock |
| Drill With 1/8″ Drill Bit And Philips Head Bit | |
| Philips Head Screwdriver | |
| Flat Head Screwdriver | |
The product featured in this tutorial is the LOCKiT! Double Bolt Sliding Lock found at Lowe’s. We have a few rental properties that have sliding glass doors and over the years, the locks that come from the manufacturer wear out and break over time. (Especially when a tenant breaks the lock because they didn’t want to pay for a lockout fee… sigh.)
When I went to replace the sliding door handle, I could not find a handle that was an exact replacement. And I definitely did not want to pay for a full sliding door replacement. So that’s when I wandered across the LOCKiT! Sliding Lock.
It is an aftermarket sliding door lock that prevents the sliding door from being lifted with a crowbar and pulled off its tracks by a burglar. It also helps prevent small children from opening the door without permission and is an extra layer of security that you can’t get from the basic lock.
So far, we’ve installed 4 of these locks and have had a ton of success! I highly recommend this product to anyone who wants an extra layer of security on their patio door or needs an easy solution to replacing a broken sliding door lock.
(If you own some rental properties and want to learn how to manage them better with less time and headache, check out my other blog, DIY Rental Manager.)
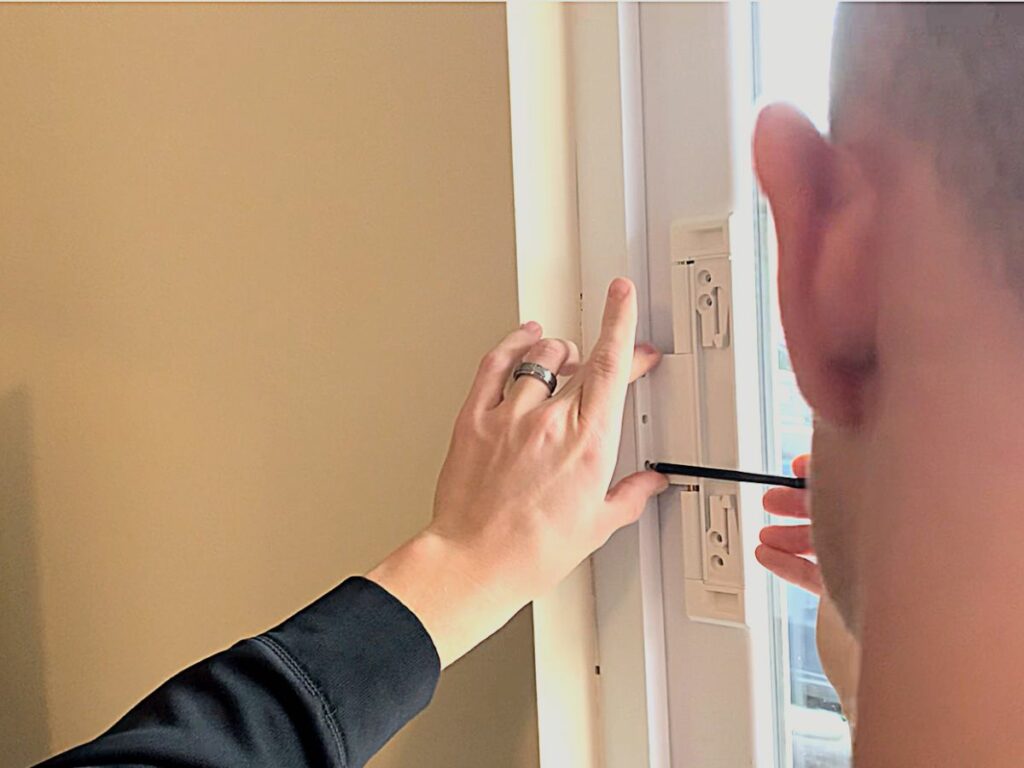
Step One: Remove The Lock Cover With A Screwdriver
The first step to adding a lock to a sliding glass door is removing the lock cover with a screwdriver.
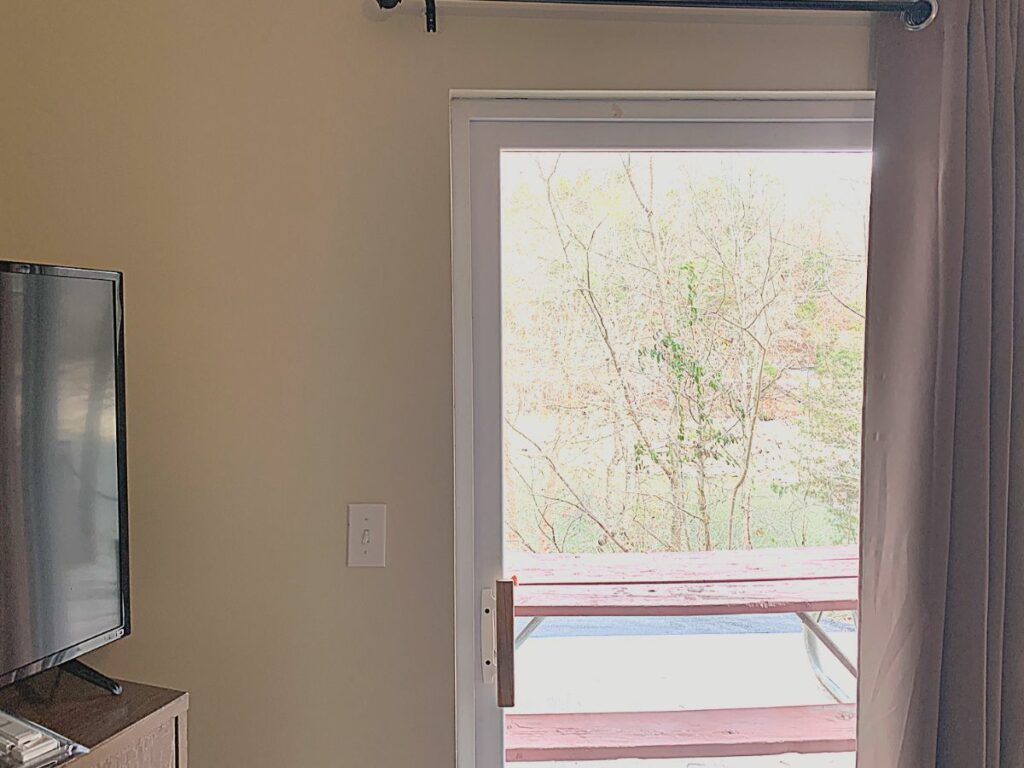
First, let’s decide the best place to install the double bolt lock. The most popular place to install the lock is halfway between the handle and the top of the door.
This positioning looks aesthetically pleasing, is convenient to use for adults and older children, and prevents smaller children from being able to open the door.
Now, grab the lock and a screwdriver, and remove the cover on the lock to expose the screw holes.
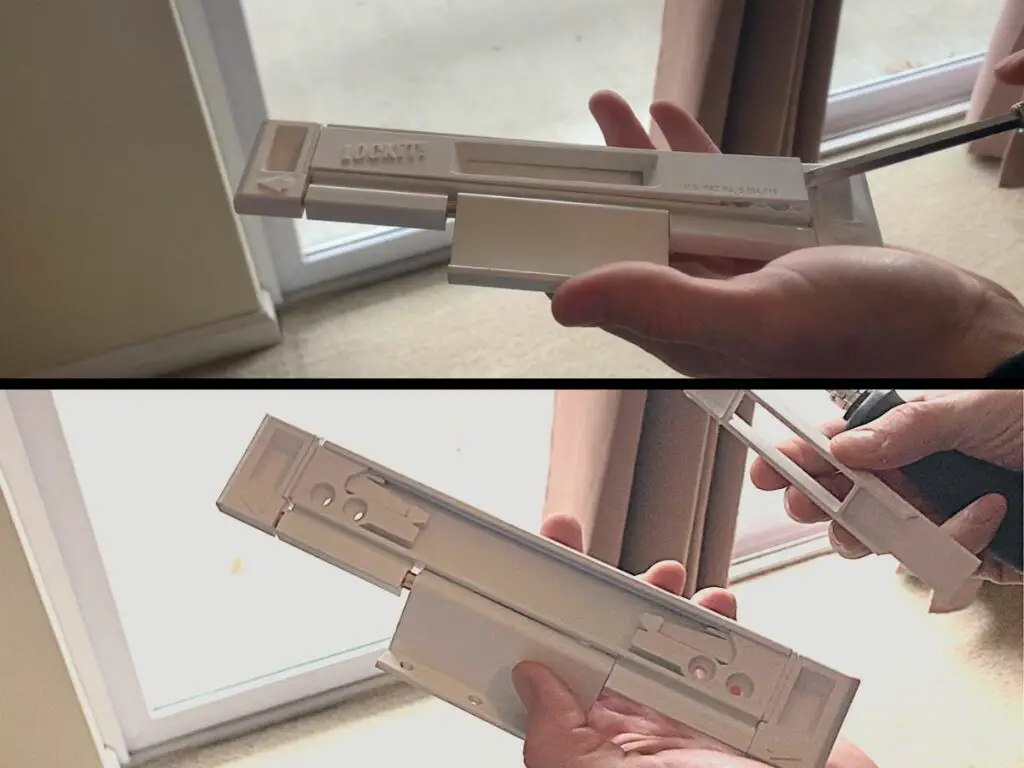
Once the cover is off, it’s time to move to the next step.
Step Two: Hold The Lock In Place On The Door & Mark The Door Frame With A Pencil
The next step to adding a lock to a sliding glass door is holding the lock in place and marking the spots to drill.
Hold the lock against the door frame in the spot you want to install it. If the lock doesn’t sit flush against both the frame and the door, then you might need to use the spacers provided in the kit or make your own spacers to get the lock to sit in the proper place.
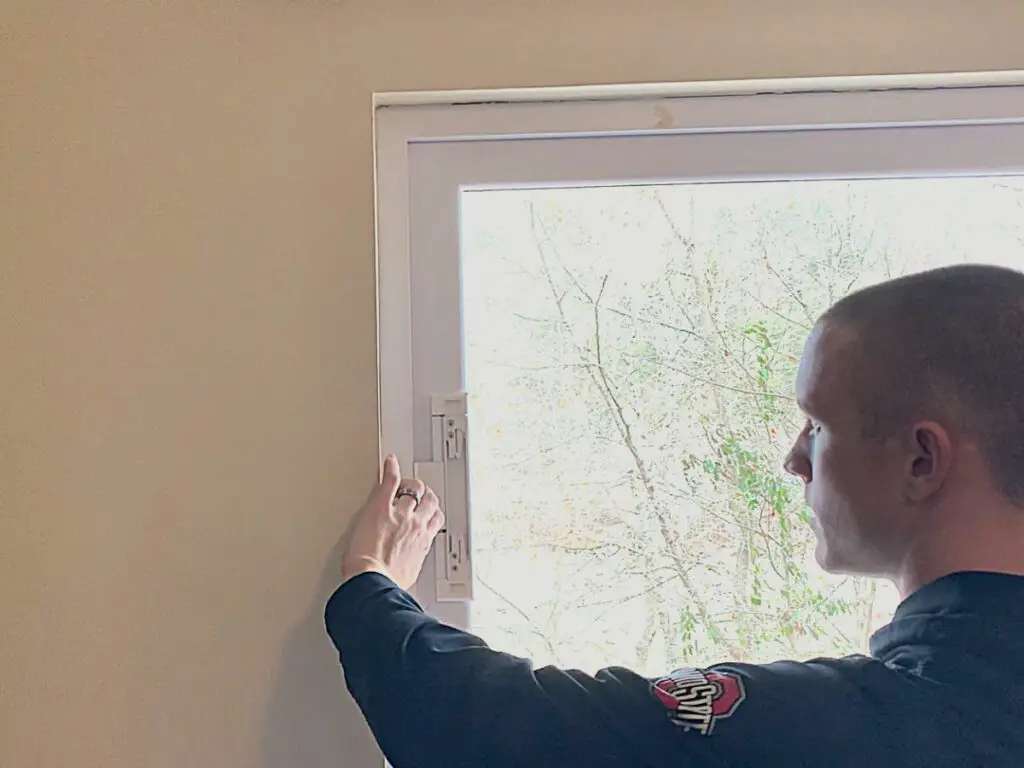
Now, take a pencil or marker and mark the screw holes in the door frame.
Once the three holes are marked on the door frame, it’s time to move on to the next step.
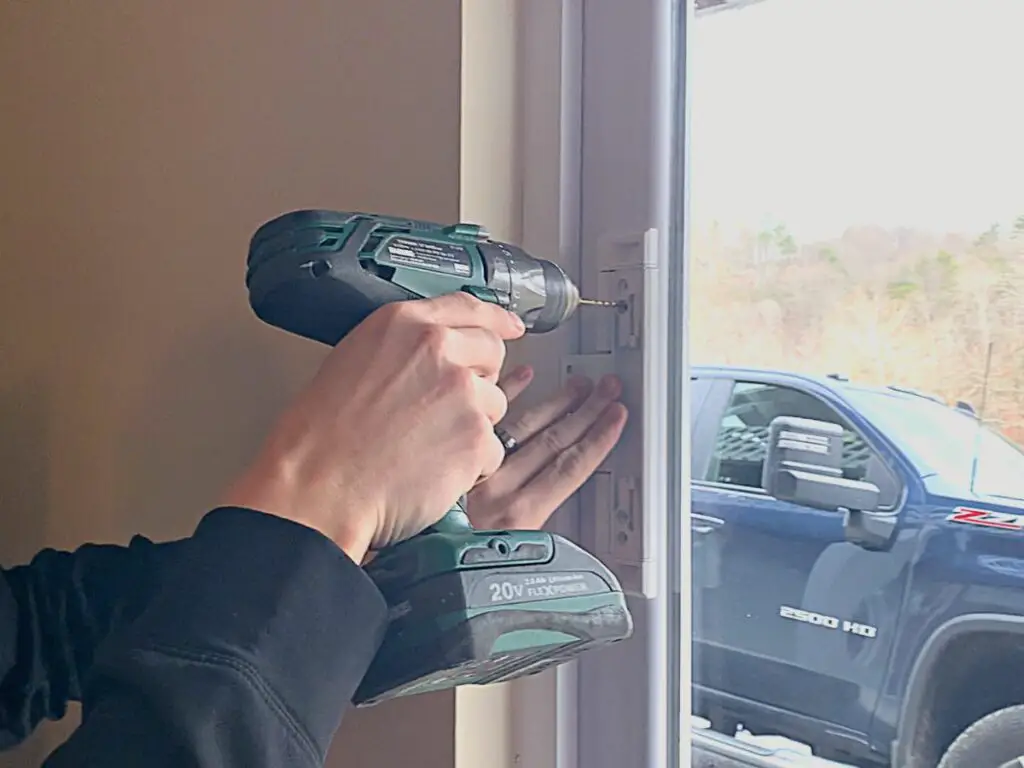
Step Three: Drill The Marked Holes In The Door Frame & Screw In Part Of The Lock
The next step to adding a lock to a sliding glass door is drilling into the door frame and screwing in the first part of the lock.
Use a 1/8-inch drill bit to drill the three holes in the door frame.
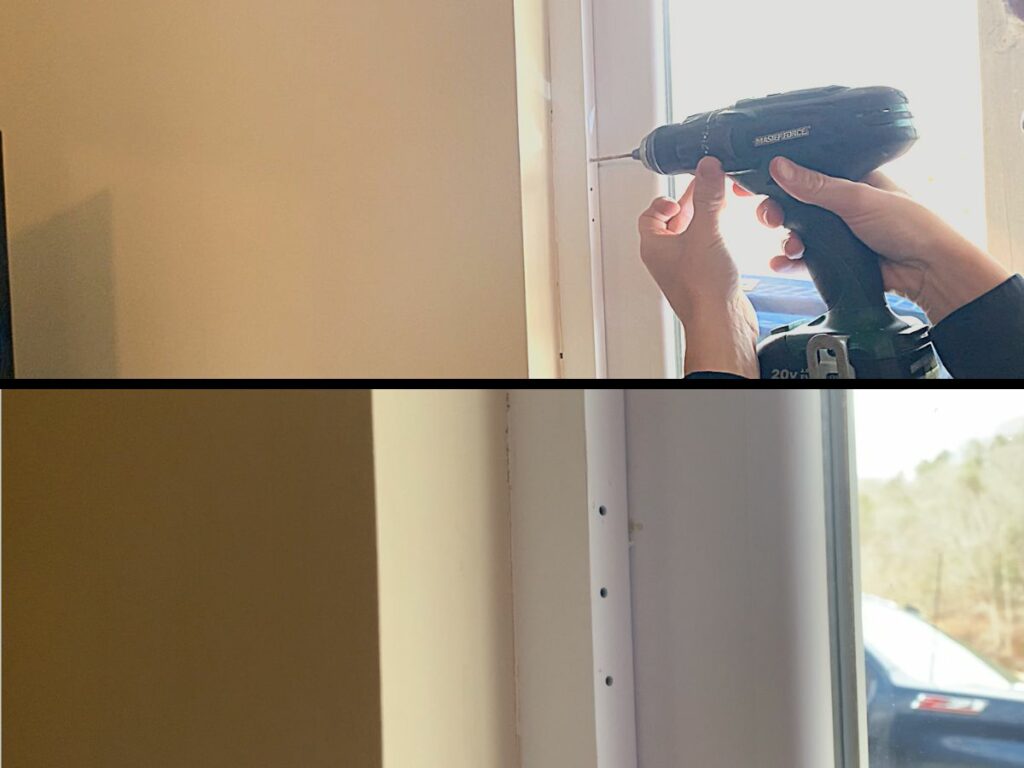
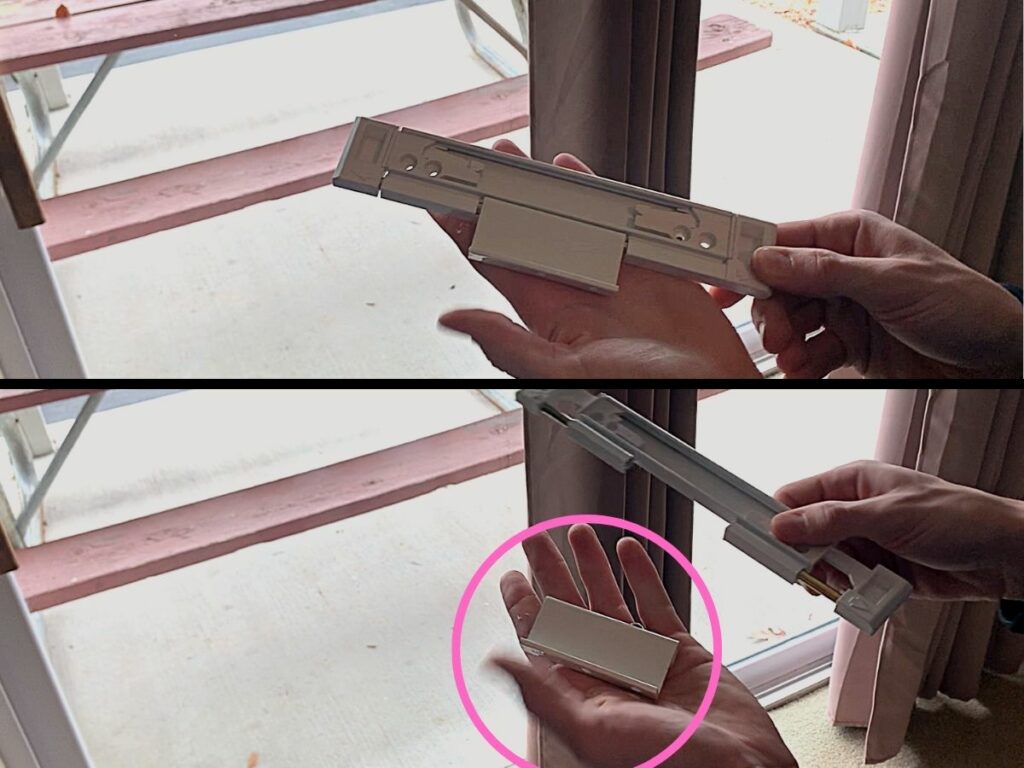
After the holes are drilled, pick up the lock and pull the top and bottom locks apart to release the latch.
Now, take one of the long screws and screw the latch into the door frame. Only screw in the center screw for the time being so we can test the door and make any small adjustments if necessary.
Once one of the latch screws is installed, it’s time to move on to the next step.
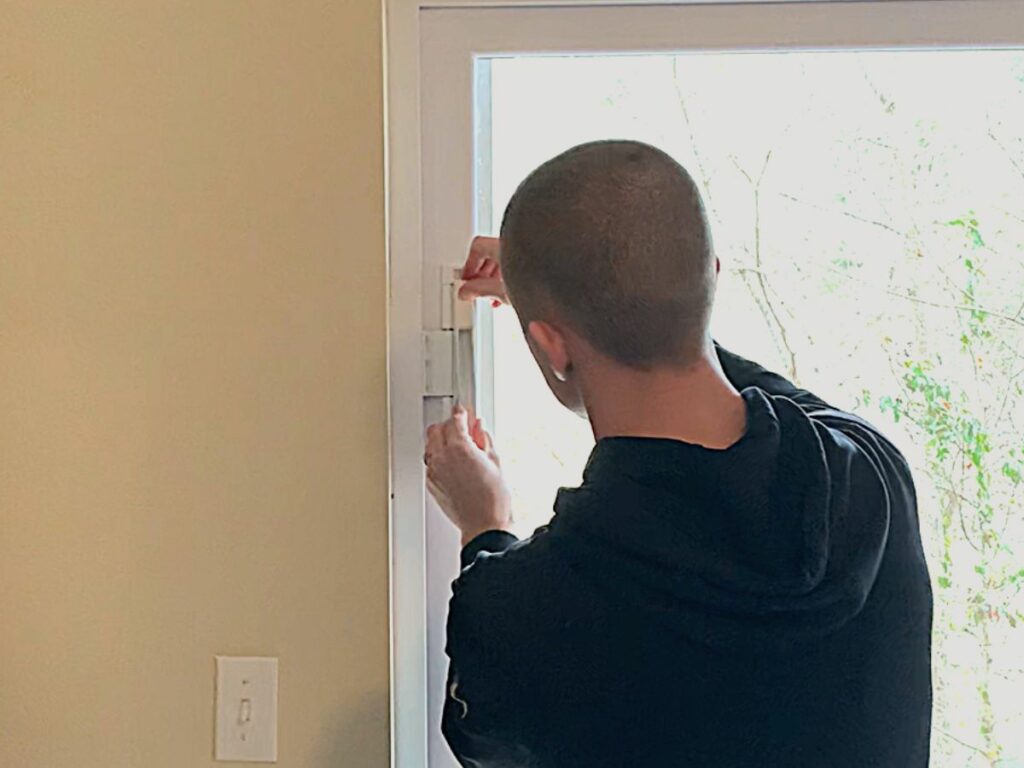
Step Four: Hold The Lock In Place On The Door Again & Mark The Door With A Pencil
The next step to adding a lock to a sliding glass door is holding the lock in place again and marking the spots to drill into the door itself.
Pick up the rest of the lock and “lock it” with the latch again. Then center the lock vertically where the bolts go into the latch as best you can and mark the four screw holes on the door with a pencil or marker.
If you don’t center the bolts while they’re in the latch, you might run into alignment issues when trying to open and close the door.

Once the holes on the door are marked, it’s time to move on to the next step.
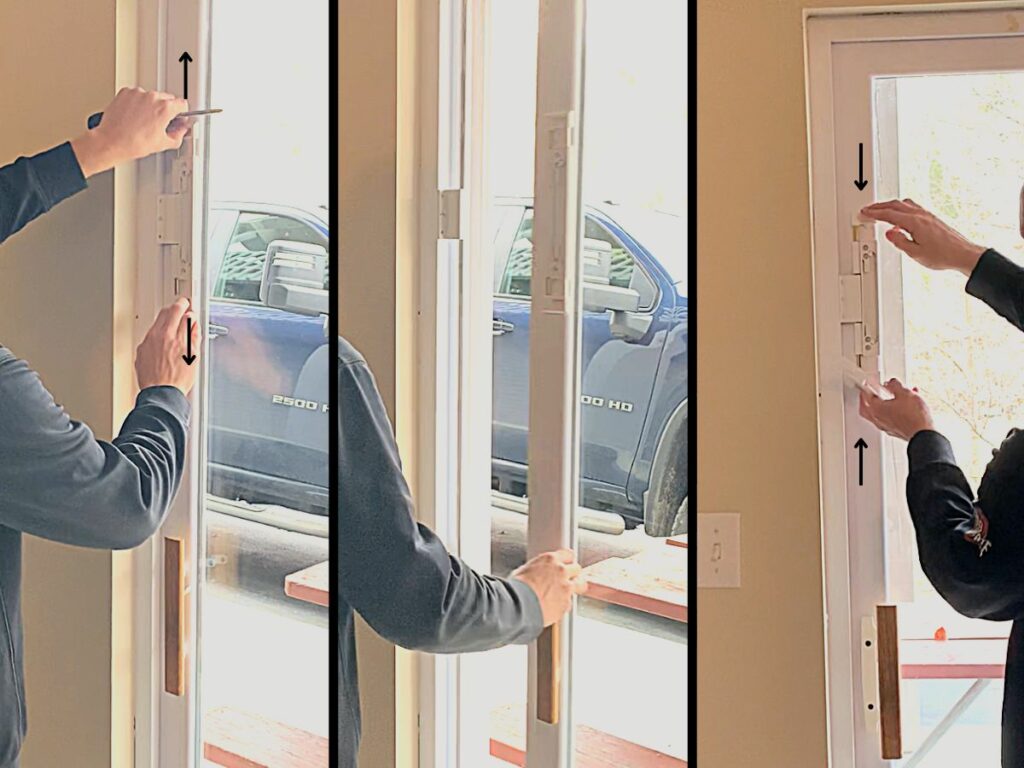
Step Five: Drill The Marked Holes In The Door & Screw In The Other Part Of The Lock
The next step to adding a lock to a sliding glass door is to drill into the door and screw in the second half of the lock.
Again, use a 1/8-inch drill bit to drill into the door. Be very careful as you drill into the door because it is possible to crack the glass… which would totally defeat the purpose of what we are trying to do.
When my husband drilled into the door, he only went about 1/4-inch deep. Just enough to feel the drill break through the top layer of the surrounding frame, but not deep enough to potentially drill through the other side.
Don’t worry too much about this part. Most glass doors only have the glass sitting about a 1/4-inch into the surrounding frame, so the odds are you will not hit the glass while drilling.
Drilling into the glass was my biggest fear as well, but after installing 4 different locks on 4 different sliding glass doors, we haven’t had any issues with drilling through the glass.
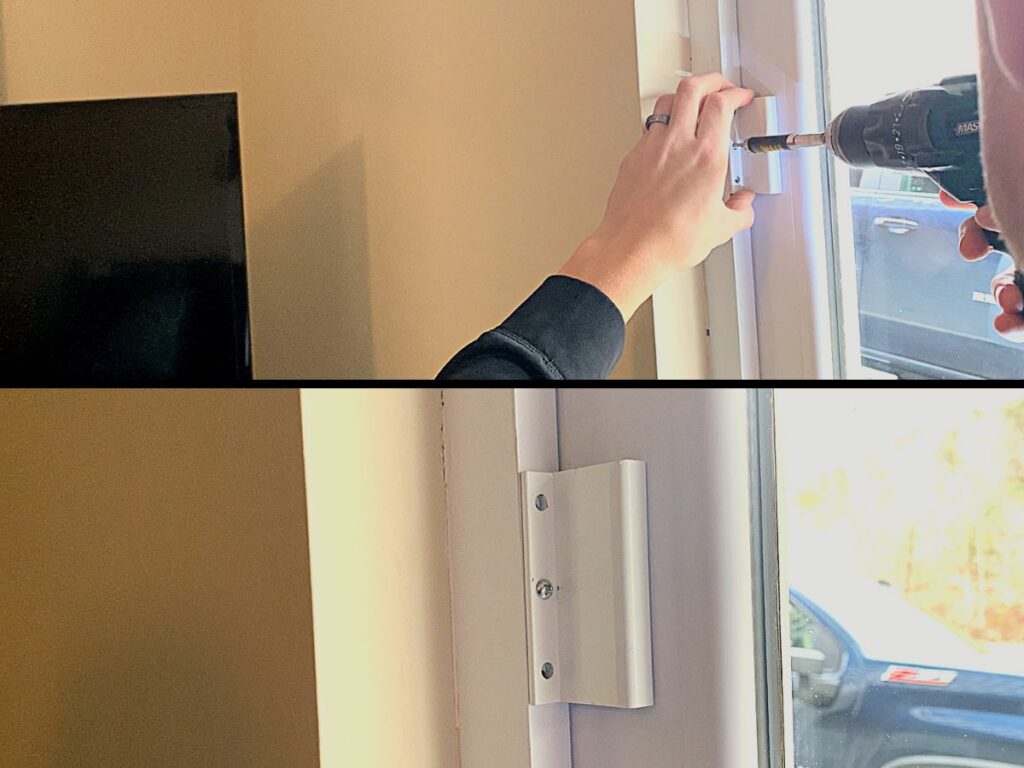
Once all four holes are drilled, use the small screws to screw the lock into the door. We used a Philips head screwdriver on the door to be able to control the pressure. Again, we didn’t want to risk cracking the glass, so we went slow and steady.

Once you’ve tested the door and the lock aligns with the latch properly, screw the remaining short screws into the lock on the door and the remaining long screws into the latch on the door frame.
Then it’s time to move on to the final step.
Step Six: Snap The Lock Cover Back In Place & Use The Door
The final step to adding a lock to a sliding glass door is to snap the lock cover back into place and use the door.
Grab the cover plate and snap it back into place to hide the screws on the door. Then voila! Your new sliding door lock is installed! Use it a few times to get the feel of it.
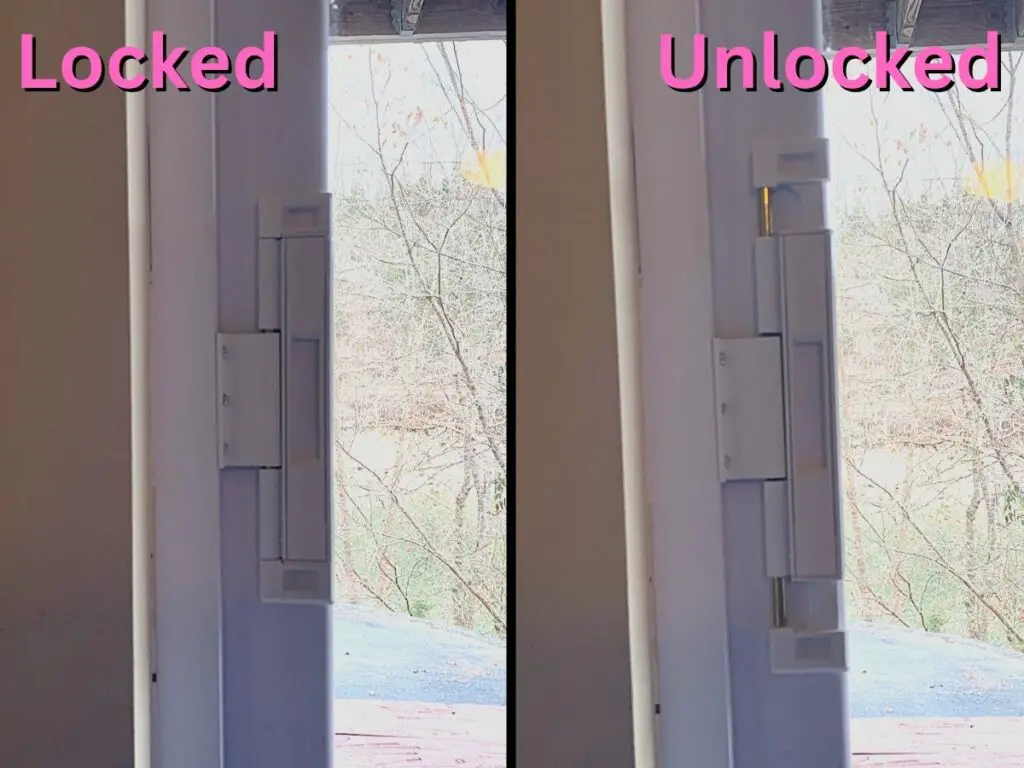
That’s it! This lock is super easy to install and feels really sturdy when you pull against it. Now you can have confidence that your patio door is secure!
Other FAQs About Sliding Door Locks
Here are some other frequently asked questions about sliding door locks to help you secure your patio door properly!
Can You Open A Locked Sliding Glass Door?
Locked sliding glass doors can be opened using a crowbar and lifting the door up and off its track. To prevent this, install a double-bolt lock that prevents the door from being lifted vertically and opened horizontally.
Can I Unlock A LOCKiT! Sliding Door Lock From The Outside?
LOCKiT! Sliding Door Locks can only be locked and unlocked from the inside. It is a secondary lock that is attached to the surface of the glass door and cannot be accessed from the outside.
Is Putting A Stick In The Sliding Glass Door A Good Way To Prevent A Burglar From Breaking In?
Putting a stick in the sliding door track can help prevent the sliding door from being lifted off its track with a crowbar. A double-bolt sliding door lock can do the same thing and looks nicer than a stick in the door’s track.
Final Thoughts On Installing A Sliding Glass Door Lock
There you have it!
We are very pleased with these locks and will be using them on the sliding doors we have in our other rental units (plus the sliding doors at my mom’s house!).
Hopefully, you find these locks helpful as well!
Catch you in my next post!

By Christine
Christine is a blogger and DIYer who tackles home renovation and decorating projects alongside her husband, Adam, for their personal residence and rental properties. Although she successfully tackles large renovation projects to avoid expensive contractor fees and bring her vision to life now, her path to success was not easy.
Go here to read her story, “From a Clueless First-Time Homebuyer To A Confident DIYer Creating Her Dream Home One Project At A Time“.
Popular Posts


DIY With Christine is a participant in the Amazon Services LLC Associates Program, an affiliate advertising program designed to provide a means for sites to earn advertising fees by advertising and linking to Amazon.com.