*My posts may contain affiliate links, which means I may receive a small commission, at no cost to you, if you make a purchase through a link! Thank you for supporting my website!*
Last updated on February 29th, 2024 at 05:17 pm
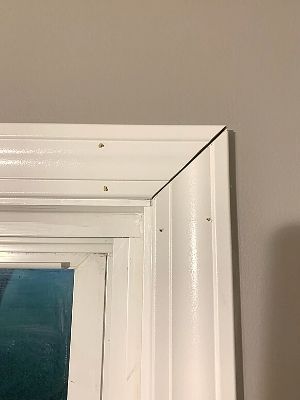
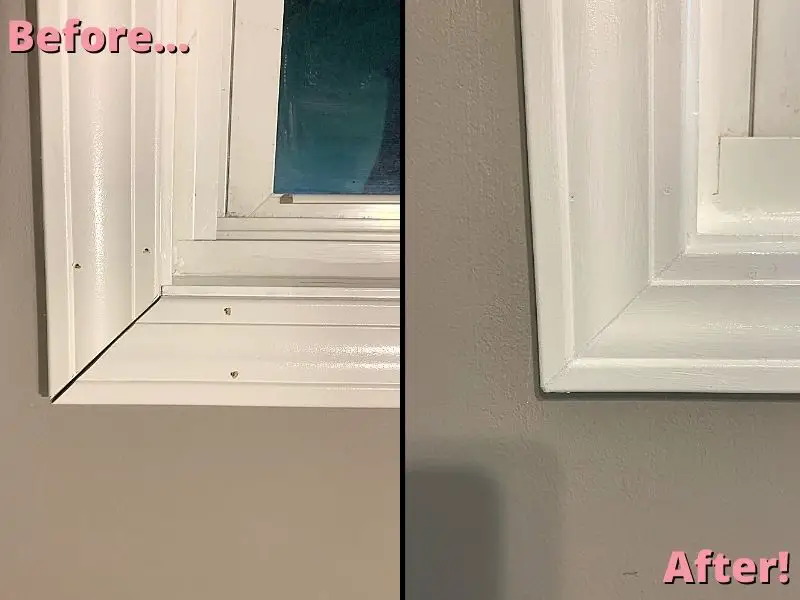
Have you ever walked around your house and noticed random gaps in your window trim or baseboard?
Maybe that’s just me who notices that stuff haha! But if you have then it might mean it’s time to fix those gaps. (Especially those gaps in the mitered corners of your window trim!)
Whether you installed your own window and door trim or a (not-so) professional did, it’s easier than you think to fix those gaps.
Believe me, we installed all new window trim, door trim, and baseboard in our 1560 square foot 1950s Ranch that we completed remodeled.
And angles can become your worst nemesis! Especially 45-degree angles in mitered joints.
Luckily, I have a cheap (how does a few dollars sound?) and an extremely easy tutorial below to solve all of your mitered corner problems! All it takes is 3 easy steps and the cost of wood filler, sandpaper, and paint.
Once you realize how easy this DIY project is, you’ll be ready to tackle the rest of the DIY projects in your house and become a super handywoman!
It all starts with this easy project.
Let’s dive on in!
How Bad Miters Occur
First off, let’s discuss how bad miters occur.
Oftentimes, walls and corners in houses (especially older homes) aren’t as square as we need them to be to create perfect mitered corners.
As a result, exact 45-degree angles might leave little gaps on corners that aren’t truly 90-degree angles.
For window trim specifically, there is a trick on how to cut a perfectly mitered corner that I will discuss below. For now, though, let’s fix your current problem of gaps in your mitered joints!
Quick Navigation: How To Fix Mitered Corners On Window Casing
- Tap In & Fill Nail Holes And Gaps In Mitered Corners
- Sand The Wood Filler With 180 Grit And Wipe Down The Window Trim
- Paint (Or Stain) The Window Trim
- Final Thoughts
| Level Of Difficulty | Time To Complete |
|---|---|
| Easy | A few hours |
| Material List | Tool List |
|---|---|
| White Wood Filler | Paint Tray |
| Sandpaper (180 grit) | 2” Angled Paintbrush |
| Cabinet & Trim Paint in your chosen color | Fine Foam Roller |
| Nail Set Punch Kit | |
| Hammer | |
| Small Putty Knife |
Step One: Tap In & Fill Nail Holes And Gaps In Mitered Corners
The first step to fix gaps in mitered joints is to tap in and fill the nail holes and gaps in the mitered corners.
Since you are taking the time to fix your mitered corners, you might as well fix the nail holes in the trim as well.
All of the nails should be tapped slightly below the surface of the window trim.
That way there is a place for the wood filler to fill in overtop the nails in the holes.
To do this, take a nail set punch and a hammer and lightly tap any nail heads that aren’t flush with the window trim.
NOTE: The nail set punch is important to use (rather than just tapping the nail head with a hammer directly) because it will sink the nail head below the surface of the trim. That little divot then gives the wood filler a place to sit in. Otherwise, you’ll be wasting your time because if the nail head isn’t sunk into the trim, the wood filler will just break off the nail head.
This nail set punch found at Amazon will do the trick for you, and it’s rather cheap!
After the nailheads are tapped in, it’s time to fill the gaps in the nail holes and mitered corners. To do this, you can either use caulk or wood filler.
Should You Caulk or Wood Fill Mitered Corners?
Different areas of trim call for a different product to fill the hole or gap. For example, caulk is fantastic to fill the gaps between trim and the wall because it spreads easily, contracts and expands with the wall, and can fill a large gap.
However, wood filler is much more useful for mitered corners and nail holes because it does not shrink over time as caulk does. Caulk on outside corners and nail holes can leave divots instead of a smooth finish as a wood filler does.
The general rule of thumb for when to use caulk and when to use wood filler on trim is as follows:
Use caulk for:
- Inside corners
- The gap between the trim and the wall (only for painted trim)
Use wood filler for:
- Outside corners/mitered joints
- Nail holes
How To Wood Fill Miter Joints
Now that we’ve solved that dilemma, it’s time to fix and fill the gaps in the miter joints with wood filler!
The magic behind this easy DIY fix is in the wood filler (found at Amazon). Wood filler or wood putty is made to do exactly what it’s called – fill in holes and imperfections in the wood.
If you’ve ever felt it, it feels like wet, sticky sawdust in my opinion. That texture is what helps it blend in with the texture of the wood (as opposed to caulk that stays smooth and shrinks).
Wood filler can also be sanded and painted, so you can give your trim that seamless look we’re all gunning for.
However, I do have to caution you if you are planning on staining your trim. Store-bought wood filler (even the “stainable kind”) does not stain as well as it should.
Avoid This Wood Filler & Stain Mistake
Yes, unfortunately, I’ve made the mistake of using store-bought wood filler then trying to stain over it while making my DIY floating fireplace mantel.
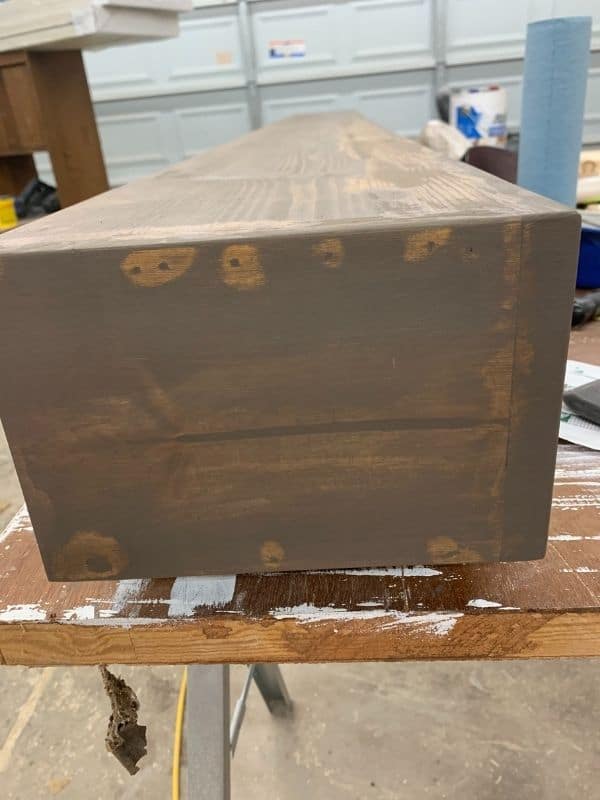
After that fiasco, I had to sand off all the stain and excess wood filler that I could before restaining to solve the problem. Talk about a lot of extra effort!
So if you plan on staining your window trim, then I recommend making your own wood filler. This website has a fantastic tutorial on how to make wood filler that will match your project much better than store-bought wood filler.
Use Store-Bought Wood Filler For Painted Trim
On the flip side, if your trim is already prefinished white like mine or you plan on painting it, then I recommend using the white-colored wood filler found at Amazon to save yourself a step of priming before doing the touch-up painting.
Now on to how to use it.
First, dab a little bit of wood filler on your finger and swipe it across each nail hole.
Leave a little extra wood filler directly over the nail hole, so you can sand it down and still be flush with the rest of the trim. The nail holes should be completely hidden once we stain or paint our trim.
Next, put a generous dose on your finger and fill in the mitered corners by wiping across the mitered corner (instead of along the mitered corner).
Wiping across the mitered corner allows the wood filler to find the gap and squish down into it until it is flush with the edges of each piece of trim.
Again, leaving extra wood filler gives you room to sand the wood filler down until it is flush with the rest of the trim.
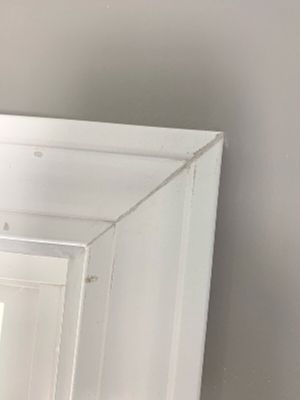
Here’s how it will look with sanded wood filler in it. It already looks 10x better than the harsh black line from an uneven cut!
Once the wood filler has dried, it’s time to move onto the next step!
Step Two: Sand The Wood Filler With 180 Grit And Wipe Down The Window Trim
The next step to fix gaps in mitered joints is to sand the wood filler and wipe down the trim.
I would allow for a few hours of drying time before sanding. (Check the label on your specific brand for dry-time – the bigger the mitered corner gaps, the longer they will take to dry.)
Once everything is dry, then you can start sanding. A small piece of sandpaper or a sanding block will do the trick for this step.
For unfinished trim, you’ll want to use 120 grit, and for prefinished or primed trim, you’ll want to use 180 grit sandpaper. (180 grit is finer sandpaper, so the surrounding surface won’t be damaged as badly as rougher sandpaper would do.)
Scrape Off Excess Wood Filler In Unwanted Areas
Start by using the corner of the sandpaper or the corner of a small putty knife to get the excess filler out of any tiny corners in the trim.
For example, I have a Colonial casing that has several corners and rounded parts. Because of this, I had to take my time while sanding. If you have craftsman-style casing then sanding will be much more simple for you!
Sand, Sand, Sand!
Next, start sanding!
The goal is to sand until the wood filler is flush with the surrounding trim. If you accidentally over sand, don’t worry, you can always add more wood filler and sand again.
To test for flushness, simply run your finger across the sanded area.
If it feels smooth to touch without much variation, then you’re ready to move on. If there’s still a divot, put more wood filler, or if there’s still too much wood filler on the trim, keep sanding.
After you’ve sanded all nail holes and mitered corners, wipe down all pieces of trim to prepare for paint or stain.
Once all of the wood filler is sanded and the dust is wiped away, you can move onto the next step!
Step Three: Paint (Or Stain) The Window Trim
The last step to fix gaps in mitered joints is to paint or stain the window trim.
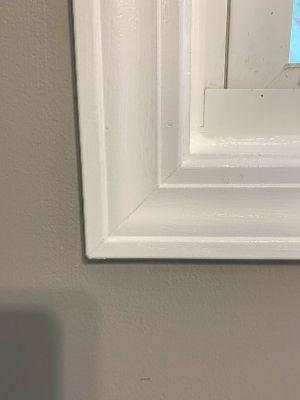
Woohoo, we’re on the last step! All that’s left to do is paint (or stain) your window trim. You’ve got it even easier if you used prefinished white trim as I did, and all you have to do is a few quick touch-ups.
I like to use cabinet & trim paint because it dries smooth and has a hard, durable finish. The ultra-pure white just looks beautiful on the trim in my opinion! But tint it whatever color you want your trim to be.
Use a 2” angled paintbrush like this fantastic short-handled brush from Amazon to get in the tight areas and a 2” fine texture foam roller like this one from Amazon to quickly paint the rest of the trim.
How Do You Cut a Perfect 45-degree Miter?
As I mentioned before, there is a trick to cutting perfect 45-degree miters in window trim, so you can potentially avoid fixing gaps in the mitered joints later.
The trick is to cut the left and right pieces of trim to the exact same size (even if each side has a slightly different actual measurement). In addition, the top and right pieces of trim need to be cut to the exact same size as well.
This means that if the left side of the window measures out to be 34-¼” and the right side measures out to be 34-½” then you should split the difference and cut two pieces of trim at exactly 34-⅜”. (Likewise, if the top piece is 40” wide and the bottom piece is 40-¼” wide then split the difference and cut two pieces at 40-⅛” inches.)
Trim is a visual thing, so splitting the difference won’t be seen by the naked eye. In addition, by cutting the trim this way, you will be creating perfect 90-degree corners on the window.
Then when you cut 45-degree miters on the window trim, the two 45-degree angles will fit the 90-degree corner perfectly. (And thus, avoiding having to fix gaps in the mitered joints!)
This video does an excellent job further explaining how to cut perfect 45-degree miter joints!

Final Thoughts On How To Fix Gaps In Mitered Joints
There you have it! Three easy steps to fix gaps in mitered joints to make your window trim look flawless. And all it cost was the price of wood filler and sandpaper (and potentially paint)!
You can take this trick and apply it to any woodworking project you go to tackle next. No need to worry about perfectly mitered corners again!
Catch you in my next post!

By Christine
Christine is a blogger and DIYer who tackles home renovation and decorating projects alongside her husband, Adam, for their personal residence and rental properties. Although she successfully tackles large renovation projects to avoid expensive contractor fees and bring her vision to life now, her path to success was not easy.
Go here to read her story, “From a Clueless First-Time Homebuyer To A Confident DIYer Creating Her Dream Home One Project At A Time“.
Popular Posts


DIY With Christine is a participant in the Amazon Services LLC Associates Program, an affiliate advertising program designed to provide a means for sites to earn advertising fees by advertising and linking to Amazon.com.
Comments are closed.