*My posts may contain affiliate links, which means I may receive a small commission, at no cost to you, if you make a purchase through a link! Thank you for supporting my website!*
Last updated on September 11th, 2024 at 09:16 am
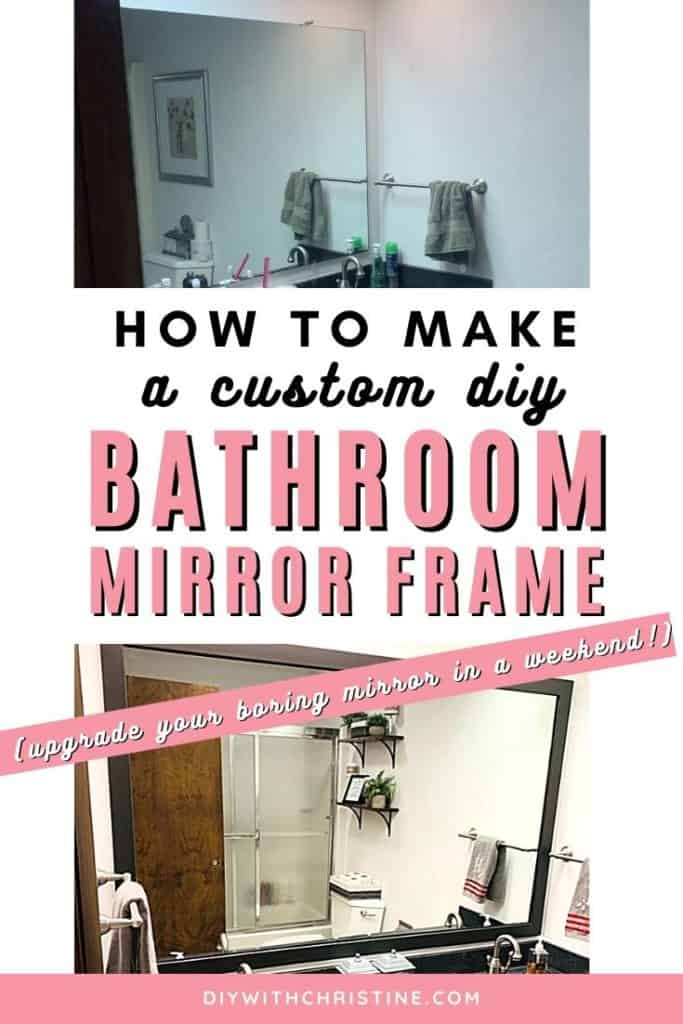
How To Frame A Bathroom Mirror For Less Than $20
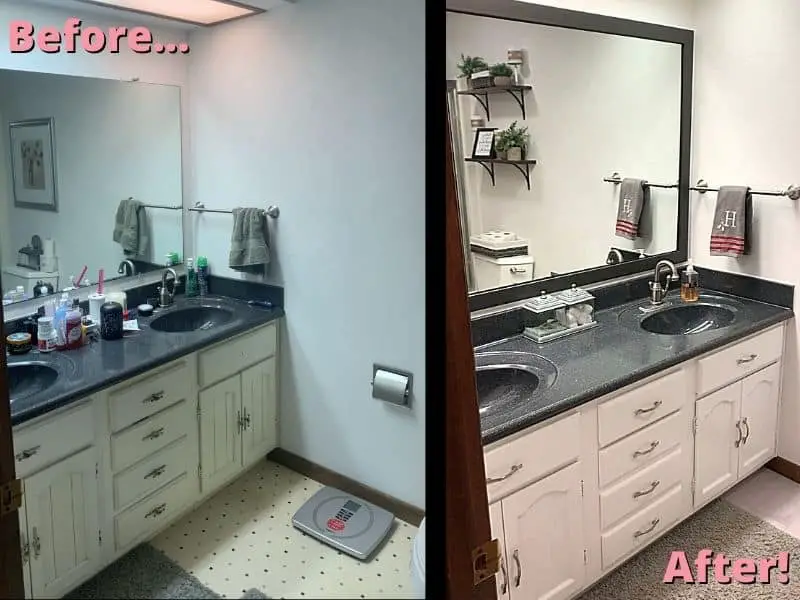
Are you in love with your large builder-grade mirror, but tired of looking at the ugly, unfinished edges? A custom DIY bathroom mirror frame can help solve your problem!
That’s exactly how I felt every time I looked at the gorgeous unframed mirror in my mom’s guest bathroom.
I knew for just a few dollars and a little bit of my time, I could make her bathroom way more modernized and elegant. And I was right!
This easy 5-step tutorial will walk you through exactly how you can transform your boring, unframed mirror as well!
Let’s dive on in!
Level Of Difficulty To Make A DIY Bathroom Mirror Frame
Easy
This DIY bathroom mirror frame project is perfect for beginners!
Time To Complete DIY Bathroom Mirror Frame
2-3 days – Mostly glue and paint dry-time!
Materials For DIY Bathroom Mirror Frame
- Door Trim or Baseboard
- Paint
- Wood Glue
- Mounting Tape
Tools For DIY Bathroom Mirror Frame
- Miter saw (or circular saw)
- 4 clamps
- 2” foam roller
- Tape measure
- Contractor pencil
How To Frame A DIY Bathroom Mirror
- Measure Your Bathroom Mirror
- Cut Your Baseboard/Trim
- Secure The Trim Together With Wood Glue
- Paint All Sides Of The DIY Bathroom Mirror Frame
- Secure The DIY Bathroom Mirror Frame To The Mirror With Mounting Tape
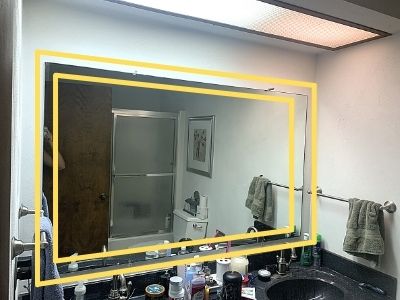
Step One: Measure Your Bathroom Mirror
The first step to making a custom DIY bathroom mirror frame is to measure your bathroom mirror.
Start by measuring the width of the mirror (left to right) and the height of the mirror (top to bottom).
Now, with those measurements in mind, it’s time to do a little math.
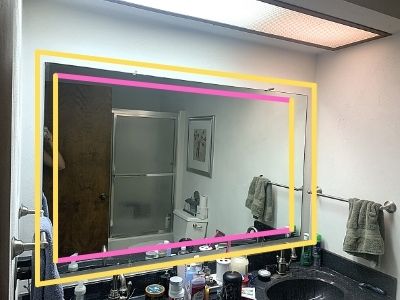
To frame your mirror correctly, you want to completely cover the little plastic clips holding it into place. This means we need to make the measurements at least a ½” shorter than how far the clips cover the mirror.
Yes, yes, I know that sounds confusing, so let me break it down a little further.
How To Measure The Left And Right Pieces Of Trim For The DIY Bathroom Mirror Frame
If the height of your mirror measures 40 inches and your clips cover the mirror by ¼” then your measurement to cut the left and right pieces of trim will be 39-¼ inches. (40 inches – ¼ inches – ½ inches for a little extra room = 39-¼ inches).
Now let me throw one more variable at you. For your frame to have mitered corners, that measurement will be the measurement from the inside corner to the inside corner of the mitered corners on the left and right pieces of trim. (Which means the longest point of the left and right trim pieces will be longer than 39-¼ inches.)

Cutting the left and right pieces this way will ensure you are covering up those pesky little plastic clips!
How To Measure The Top And Bottom Pieces Of Trim For The DIY Bathroom Mirror Frame
Now that you’ve got the hang of how to cut the left and right pieces, the top and bottom pieces should be a breeze!
The only goal with the top and bottom measurements is to make sure they overhang the mirror as much as the left and right pieces do.
To do this, we are going to do the same math!
Take the mirror width measurement and subtract the same amount that you subtracted from the left and right pieces. (In this case, we’ll subtract ¾ inches total.)
So if the width of your mirror is 48 inches then you should cut the top and bottom trim pieces at 37-¼ inches. Again, this measurement is from the inside corner to the inside corner of the mitered corner you’ll be cutting!
How To Make Perfectly Mitered Corners For Your DIY Bathroom Mirror Frame
Before you start cutting your trim, I want to give you a small tip on how to cut perfect 45-degree angles in your bathroom mirror frame.
As long as the top and bottom pieces measure exactly the same to each other (and as long as the left and right pieces measure exactly the same to each other), then you will have perfect 45-degree angles.
However, if you’ve cut the top and bottom and hold them together and can feel a slight difference in length, then you’ll want to cut one piece to get the lengths exact. (Same for the left and right pieces.)
At this point, if your pieces are a saw blade or two shorter than your initial measurement, that won’t matter. All that matters is that your pairs are equal to each other, and your mitered corners will turn out fantastic!
On the off chance that you can’t get your mitered corners to come out as perfectly as you hoped, then this tutorial will show you exactly how to fix them after you’ve installed the frame on the mirror.
Trust me, it’s super simple, so don’t worry too much about this part!
Now that you’ve got your measurements and how to cut the perfect mitered corners, you can head out to your saw and onto the next step!
Step Two: Cut Your Baseboard/Trim
The next step to making a custom DIY bathroom mirror frame is to cut the baseboard or trim to your measurements.
Mitered corners are a little bit more difficult to measure and cut from the inside angles, but no need to fear. We’re handywomen, and we can overcome anything!
To start, I recommend cutting the first 45-degree angle on the end of your piece of trim.
Then take your tape measure and have someone hold the 1-inch line directly on the point of the inside corner on the miter.
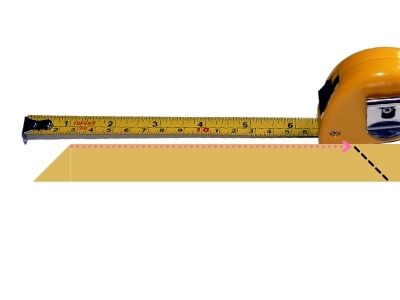
While they’re doing that, measure to your measurement from the previous step PLUS ONE INCH. (Make sure to add one inch since you are holding the tape measure at the one-inch mark instead of the zero mark.)
Then cut your second mitered corner so the inside of the corner is right where you made your mark with your pencil.
The reason behind starting at the one-inch mark is because it’s hard to hold the metal tip of the tape measure on an inside corner like that. It’s easier to line up the one-inch mark directly on the corner and measure from there (plus one-inch. I’m repeating it because I’ve made that mistake several times haha!)
After you cut all four pieces, don’t forget to go back and make sure the top and bottom are the same lengths and the left and right are the same lengths for your perfect mitered corners!
Once all four pieces are cut and ready to go, you can move onto the next step!
Step Three: Secure The Trim Together With Wood Glue
The next step to making a custom DIY bathroom mirror frame is to secure the cut trim pieces together with wood glue and clamps.
Since your mirror frame is just going to be sitting over the top of the mirror and won’t be touched that much, some wood glue found at Amazon should do the trick.
However, if your trim is ½ inch thick or more then you might want to glue and secure each corner with brad nails. My trim was too thin, so the brad nails would have shot out of the front or back where I didn’t want them to be.
I’ve seen others use little metal plates to support the back along with wood glue, but again, my trim was too thin to screw the metal plates into it. I guess I could have tried gluing the metal plates to the back, which would have helped!
This video does a fantastic job of showing you techniques on how to measure, cut, and secure mitered corners.

But for my purposes, the wood glue was plenty strong to hold it together while I transported the bathroom mirror frame upstairs and secured it to the mirror. Ultimately, it’s your choice!
How To Make a Homemade Mirror Frame
To secure the four trim pieces together to make a homemade mirror frame, I squeezed wood glue in each mitered corner and used clamps to hold the mitered corners together until they dried.
Do one corner at a time, and try not to disturb the finished corners as you secure each new corner together.
If you choose to use brad nails or a metal plate, then now is the time to shoot or install them on the corners to give some extra support while the wood glue is drying!
Let the wood glue dry according to the bottle’s instructions.
Once your frame is secured and dry, it’s time to paint!
Step Four: Paint All Sides Of The DIY Bathroom Mirror Frame
The next step to making a custom DIY bathroom mirror frame is to paint all sides of the bathroom mirror frame. (Yes, that even includes the back!)
I made the mistake of only painting the front of the mirror and was so disappointed when you could completely see the unpainted backside of the frame within the mirror’s reflection! #EpicFail
No worries though. I just took it off and painted it, but that meant I had to wait another day before I could hang it because I had to let it dry.
Avoid this problem by painting all sides! That includes the front, back, inside, and outside edges of the mirror frame.
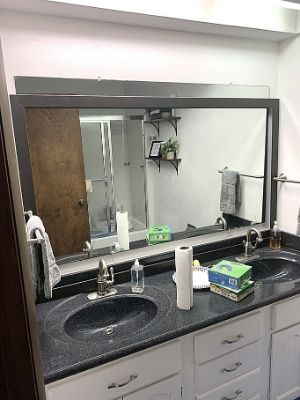
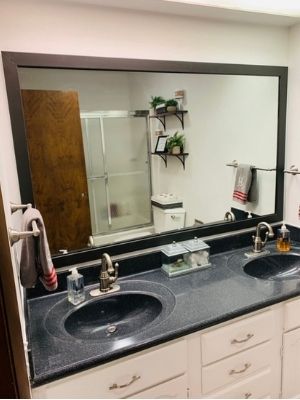
For my mirror frame, I painted it flat black, and I am in love with how it turned out! I originally painted it a satin black, but I didn’t like the shiny look.
So when I had to take it down to paint the backside, I jumped ship and switched to this flat black. So much more modern and sleek in this bathroom! (You can check out the other 9 steps we took to remodel this bathroom on a budget here!)
Let the paint dry on one side before flipping it over and painting the other side.
Once your DIY bathroom mirror frame is dry, you can move onto the last step!
Step Five: Secure The DIY Bathroom Mirror Frame To The Mirror With Mounting Tape
The last step to making a custom DIY bathroom mirror frame is to secure the bathroom mirror frame to the mirror with mounting tape.
I’m sure you’ve seen others secure their homemade mirror frames with glue straight to the mirror.
I don’t know about you, but I just couldn’t get on board with permanently adhering the mirror frame to a perfectly good (and expensive) mirror. I mean, what if I want to change the frame later??
So I had to come up with a better way to secure the mirror without doing permanent damage to the mirror.
How To Attach Wood To A Mirror
That’s when I found this mounting tape on Amazon! It’s literally double-sided tape that’s made to hold 11 lbs per 6 inches. That made it perfect for my bathroom mirror frame because it’s fairly light!
I used two 12 inch strips (one on each side) on the back of the mirror frame and stuck it directly to the mirror.
The tape is clear, so it didn’t show in the reflection of the mirror. I even stuck the tape too close to the edge of the frame, so I had to peel it off to adjust it on the back of the frame, and it didn’t damage the mirror! Just what I wanted!
How To Frame A Bathroom Mirror Over Plastic Clips
Luckily, the plastic clips on this mirror were thin enough that the frame covered them.
However, if your clips are too thick and make the mirror frame stick off the mirror, you can try cutting out a divot in the back of the frame so the plastic clips can sit within the divot.
Then the rest of the mirror frame would sit flush to the mirror. My trim was too thin to do this, but yours might work out perfectly!
As I researched ways to solve this problem (in case the plastic clips did get in our way), I came across the solution to use plastic washer in place of the plastic clips.
I thought that was going to be a fantastic solution to my problem! Washers are flat, so they’d sit more flush to the mirror like I needed. Plus, they are plastic, so they wouldn’t be too tough and break the mirror.
WELL, this solution did not work for me, so I ended up putting the plastic clips back in. This forum does a good job of explaining why using plastic washers in place of the plastic mirror clips wouldn’t work.
In summary, if you can leave your current mirror clips in, that would be the best solution. After your mirror frame is secured to the mirror, step back and admire your handiwork because you did it!
Final Thoughts On How To Frame A DIY Bathroom Mirror
There you have it! Your basic builder-grade mirror can have a total MAKEOVER for the cost of paint, trim, wood glue, and mounting tape. (Brownie points to you if you can use leftover wood/trim and paint from another project!)
Whether this is your first DIY project or your 100th, there is nothing more empowering than creating something beautiful with your own two hands.
Especially when you can do it while balling on a budget and making your room look twice as elegant!
I hope I’ve encouraged you that you can tackle this simple and cheap DIY project!
Catch you in my next post!

By Christine
Christine is a blogger and DIYer who tackles home renovation and decorating projects alongside her husband, Adam, for their personal residence and rental properties. Although she successfully tackles large renovation projects to avoid expensive contractor fees and bring her vision to life now, her path to success was not easy.
Go here to read her story, “From a Clueless First-Time Homebuyer To A Confident DIYer Creating Her Dream Home One Project At A Time“.
Popular Posts


DIY With Christine is a participant in the Amazon Services LLC Associates Program, an affiliate advertising program designed to provide a means for sites to earn advertising fees by advertising and linking to Amazon.com.
Comments are closed.