
*My posts may contain affiliate links, which means I may receive a small commission, at no cost to you, if you make a purchase through a link! Thank you for supporting my website!*
Last updated on September 11th, 2024 at 09:19 am
How To Plan & Install Laminate Flooring Like A Pro
Wondering the best way to plan your laminate flooring layout? Well, look no further because I have your answer!
To install laminate flooring you must, remove obstacles, level the subfloor, install the transition strips, plan the stagger pattern, install the boards, and snap the transition strip covers into place.
Now that we’ve got the basics out of the way, lets break it down a little further so you can install your laminate flooring with ease!
Let’s dive in!
Quick Navigation: Laminate Flooring Installation Over Concrete
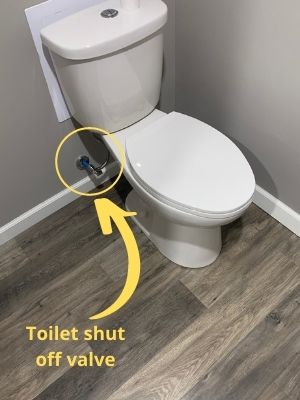
- Remove Toilets, Baseboards, Door Jambs, Other Obstacles To Prepare For Laminate Flooring
- Level Uneven Concrete Subfloor & Install Underlayment
- Install Metal Base Of Laminate Flooring Transition Strips In Doorways
- Plan Staggered Pattern For Laminate Flooring Layout
- Start Laying Laminate Flooring
- Install Transition Strips Over Laminate Flooring Edges
- Re-Install Toilets, Baseboards, Etc. Over Laminate Floor
- Other FAQs About Laminate Flooring Layouts On Concrete
- Final Thoughts
| Level Of Difficulty | Time To Complete |
|---|---|
| Medium | 1 day for a small room (6 ft x 6 ft) up to several days for a large room/whole house |
| Material List | Tool List |
|---|---|
| Underlayment | Laminate flooring installation kit |
| Underlayment tape | Hammer |
| Laminate flooring | Jigsaw |
| Transition strips (dependent upon your room needs – T-Moulding, Reducer, Stair Nose, Endcap) | Circular saw |
| Miter saw | |
| Table saw | |
| Spade drill bit for plumbing | |
| Oscillating Multi-Tool for door jambs |
Step One: Remove Toilets, Baseboards, Door Jambs, Other Obstacles To Prepare For Laminate Flooring
The first step to installing laminate flooring on concrete is to remove all of the obstacles in the way.
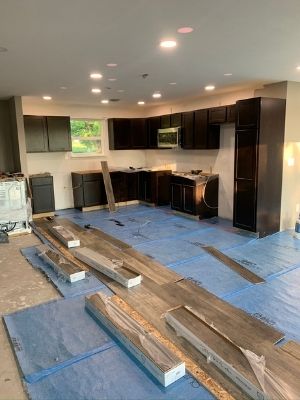
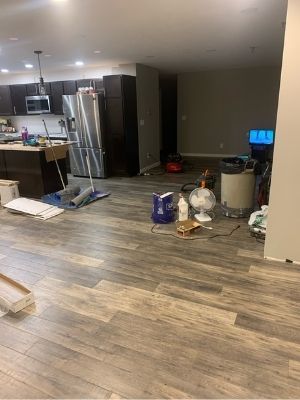
So far, we’ve laid laminate flooring in a completely gutted house with a concrete subfloor that had no toilets, doors, baseboard, or pretty much any obstacles.
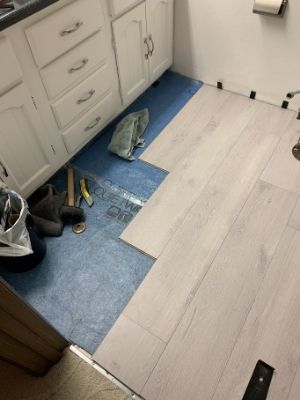
And we’ve laid laminate flooring in a tiny 6-½” x 6” bathroom with a wood subfloor that needed a toilet, old pipes, rugs, and baseboard removed.
No matter your starting situation, you want to remove all of the items that will be in your way, so you have a clear area to work.
To start, I would first remove the furniture, toilets, rugs, and anything else sitting on top of the current flooring.
For help on removing a specific item to get the room prepared for laminate flooring, check out my other tutorials:
- How To Remove A Toilet Before Installing Laminate Flooring
- How To Remove Baseboard Without Damaging Your Wall Before Installing Laminate Flooring
- How To Cut The Door Jamb And Trim Before Installing Laminate Flooring
Once all of your obstacles are out of the way, you can move on to the next step!
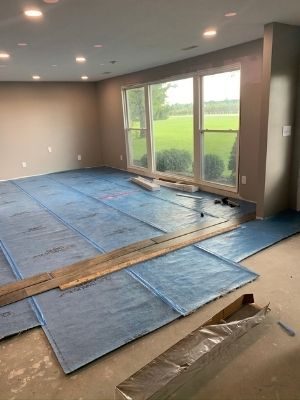
Step Two: Level Uneven Concrete Subfloor & Install Underlayment
The next step to installing laminate flooring on concrete is to level the subfloor & roll out the underlayment.
How laminate flooring works is that it “floats” across your room. So if there are bumps and unevenness, it will bridge across that “gap”.
If we only cared about looks, then that would be fantastic! But unfortunately, as soon as you step on that gap (if it’s big enough), you run the risk of snapping or breaking the board in some way.
To avoid this, you just need to prep your surface with a topcoat of a self-leveling compound before rolling out the underlayment. (It’s concrete that doesn’t have any rock chunks in it, so it comes out nice and smooth.)
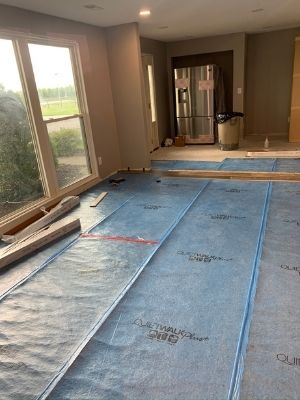
Also, underlayment is extremely important for laminate flooring over concrete. For help on choosing the best underlayment for your home, check out my article here.
Once your floor is level and all of your underlayment is installed, you can move on to the next step.
Step Three: Install Metal Base Of Laminate Flooring Transition Strips In Doorways
The next step to installing laminate flooring on concrete is to install the metal part of any transition strips in the room.
If there are any doorways or staircases in the room you are installing laminate flooring, then it’s time to install part of the transition strips.
For help on the different laminate flooring edging options and when to use them, check out my article here.
Step Four: Plan Staggered Pattern For Laminate Flooring layout
The next step to installing laminate flooring over concrete is to plan the staggered pattern and start laying laminate flooring.
First, you must choose which direction you will lay your laminate flooring.
Which Direction Should You Lay Your Laminate Floor?
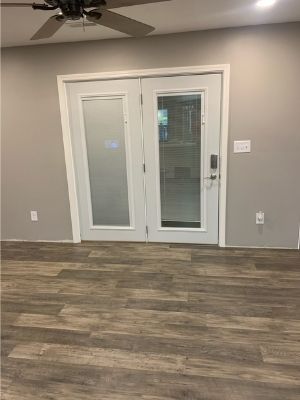
In general, laminate flooring should run perpendicular to the largest window in a room. In a bathroom, run laminate flooring parallel to the bathtub to minimize the number of seams next to a high-moisture area. Otherwise, run the floor parallel to the longest wall in the room.
There’s a general rule for choosing the direction of laminate flooring. Find the largest window in the room and lay your laminate flooring perpendicular to that window.
Yes, it’s that simple! The way the light reflects in helps hide the seams. However, if you lay your laminate flooring parallel to the largest window then the light will showcase the seams more.
Room With Windows
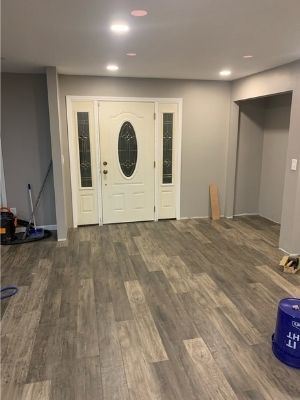
Now, I’m sure you’re asking, “What if there are windows on multiple walls in the room?” I asked the same question before we laid the flooring in our open concept living room/dining room/kitchen area that has two glass doors, a 12 ft x 12 ft floor to ceiling window, and a small kitchen window.
The answer is still to pick the largest window in the room and run the boards perpendicular to it. Most of the light from the room will come from the largest window, so you want the seams to be hidden a little better based on that window.
Room Without Windows
But what if the room has no windows? Yes, the small guest bathroom we laid didn’t have any windows either, so I have an answer for that as well!
You can choose one of two things; first, you can lay the laminate flooring parallel to a bathtub or bathroom cabinets, or second, you can pick the longer side of the room and run the boards the length of that wall.
The reason behind laying the boards parallel to a bathtub or cabinets is because both of these areas are high water traffic areas (more so the tub than the cabinets). So you want to have the least amount of seams around this area as possible to keep water out from underneath.
Also, it’s easier to caulk a seam that is perfectly straight along the length of the tub than a seam that is uneven because you cut each end piece slightly differently.
On the other hand, if there’s no tub or cabinets, then you can run the boards in any direction you please. I like to choose the longest wall and run the boards parallel to that because it will result in the least amount of waste.
At the end of the day, you really can’t go wrong! Once you have the direction chosen, it’s time to calculate the starting row dimensions.
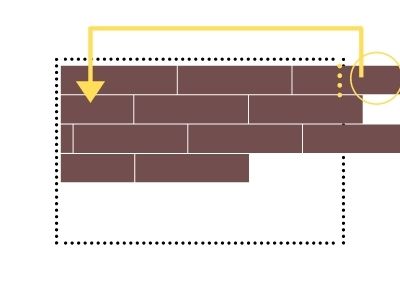
How Should Laminate Flooring Be Staggered?
Planning the laminate flooring layout is by far the hardest part of laminate flooring. But it’s also the most crucial.
So, to help you more easily calculate and plan out a staggered pattern specifically for your room, you need to check out my tutorial here.

Step Five: Start Laying Laminate Flooring
The next step to installing laminate flooring is to finally start laying laminate flooring! I know you might think I’m crazy for having the actual installation of the laminate floor be STEP FIVE of SEVEN, but that just goes to show how important the prep work is.
If you do steps 1-4 properly, then you will cruise through the actual installation of the floorboards. So without further ado, let’s dive into the real work!
One: Pull From Multiple Boxes
The first note I need to make is this; “randomize” the colors on your floor by pulling from different boxes.
Oftentimes, laminate flooring comes in slightly varying shades of color to give it a more realistic wood look. Also, the manufacturing process naturally results in a little variation in color.
To create a more natural look, you want to pull pieces from 2-3 different boxes at the same time. This will help you avoid having all the “light” pieces in one corner and all the “dark” pieces in another, and nothing is more randomized than literally pulling pieces out in random order from multiple boxes.
Just open 2-3 boxes at a time and go in order, pulling from each one then starting over. I wouldn’t think much more about it beyond that!
Two: Cut The First Piece/Row
Next, it’s time to cut the first piece! Remember, we did all those calculations above in preparation for this moment.
We did all that upfront, so now you can just cut and click together, cut and click together. You really shouldn’t have to do much more math beyond this other than reading measurements off a tape measure!
Find the measurement you calculated for the first piece and cut it to length first using a miter saw or circular saw, then to width second using a table saw or circular saw.
(It’s very possible you could start with a full piece if the rest of the math worked out alright. In that case, just plop it down and move on to the next step!)
Note: It’s important to cut it to length first because you want to use the leftover piece to start the next row. If you cut the piece to width first, then to length, you will have to cut another board to have a starting piece for the next row (which just creates extra waste and wasted money).
If your entire first row needs cut to width, then cut them all now so you can install them all at once!
Which Side Of Laminate Flooring Goes Against The Wall?
The next question you might be wondering is, “What side of laminate flooring goes against the wall?”
The answer simply is it doesn’t matter. However, it does matter if you want to make your life easier by being able to swing the hammer with your dominant hand. First, face the wall the first row is being installed against. Second, decide whether you are right-handed or left-handed (should be simple enough haha!) and follow the table below.
| Right-Handers | Left-Handers | |
|---|---|---|
| Direction To Work | Left to right | Right to left |
| Which Side To Put Against The Wall | Put the tongue (shorter side) against the wall with the groove (longer side) on the bottom working towards the right | Put the tongue (shorter side) against the wall with the tongue (shorter side) on the bottom working towards the left |
(Yes, if your first row needs cut to width, you will need to cut off the tongue side that goes against the wall according to the table above. It’s best practice to cut the tongue off against the wall in the starting row anyway even if you are starting with a full piece.)
Deciding which way to start based on your dominant hand will help you be able to install the boards easier and faster.
Do You Have To Cut The Tongue Off The First Row Of Laminate?
As mentioned above, it is best practice to cut the tongue of the first row of laminate then add a spacer to allow for the recommended ⅜” expansion gap.
However, if your baseboard is thick enough to cover both the ⅜” expansion gap and the tongue being left on against the wall then it’s not necessary to cut it off the first row.
In some of our projects, we left the tongue on because the baseboard easily covered the distance. And in other projects where the floor butted up against a bathtub, we cut the starting tongue off.
You want a ⅜” expansion gap against all walls so the floating floor can breathe. However, if you are installing boards against a bathtub then you won’t want to see a big gap.
To solve this problem, you can press the boards against the tub and just leave the expansion gap on the other sides of the room. That will let the laminate floor breathe still while also shrinking the gap directly next to the tub (where water can ruin the floor if not properly sealed along that seam).
How Many Spacers Do You Need For Laminate Flooring?
When you are ready to start laying the first row of laminate flooring, it’s time to break out some spacers. I love this cheap laminate floor installation kit at Amazon because it comes with all the tools you need to complete this project (besides the cutting tools).
You could also use a scrap piece of the laminate flooring as a spacer because they are close to the same size. However, you will need several of them and you need the other tools in the kit, so it’s usually just easier to use the spacers that come with it.
Spacers need to be placed against every wall to help keep the ⅜” expansion gap from the wall and to support the first row as you tap the other rows into it. You need 2-3 spacers along the long side of the boards and 1-2 spacers along the short side of the boards that touch a wall.
More spacers certainly won’t hurt your project.
Three: “Click Together” The Next Piece
Hallelujah! It’s finally time to click the pieces together! Now I don’t know about you, but my husband and I STRUGGLED with this at first.
I know these things are made to “click” together, but I am here to tell you that they do not click in any sort of fashion that I would have expected.
They do kind of pop together when they are correctly in place, but there is no satisfying click noise to help you identify that you’ve locked them together correctly.
Also, if you aren’t using the proper tools (such as the block and pull bar that comes in a laminate installation kit), then the tongues break easily. Unfortunately, when the tongue breaks, the board is useless.
(You can possibly use the unbroken side of the board in another spot in the room, so don’t discard it quite yet.)
So you want to use the proper tools at the proper time.
How To Click Together Laminate Flooring
- Whenever possible, connect the long side of the board first.
- Lean the new board at a 45-degree angle against the installed piece
- Slide the tongue of the new board into place
- Use your rubber mallet to tap lightly against the piece to further slide it into place
- Smack the entire new board down with the rubber mallet to “click” it into place
- Go to the short end and start tapping it back toward the other board to connect it as well (use the rubber mallet and block)
- Make sure both sides are fully slid into place with the seams showing no gaps
Video Of Laminate Flooring Installation Tips and Common Problems
I know this probably sounds super confusing, so here is a video that further demonstrates what I am talking about.

(Note: In this video, it says the minimum size of the starting piece should be 8 inches instead of the 6 inches that I recommended earlier. This measurement is dependent upon the specific brand of laminate flooring you are installing. The instructions with your flooring should specify these slight variations better for you. As long as you are within this range or greater, your floors will be fine.)
Once you reach the end of a row and need to “pull back” a piece into place, use the pull bar and a real hammer to slide it back into place. We found a rubber mallet didn’t work very well with the pull bar. A regular hammer worked well here.
Four: Use The Leftover To Start The Next Row
As we’ve talked about in previous sections, your laminate floor needs a “random” pattern that lets the floor expand and contract like it needs to.
To do this, measure and cut the last piece of a row, then take the remaining piece and put it as the starting piece for the next row.
Simple! Plus, you’re saving lots of money by using less waste.
However, if the remaining piece is less than 6 inches, then it’s time to start over with a full piece or whatever the length of your very first starting piece was cut at.
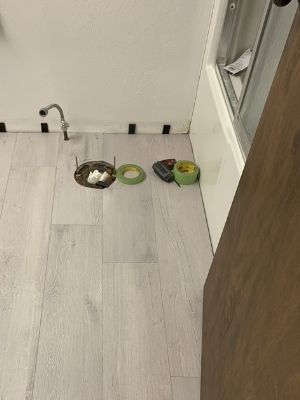
Five: Cut Around Obstacles
Outside of that, you just need to keep chugging along and installing piece after piece! If you reach an obstacle like a toilet flange, plumbing sticking out of the subfloor, or corners in the wall, then cut your piece to fit around it while still leaving a ⅜” expansion gap.
Cutting around obstacles is the most time-consuming part of the installation process. This is why large rooms feel like they take less time than small rooms. Fewer obstacles mean less time measuring and cutting!
Use a circular saw, miter saw, table saw, and a jigsaw to get the job done. Also, you can use spade drills to cut holes for plumbing if desired.
Once you have your entire floor installed, it’s time to move on to the last step!
Step Six: Install transition Strips Over Laminate Flooring Edges
The next step to installing laminate flooring over concrete is to install the transition strips.
All you have to do at this point is cut the transition strip to length with a miter saw and snap it into the metal strip you’ve already secured into the concrete.
EASY!
Once all of the transition strips are installed, it’s time to move on to the final step.
Step Seven: Re-Install Toilets, Baseboards, Etc. Over Laminate Flooring
The last step to installing laminate flooring over concrete is to add the finishing touches!
Once all of your laminate floorboards are installed, you just need to complete these last few touches:
- Re-install baseboard
- Re-install items we originally removed (toilets, furniture, etc.)
- Don’t forget to install a new wax ring before re-installing the toilet
- If you are in a kitchen or bathroom, caulk along the
- Bathtub or shower base
- Bathroom cabinets
- Kitchen cabinets
- Base of the toilet (if it needed shimmed to be level)
- Only caulk the front ¾ of the toilet base so water can come out the back and notify you if there is ever a leak
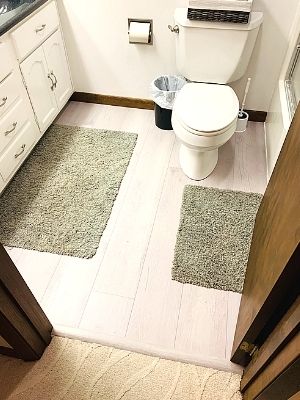
That’s it! Your room is ready for use again. Only this time, it’s 10x prettier with your new laminate floors!
Final Thoughts On Laminate Floor Over Concrete
There you have it!
You now have everything you need to know to install laminate flooring like a pro (and save lots of money!!).
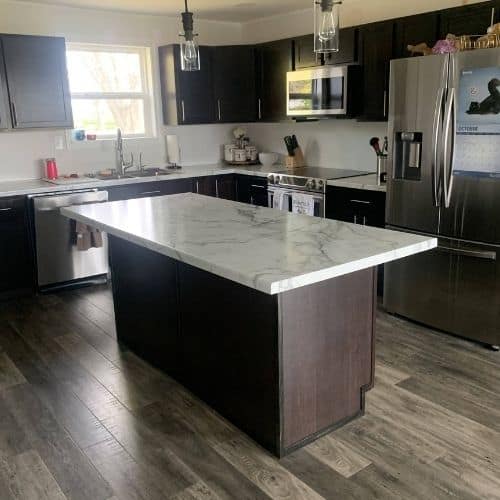
Laminate flooring is a fantastic DIY project that adds a ton of value to your home. Just think about it – wood floors always look more luxurious and expensive than carpet.
If you think that, then others will think that as well. Install laminate plank flooring yourself and reap the benefits if you ever sell your home!
Catch you in my next post!

By Christine
Christine is a blogger and DIYer who tackles home renovation and decorating projects alongside her husband, Adam, for their personal residence and rental properties. Although she successfully tackles large renovation projects to avoid expensive contractor fees and bring her vision to life now, her path to success was not easy.
Go here to read her story, “From a Clueless First-Time Homebuyer To A Confident DIYer Creating Her Dream Home One Project At A Time“.
Popular Posts


DIY With Christine is a participant in the Amazon Services LLC Associates Program, an affiliate advertising program designed to provide a means for sites to earn advertising fees by advertising and linking to Amazon.com.