*My posts may contain affiliate links, which means I may receive a small commission, at no cost to you, if you make a purchase through a link! Thank you for supporting my website!*
Last updated on September 11th, 2024 at 09:18 am
How To Maximize Space In An Entryway Closet For Less Than $80
Are you sick and tired of not having enough storage in your entryway coat closet? I felt the same way… except for the fact that I didn’t have any storage in my entryway coat closet!
Of course, that’s because we completely gutted and remodeled our 1950s Ranch. Now, it’s finally time to makeover the entryway closet!
Now, the traditional entryway coat closet has never made much sense to me. One closet rod and shelf just seem like a bunch of wasted space to me.
So when I started to plan how I wanted to maximize storage space for this extra closet in our house, I knew I wanted more than just one shelf. We need shoe space, storage bin space, and a coat rack.
Also, I wanted to accomplish this project for as little money as possible. Then was born this DIY entryway closet makeover! Follow this detailed tutorial, so you can makeover your own entryway coat closet on a budget!
Let’s dive on in!
Level Of Difficulty
Easy
Time To Complete
3 days – Mostly stain & polyurethane dry-time
Entryway Closet Makeover Materials
- 3 pieces of 1” x 12” x 8’ Standard Pine Boards
- 1 piece of 1″ x 2″ x 8′ Furring Strip
- 1 quart of stain or paint (I chose Ebony from Varathane)
- 1 quart of polyurethane (I chose satin from Varathane)
- 2 foam brushes (for stain/polyurethane)
- 2” drywall screws
- ¾” multi-purpose construction screws #8 (for use with metal and wood)
- 1 closet rod (8 ft)
- 2 closet rod end caps
- 3 shelf and rod brackets
- 1 shelf bracket
Entryway Closet Makeover Tools
- Impact Driver
- Drill (with various drill bits)
- Miter saw (or circular saw)
- Mechanical sander (with 80 grit sandpaper)
- Tape Measure
- Pencil
- Stud finder
- Torpedo level
- 4-foot level
- Hacksaw (or bandsaw or Sawzall)
Entryway Closet Makeover Instructions
- Measure Your Closet Length, Width, & Height
- Plan Your Closet Shelf Dimensions
- Cut & Sand Your Entryway Closet Shelves
- Stain or Paint Your Entryway Closet Shelves
- Apply A Topcoat To Your Entryway Closet Shelves
- Install Your Closet Shelf Brackets
- Put Your Entryway Closet Shelves In Place
- Install Your Closet Rod
- Organize Your Belongings!
Step One: Measure Your Entryway Closet Depth, Width, & Height
The first step to makeover your entryway closet is to measure your closet! Each closet can have different dimensions, so it’s important to get these dimensions upfront. Then you can customize this makeover to fit your own space.
You need just a few measurements:
- Height of your closet (measure from the floor to the ceiling)
- Width of your closet (measure from the left wall to the right wall)
- Depth of your closet (measure from the front wall to the back wall)
Once you have these dimensions, you can move onto the next step.
Step Two: Plan Your Entryway Closet Shelf Dimensions
The next step to makeover your entryway closet is to plan where your closet shelves will be installed.
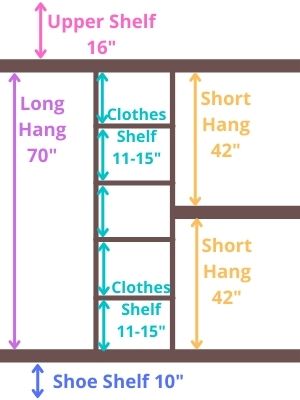
Standard Closet Dimensions
Before you decide where to put shelves and closet rods, there are some standard dimensions you should know:
- Long hang (dresses, long skirts, long coats, pants) – 70 inches tall
- Short hang (shirts, coats, short skirts( – 42 inches tall
- Upper shelf (above top rod) – 16 inches tall
- Shoe shelf – 10 inches tall
- Shelves for clothes/shoes – 11-15 inches deep
- Shelves for bulky storage – 24 inches deep, 20 inches tall
How To Plan Out Your Entryway Closet Dimensions
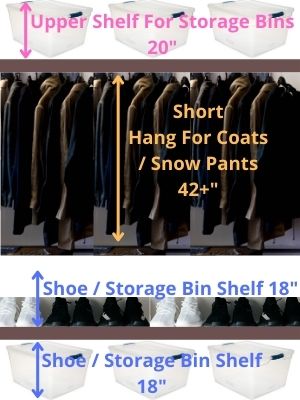
First, I decided which of these features I wanted in my closet. That’s where you should start as well. For this entryway coat closet, I decided I wanted a top shelf for bulky storage, one rod for coats and other out-of-season clothes, and one wide, full-length shelf for shoes/additional bulky storage.
My closet is on the smaller side (only 5 feet wide instead of 8 feet like a standard bedroom closet), so I didn’t have any room for side shelves. (Otherwise, I would have added those for extra storage as well!)
Next, use the standard dimensions above to determine your shelving and rod heights. For the top shelf, I chose 20 inches tall to fit some storage bins up there. I planned to turn my storage bins sideways, so I kept the depth at 11 inches deep instead of 24 inches.
Then I chose to hang the rod from that top shelf using shelf & rod brackets. That gave me plenty of space to hang coats, snow pants, and whatever other out-of-season clothes I desire.
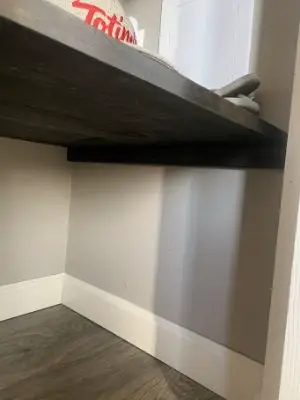
Finally, to incorporate 2 shoe/storage container shelves, I chose an 18-inch tall shelf off the ground that is two 1×12 boards wide (24 inches). I had an access panel in the way, otherwise, I would have made this shelf the full standard 20 inches tall.
By installing the bottom shelf this way, I now have two shelves that are 24 inches deep (if I count the floor as a shelf), with plenty of space for shoes or storage containers.
Also, my coats and snow pants have plenty of room to hang down from the top shelf and rod, and I still have a top shelf for more storage. This configuration is a much better set up than a single rod and shelf set up!
After you have all your dimensions, you can take your pencil and put a small mark on the walls where the bottom of your shelves will go to help you in future steps.
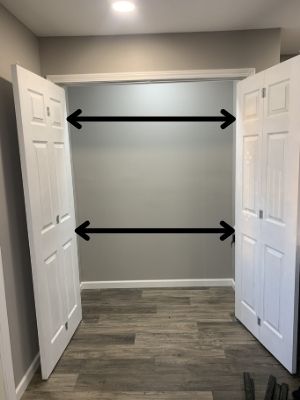
Measure For The Shelves
Once you have your dimensions planned, measure from the left wall to the right wall to get the shelf length (1” x 12” pine board length) you need. Do this for all spots where you want to install shelves.
Also, measure from the front of the closet to the back to get the furring strip measurements for the bottom shelf. Since we are making that shelf deeper than the top one, it needs some extra long supports to incorporate both shelves.
Furring strips are cheap and get the job done! Cut two pieces for the sides and two more pieces that are 6-10 inches. These two extra pieces will help support the center of the second board that’s farther off the wall. We will discuss this later!
Write down all of the measurements and head off to the next step!
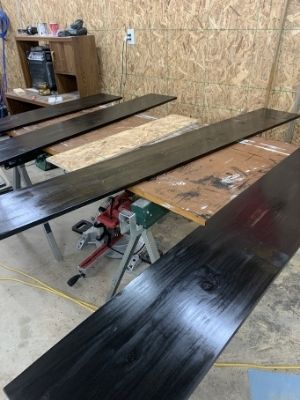
Step Three: Cut & Sand Your Entryway Closet Shelves
The next step to makeover your entryway closet is to cut your 1” x 12” pine boards and furring strip! Break out your miter saw or circular saw and cut all the shelves and the furring strip supports to the lengths you wrote down from the previous step.

After all of the shelves and supports are cut, lightly sand all sides and edges (especially the edges that were cut) to smooth out any rough spots.
Typically, I start sanding using my mechanical sander with 80 or 100 grit sandpaper then work my way to 120 grit then finally 220 grit sandpaper.
Since these are just simple closet shelves that will see some wear and tear, I didn’t work too hard to make these look perfect. I just sanded until the splinters and rough spots went away only using 80 grit sandpaper.
Then I wiped everything down and moved onto the next step. For your entryway closet shelves, it’s completely up to your personal preference on how much time and effort you spend sanding!
Once all of the boards and supports are cut and sanded, you can move onto the next step.
Step Four: Stain or Paint Your Entryway Closet Shelves
The next step to makeover your entryway closet is to stain or paint your closet shelves and the furring strip supports. Personally, I chose to stain all of the shelves and supports because the polyurethane topcoat I added made them more durable than just a coat or two of paint could do.
Although, depending on how often you are planning to pull from your closet shelves, some paints are durable enough to withstand occasional use.
I chose to use Ebony stain from the Varathane FastDry collection because it matched my kitchen cabinet stain. (And also because I had some leftover from my kitchen island upgrade project. Check out that tutorial when you are ready to update the back of your kitchen island with some simple, but elegant trim!)
Just set up some sawhorses with an old door or piece of wood spread across them to make a bench, and lay the closet shelves and supports out for staining.
I recommend using a foam brush found at Amazon and some rubber gloves to keep your hands clean. Oftentimes, I’m lazy and just use a rag and my bare hands to stain, but I always regret it once I’m done because the stain doesn’t just wash off with soap and water.
Usually, I have to break into some mineral spirits to wash it off my hands, which just smells bad and dries my hands out.
Apply Stain Lightly At First
If you aren’t sure about the color you’ve chosen, wipe it onto a scrap piece of wood first. To get a lighter finish, wipe a small amount on and immediately wipe it off with a clean rag.
Trust me, less is more in this situation until you decide you want a darker shade. At that point, if you want a darker color, then apply more and let it sit for a few minutes before wiping it off.
For my shelves and supports, I wanted a rich black, so I slathered the stain on and let it sit for a few minutes before wiping it off.
Start With The Edges
As I stained, I found it easier to stain all edges first, then the bottom of the shelf, then the top. Whatever side was the prettiest (had the least dents, scratches, knots), I called my “top”.
I did it in this order, so the top part that would be seen the most would have the best application of stain.
If the bottom got messed up a little while drying (which it never did), then so be it. For the top shelf, however, you’ll see the bottom more often than the top. So for that shelf, I just faced the prettiest side down.
You could certainly wait until one side is dry before flipping over and staining the other. I, however, did not want to wait that long. And you can’t tell that I stained both sides at the same time. Because of that, I sped the process up a little bit!
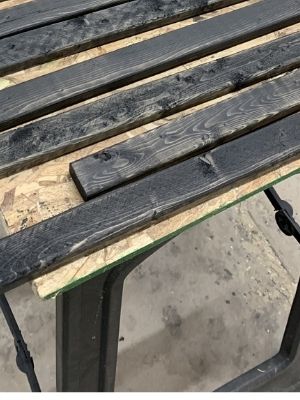
For the furring strips, I didn’t bother staining the back bc that part would be pressed against the wall. I just quickly swiped over the sides and front then moved on.
Once all three boards and all supports are stained, follow the directions on the can for the dry time. If you use the Varathane FastDry stain as I did, then you can move onto the next step in an hour! (Which is exactly why that’s my favorite brand of stain to use. I can be impatient at times!)
Step Five: Apply A Topcoat To Your Entryway Closet Shelves
The next step to makeover your entryway closet is to apply a topcoat to your closet shelves. Waiting for polyurethane to dry is by far the most time-consuming part of this project.
The sooner you can start this process, the better. But first, let’s go over a few mistakes I’ve made in the past that I want you to avoid!
Don’t Shake The Can
Oh wow, I learned this one the hard way. I’m pretty sure it says somewhere on the can to stir the contents instead of shaking them, but I apparently skipped over that section when I was reading the instructions.
Sigh.
Yeah, when you shake the can, little air bubbles form, which will show up all over your beautiful project. The only way to fix this mistake is to sand off all the bumpy polyurethane and start over.
It’s a huge time-waster, so just stir the can! If you already shook the can before reading the instructions as I did, it’s okay. Just let the can sit still for a few hours, and you will be able to use it like normal again.
Use Foam
The second mistake I learned early on was to use a foam brush or roller instead of a traditional paint roller. Whatever wool-like material traditional paint rollers are made out of will leave little fuzzies all over the wood.
Again, the only way to fix this mistake is to let it dry and sand it off later. Foam brushes and rollers don’t leave fuzzies or brush marks through the polyurethane. They help you brush or roll on a beautiful finish.
Avoid “Slathering” It On
Lastly, you want to put enough polyurethane on to create a smooth finish, but you don’t want to slather it on. If you brush on a huge gob of polyurethane and don’t spread it out, you will have large drips within your finish when you come back after four hours.
Again, the fix is more sanding. Now, this mistake should be the least of your worries. Just check a couple of times a few minutes after applying each coat to see if you see any drips. If you do, then just brush them out right now.
Problem solved. I just wanted to give you a heads up because I was surprised at the huge drip marks in my finish when I came back the first time.
Apply Three Coats
Now, the last step you need to take when applying polyurethane is to apply three coats. I know that seems excessive, but that third coat is what finally makes your project the correct sheen you want and the thickness you need to be considered durable.
Since it takes four hours between each coat, I looked for ways to speed this process up. What I decided to do was apply one coat on all sides, then only apply two more coats on the top and one side (the front). (I skipped the second and third coats on the bottom.)
Why did I do this?
Well, I wanted one coat on all sides to seal the wood and keep it from potentially warping overtime (through humidity). But after that, the bottom and three sides touching walls will never be seen/touched. So I wasn’t worried about those spots being extra durable.
The top and front, however, might see some wear and tear, so I took the extra time to apply three coats of polyurethane to them.
If you want to take the time to apply three coats of polyurethane to all sides, then you’re more than welcome to! Just let them dry the required time according to the can before installing them!
As for the furring strips, they won’t really be seen or touched, so I didn’t waste any time polyurethaning them. They are solely for support, and they do the job perfectly just with a swipe of stain!
Once all three boards have a dry topcoat, you can move onto the next step.
Step Six: Install Your Entryway Closet Shelf Brackets
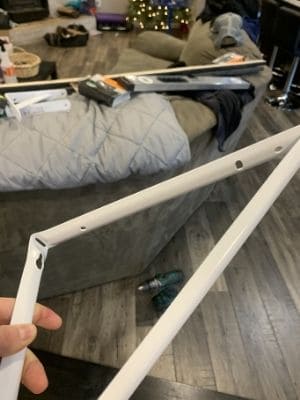
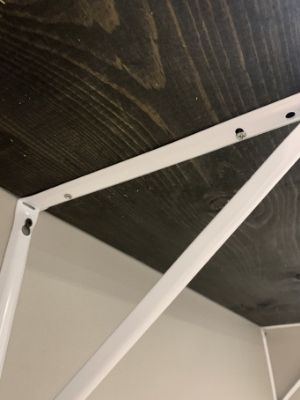
The next step to makeover your entryway closet is to install the shelf brackets & furring strip supports. For this closet design, I used two different types of shelf brackets along with furring strip supports; a shelf and rod bracket and a shelf bracket.
For any shelves that you want to hang a closet rod from, the shelf and rod brackets are perfect to use! They’ll support the shelf and the rod for your coats/clothes.
The regular shelf brackets are perfect for the shoe shelf across the bottom. They are low-profile, so you can easily fit shoes or storage containers under the entire shelf. Plus, they are usually a little cheaper than the shelf and rod brackets, which is awesome!
Break Out Your Stud Finder
To install the shelf brackets, you need to find 3 different studs along the back wall of your entryway closet.
Find a stud in the:
- Far left corner
- Far right corner
- Middle (ish) of the closet
Note: If your entryway closet width is shorter than 4 feet, then you only need two brackets per shelf. (You can skip the middle bracket.)
Once you have all of the studs marked, hold up the first shelf and rod bracket over the stud in the far left corner. Line up the top of the bracket with the mark you made on the wall earlier to signify the bottom of the shelf (for the upper shelf that will hold a rod).
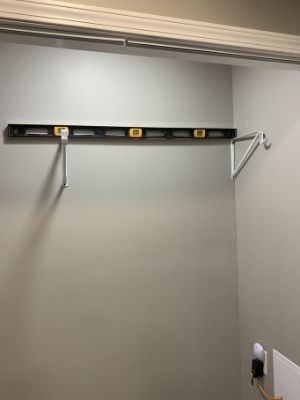
Use your torpedo level to level out that bracket before screwing it into the stud using 2 inch drywall screws.
Next, take another shelf and rod and hold it up over the stud in the middle of the back wall. Again, line up the top of the bracket with the mark signifying the bottom of the shelf.
This is where multiple hands might be helpful; while holding that second bracket, place a 4-foot level across the first bracket and the second bracket, and level out the second bracket before screwing it into the stud.
Lastly, repeat that process again with the third and final shelf and rod bracket, so that it is screwed into the stud on the far right and level with the other two brackets. Ta-da! Your shelf and rod brackets are installed!
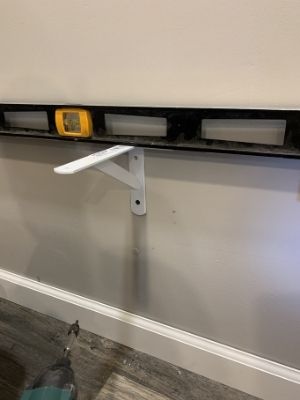
For the bottom shoe/storage bin shelf, you need to install a furring strip first. Line it up with the mark you made on the wall and level it out with your torpedo level. Pre-drill a hole before screwing the furring strip into the stud to prevent it from cracking.
Once the first furring strip support is screwed in, install the center shelf bracket by leveling it with the furring strip before screwing it into the center stud. Lastly, level, drill, and screw in the last furring strip.
Once all brackets and support strips are installed, you can move onto the next step.
Step Seven: Put Your Entryway Closet Shelves In Place
The next step to makeover your entryway closet is to install the closet shelves into the closet. After all of the shelf brackets and supports are installed, you are in the home stretch!
All you need to do is plop your finished shelves on top of the secured brackets and supports, and screw them into place.
To do this, take ¾” #8 metal/wood screws and screw through the holes in the shelf brackets into the bottom of the shelf.
It’s that simple! Two screws per shelf bracket should secure it well.
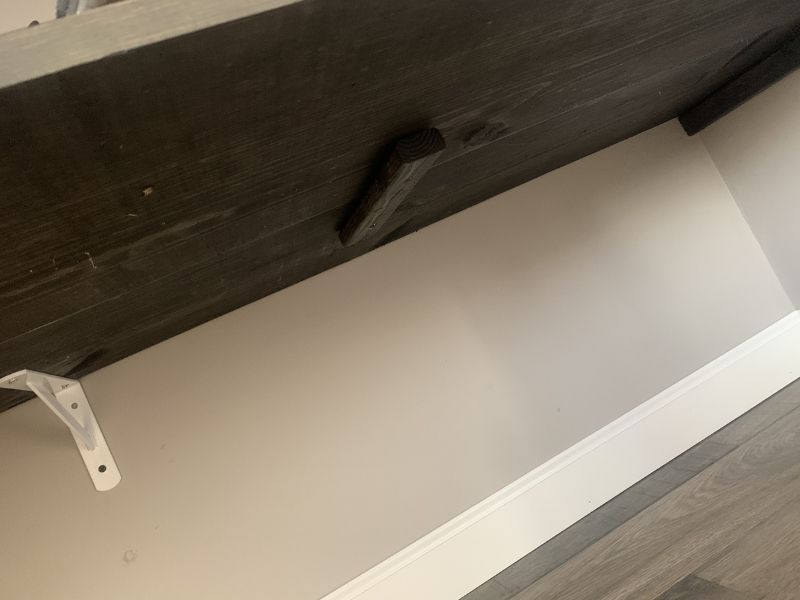
For the bottom shelves sitting on the furring strips, pre-drill and screw through the top of the board into the furring strip supports.
After all of the boards are secured, take the two extra 6-10 inch furring strips and pre-drill and screw them into the bottom of the two lower shelves. Make sure they bridge across the seam so the outside shelf has better support through the middle.
Once all three entryway closet shelves are secured, you can move onto the next step.
Step Eight: Install Your Entryway Closet Rod
The next step to makeover your entryway closet is to install the closet rod. There are only four simple parts to this step:
- Cut the rod to length
- Slide the closet rod caps on each end
- Put the rod in place
- Secure the rod into place using ¾” #8 metal screws
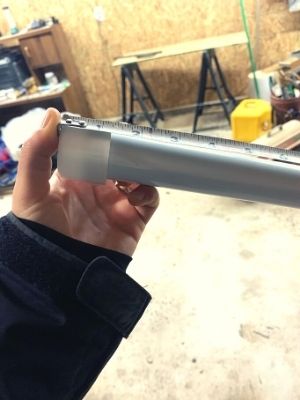
Cut The Rod To Length
First, measure from bracket end to bracket end on the shelf where the rod is going. Then add the length of the closet rod caps to each side before cutting. The goal is to keep the rod caps from interfering with how the rod sits in the shelf and rod brackets.
I know sometimes there isn’t enough room beyond the ends of the brackets to fit the full length of the rod caps. Just leave as much of an overhand as you can past the left and right brackets.
When you secure the rod into the brackets, the caps being in the way won’t be much of a factor anymore.
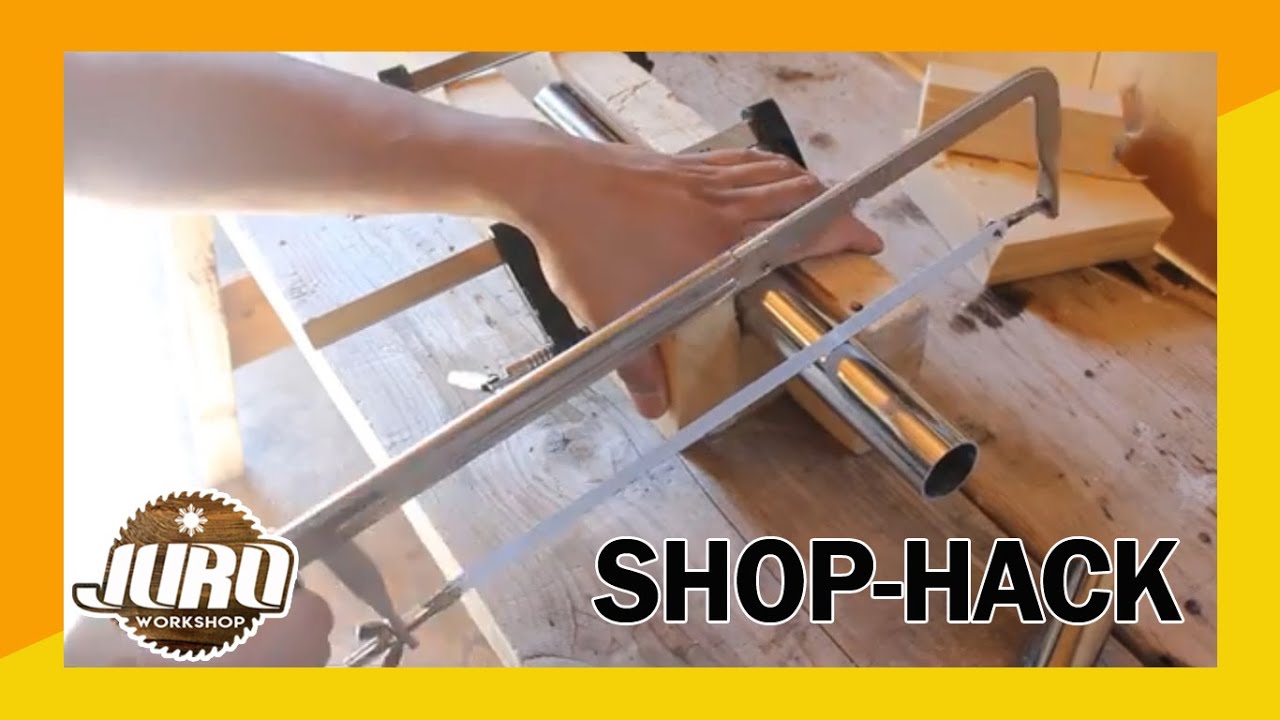
Next, cut the rod to that length using a bandsaw, Sawzall (reciprocating saw), or a hacksaw.
This video does a fantastic job showing you how to cut the rod using a hacksaw. Bandsaws or Sawzalls make the job 1000x easier though!
Slide The Closet Rod Caps On
Second, break out the closet rod caps and slide them on each end. These caps give the rod a clean, finished look, and they hide the rough edge of the cut ends.
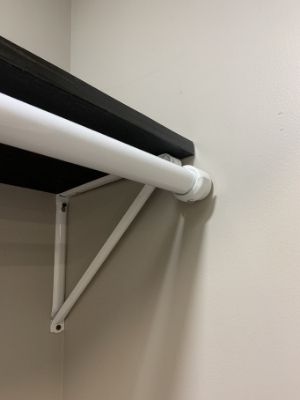
Put The Rod In Place
Third, put the rod in place on the shelf and rod brackets.
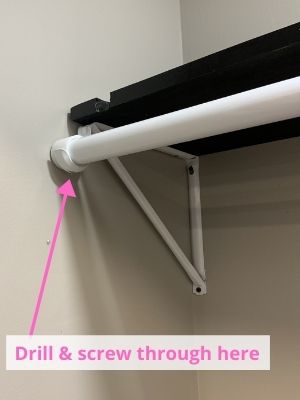
Secure The Rod
Fourth, secure the rod into place using the same ¾” #8 metal screws we used to secure the shelves into place. (However, if your rod is thinner, then you might need shorter screws.)
Just like when you secured the shelves, pre-drill, and screw through the hole in the shelf and rod bracket into the metal rod. That will help keep the rod from sliding around or falling off while you use it!
After your rod is installed, you can move onto the last step!
Step Nine: Organize Your Belongings!
The last step to makeover your entryway closet is to organize your belongings! I love the organization step because I feel like I can finally see my project come to fruition!
How To Organize Your New Entryway Closet
Here are the simple steps I take to organize a new area in my house.
Brainstorm What You Need
First, I like to sit down and list the general type of items I want to store in my closet. Will I need bins? What size? Will I need hangers and how many (rough estimate)?
Are there any other decorative baskets or storage containers that would make my life easier? Do I have any storage bins in my house already that would be more useful here?
Purchase Your Storage Items
Second, l go out and buy them!
Don’t buy things just to buy them though. Be very intentional in this stage and only buy items that will truly serve a purpose in your new space. If you have to do this in a few rounds of ordering, then so be it!
Better to only spend your money on the things you’ll actually use, then several things that just get stuffed in the closet until you forget about it.
For our closet, I had some extra storage containers on hand, so I just used those even though they don’t match.
One day, maybe I will upgrade them to some of the better storage containers I listed above, but for now, these work perfectly!
Purge Your Belongings
Third, I go through all the items I want to put in the new closet, and I throw stuff away! (Or donate if it’s in good shape)
I am a big believer in getting rid of clutter and stuff that isn’t serving a purpose anymore. As we go through life, it’s only natural to gather “stuff”. Most of the time, we don’t purchase things with the intention to let it sit there and collect dust, but it happens.
When that happens, it’s time to get rid of it. Getting rid of this stuff will help you find things quicker in the future, make the organization process easier, and make your mind and your home feel more clean and spacious.
The best way to do this is to pick up every single item and really think about whether you need or use this item. If you haven’t used the item in forever and you don’t occasionally need it (i.e. for holidays or special occasions), then this item is a perfect candidate for the donation or trash pile.
By picking up every item, you’ll be forced to think about its use, and it will make the purging process easier. In addition, doing this with a partner that has no stake in the items (like a friend or random family member that doesn’t live with you), they’ll be able to help you decide whether something should be kept or purged.
Put Your Items In Your Organization Containers & Fill The Closet
Fourth, put the remaining items in your new storage containers, and put them in the closet!
If you’ve never read The Life-Changing Magic of Tidying Up by Marie Kondo, then I highly recommend you go out and get it. Her strategy to declutter completely changed the way I look at my belongings.
I no longer keep things “just in case”. I only keep the things that truly bring me happiness, and I remove the rest from my home. By doing this, I can create a space that feels homey and I truly enjoy.
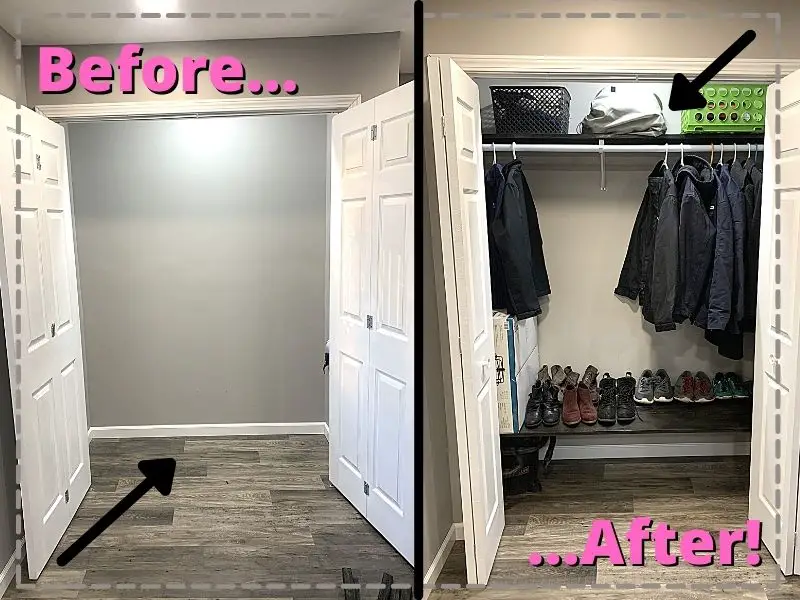
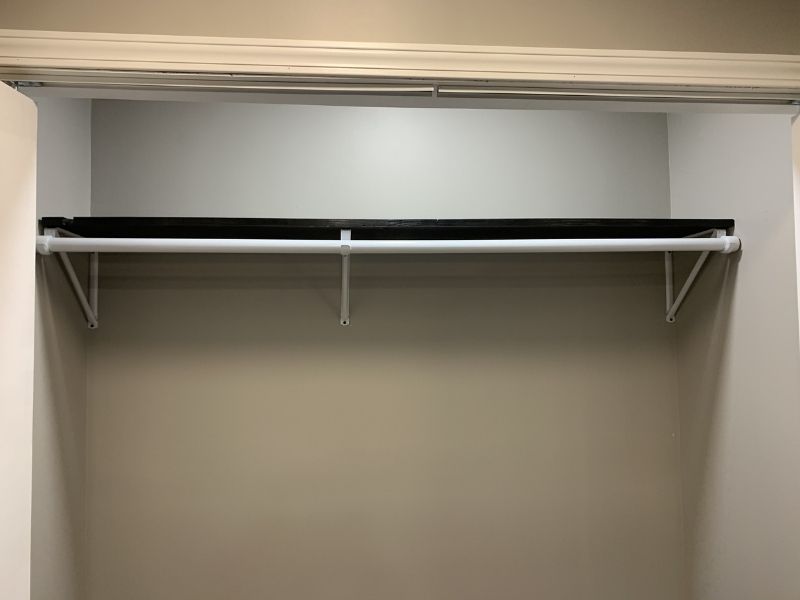
Final Thoughts On Entryway Closet Makeover
There you have it! I love how simple, cheap, and beautiful this entryway closet makeover turned out! Here’s what it looked like when we bought it, after we demo’d it, and now, the final product!
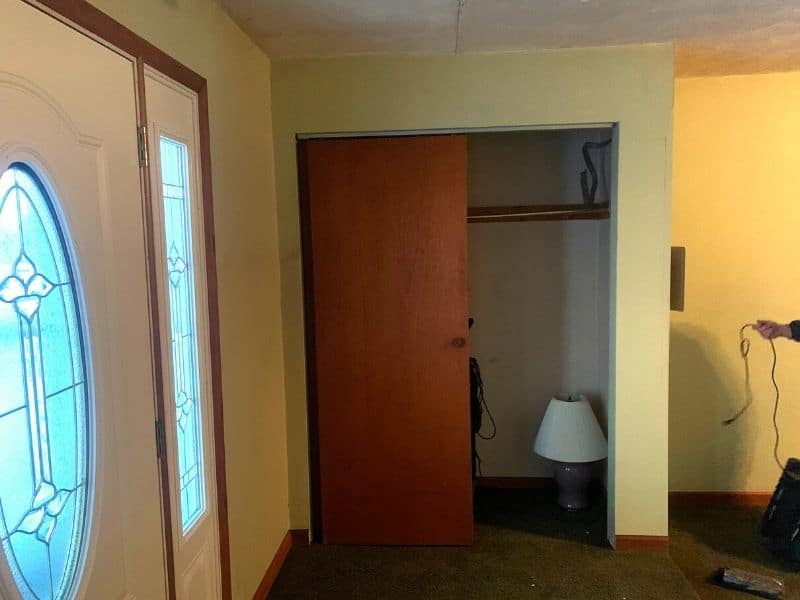

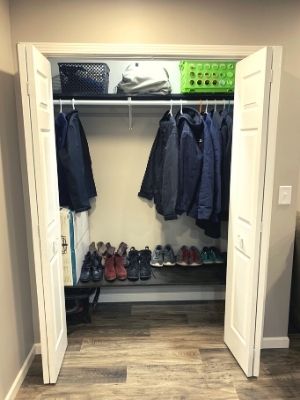
We were able to plan and execute this makeover in a weekend, and it’s made such an impact on our storage space! Finally, I can hang my coat up instead of draping it across the back of the couch haha!
Catch you in my next post!

By Christine
Christine is a blogger and DIYer who tackles home renovation and decorating projects alongside her husband, Adam, for their personal residence and rental properties. Although she successfully tackles large renovation projects to avoid expensive contractor fees and bring her vision to life now, her path to success was not easy.
Go here to read her story, “From a Clueless First-Time Homebuyer To A Confident DIYer Creating Her Dream Home One Project At A Time“.
Popular Posts


DIY With Christine is a participant in the Amazon Services LLC Associates Program, an affiliate advertising program designed to provide a means for sites to earn advertising fees by advertising and linking to Amazon.com.