*My posts may contain affiliate links, which means I may receive a small commission, at no cost to you, if you make a purchase through a link! Thank you for supporting my website!*
Last updated on September 11th, 2024 at 09:30 am
Can You Put A Toilet On Laminate Flooring? Find Out Here!
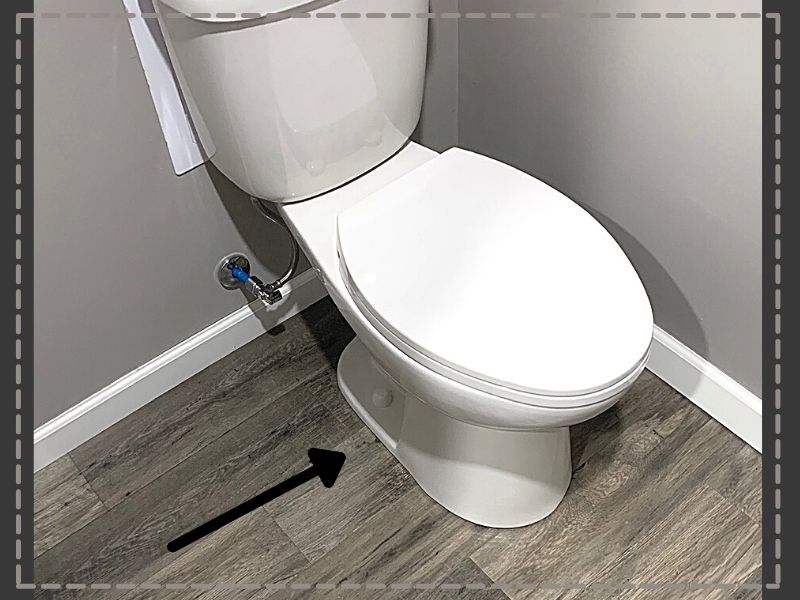
Wondering if you have to remove your toilet to install laminate flooring? Also, aren’t you not supposed to put things on a floating floor? Well, look no further because I’ve got your answer!
To install laminate flooring, the toilet should be removed so that the cut laminate edges can be hidden underneath the toilet. A toilet can be installed on top of the floating floor without worry because the flooring can still expand and contract from the gap against the walls throughout the rest of the room.
Alright, now that we’ve got that out of the way, let’s dive further into the details on how to do this properly!
Let’s dive in!
Quick Navigation: Removing Toilet To Install Laminate Flooring
- Can You Install Laminate Flooring Without Removing The Toilet?
- How To Remove A Toilet To Install Flooring
- How To Cut & Install Laminate Flooring Under A Toilet
- How To Install Laminate Flooring
- Other FAQs About Laminate Flooring In Bathrooms
- Final Thoughts
Can You Install Laminate Flooring Without Removing The Toilet?
Laminate flooring is considered a floating floor. This means that the flooring isn’t glued or stapled into place, it just sits or “floats” on top of the subfloor.
This “floating” aspect of laminate flooring is crucial to prevent damage to the floor.
Laminate flooring needs to be able to expand and contract with humidity and temperature fluctuation, and while people walk on it.
Without the ability to move freely, laminate can buckle, bulge, bubble, and slowly break down over time.
So naturally, you would think that putting a toilet on top of the floating floor would pin it down and cause problems. However, that is not the case.
Why You Can Install A Toilet On Top Of A Floating Floor
A toilet can be placed on top of laminate flooring without the risk of the flooring bulging or buckling because the flooring has space to expand and contract underneath the baseboards and transition strips.
In other words, the floor still has somewhere to move since not all sides are pinned in place.
If you really think about it, this makes sense. It is exactly the same scenario as setting a couch on the laminate flooring in a living room.
You wouldn’t install laminate flooring and then avoid putting a couch on top of it because it’s supposed to float. Nope, you would place your couch on the “floating floor” and not think twice about it.
Again, this is possible because the floor has room to move underneath the baseboards (which is why it’s crucial to make sure a gap exists during the installation process).
In addition, it is a huge benefit to install laminate flooring underneath the toilet. You will save on time and labor because now your cuts and measurements do not have to be exact.
They just have to be hidden beneath the toilet.
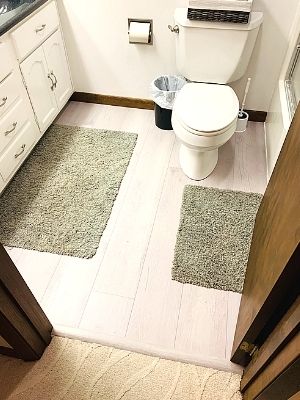
It is recommended to remove the toilet before installing laminate flooring to make the installation process much easier and the final finish look perfect. Now there’s no need for precise cuts or caulking to make the laminate around the toilet look perfect.
Now that we’ve covered that, let’s go over how to remove the toilet before starting the installation process!
How To Remove A Toilet To Install Flooring
If you’ve never removed a toilet before then this part might be a little nerve-wracking to you. (It was to me, at least.) But it really is a simple process.
| Level Of Difficulty | Time To Complete |
|---|---|
| Easy | 5 minutes |
| Material List | Tool List |
|---|---|
| Wax Ring (to replace the old one when you re-install) | Wrench |
| Toilet Flange Extension Kit (when you re-install the toilet if the new flooring is thicker than the old flooring) | Caulk gun |
| Flange Bolt Kit (when you re-install the toilet if the new flooring is thicker than the old flooring) | |
| 100% silicone caulk (to caulk along laminate and subfloor, and around toilet base) |
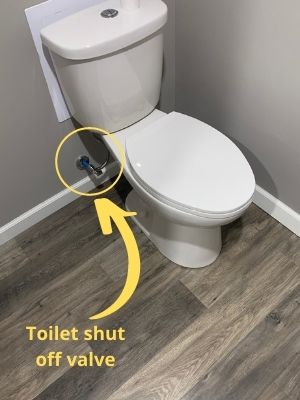
Step One: Turn Off Toilet Valve
First, turn off the water to the toilet. Most of the time, there will be a valve connected to the toilet that lets you shut off just that toilet without affecting the rest of the house.
If your toilet has that, then simply twist that to the off position and you’re done! If not, then you will have to hunt down the main water turn off in your home and shut that off.
Step Two: Drain Water From Toilet
Second, flush the toilet multiple times to drain out as much water as possible. This will make the toilet lighter and you’ll be less likely to make a mess while you move it.
Step Three: Remove Caps & Loosen Flange Bolts
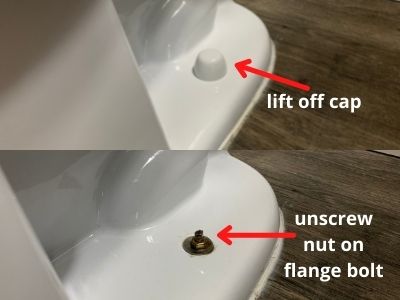
Third, lift off the caps covering the flange bolts on the base and unscrew the bolts with a wrench. These bolts are what’s holding the toilet in place. Unscrew them so you can move the toilet!
Step Four: Lift Toilet And Move
Fourth, lift the toilet off the flange (making sure to keep it leaning forward so water doesn’t spill out the back) and maneuver it into the bathtub.
You are definitely going to want help with this part as some older toilets are heavy! Go ahead and lean the toilet backward so more of the water spills out into the tub.
Step Five: Remove Old Wax Ring & Cover Sewer Hole
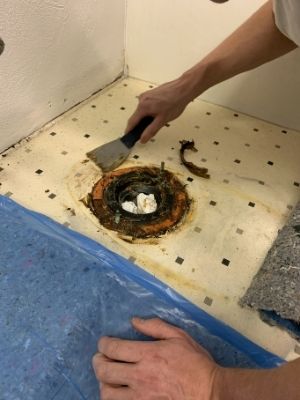
Fifth, scrape off the old wax ring in the flange (the sewer hole) and clean up that area. You need to replace the wax ring every time a toilet is moved or replaced.
Step Six: Raise Toilet Flange & Buy Longer Bolts
Sixth (possibly), if your old flooring isn’t as thick as your new laminate flooring then your toilet won’t be able to touch flange anymore once the new, thicker laminate flooring is installed.
To fix this, you can buy this toilet flange extension kit found at Amazon and longer flange bolts (also at Amazon) to be able to secure the toilet back into place over the new flooring.
These kits are relatively simple and cheap, and they let you build up the flange to the exact height you need without any major renovation.
We used this extension kit on both of our bathrooms and my mom’s guest bathroom, and it worked way better (and was much easier) than we could have hoped for.
If the flange bolts are rusty and crusty, then it’s probably a good idea to replace them anyway, so your toilet installation will last for decades without problems.
How To Cut & Install Laminate Flooring Under A Toilet
Since you’ve removed the toilet, actually installing the laminate flooring around the toilet is quite simple.
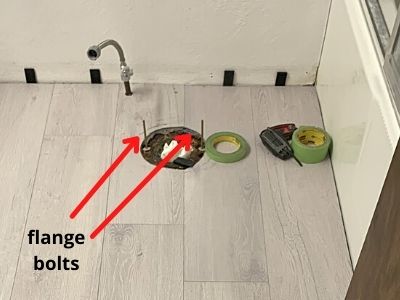
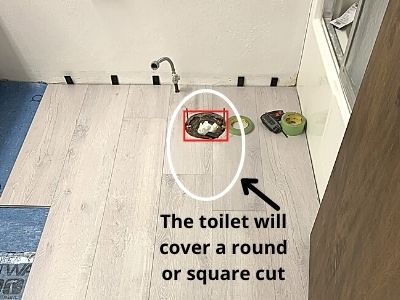
Install all of your pieces up to the toilet flange as normal. Once you have a piece that will run into the flange, measure where the cut needs to be and use a jigsaw to cut the board.
Then continue installing the rest of the pieces as normal.
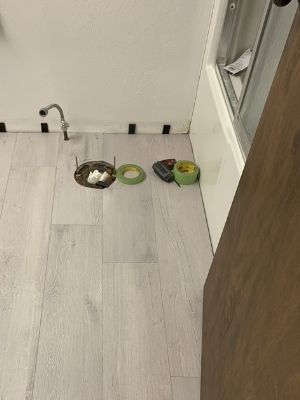
Or if you don’t want to make a rounded cut, you can just cut a square around the flange. As long as the toilet will cover the cut pieces of laminate, it doesn’t matter what shape you cut around the toilet flange.
After all of the flooring is installed and it’s time to re-install the toilet, don’t forget to replace the wax ring.
You will likely have a leaking toilet that can ruin your new laminate flooring if you don’t replace the wax ring every time you pull up a toilet. Just replace it now and don’t worry about it!
How To Install Laminate Flooring
If you’re new to installing laminate flooring and want to see the entire step-by-step process to install it like a professional, check out my article here.
I’ll help you with each step and help you avoid mistakes so the installation process will be as easy as pie!
Other FAQs About Installing Laminate Flooring In A Bathroom
Here are some other frequently asked questions about installing laminate flooring in a bathroom to help you achieve a professional finish!
Does The Toilet Flange Need To Be Flush With The Laminate Floor?
A toilet flange should sit 1/4″ above laminate flooring to ensure a good seal with any wax ring thickness. Use a toilet flange extension kit or a thicker wax ring to help a toilet to seal with a flange that is flush or lower than the floor.
This toilet flange extension kit by Oatey (found at Amazon) will help you get the perfect flange height without any major renovation.
Or this extra thick wax ring found at Amazon can solve your problem as well. Although, many will agree that the thicker wax ring doesn’t last as long as the extension kit does.
So we went with the Oatey extension kit on all three bathrooms we renovated and haven’t had a problem! (They’ve been installed for 2 years and counting with no leaks.)
How Do You Protect Laminate Flooring Around A Toilet?
To protect laminate flooring around a toilet, caulk along the cut edge of the laminate and the subfloor with 100% silicone caulk. Silicone caulk is waterproof and will prevent water from a leaking toilet from going under the laminate flooring.
This 100% silicone caulk found at Amazon will do the trick.
Final thoughts On Laminate Flooring In Bathrooms
There you have it!
Remove the toilet before installing laminate flooring to save time and energy and make the finish look perfect around the toilet.
It’ll make your life way easier and your installation look much better!
Before you go, if you need help calculating the stagger pattern for your laminate flooring, check out my article here.
I’ll walk you through exactly how to calculate the dimensions for your specific room, and I’ll give you our room as an example to help you fully execute.
Catch you in my next post!

By Christine
Christine is a blogger and DIYer who tackles home renovation and decorating projects alongside her husband, Adam, for their personal residence and rental properties. Although she successfully tackles large renovation projects to avoid expensive contractor fees and bring her vision to life now, her path to success was not easy.
Go here to read her story, “From a Clueless First-Time Homebuyer To A Confident DIYer Creating Her Dream Home One Project At A Time“.
Popular Posts
DIY With Christine is a participant in the Amazon Services LLC Associates Program, an affiliate advertising program designed to provide a means for sites to earn advertising fees by advertising and linking to Amazon.com.

