*My posts may contain affiliate links, which means I may receive a small commission, at no cost to you, if you make a purchase through a link! Thank you for supporting my website!*
Last updated on September 11th, 2024 at 09:28 am
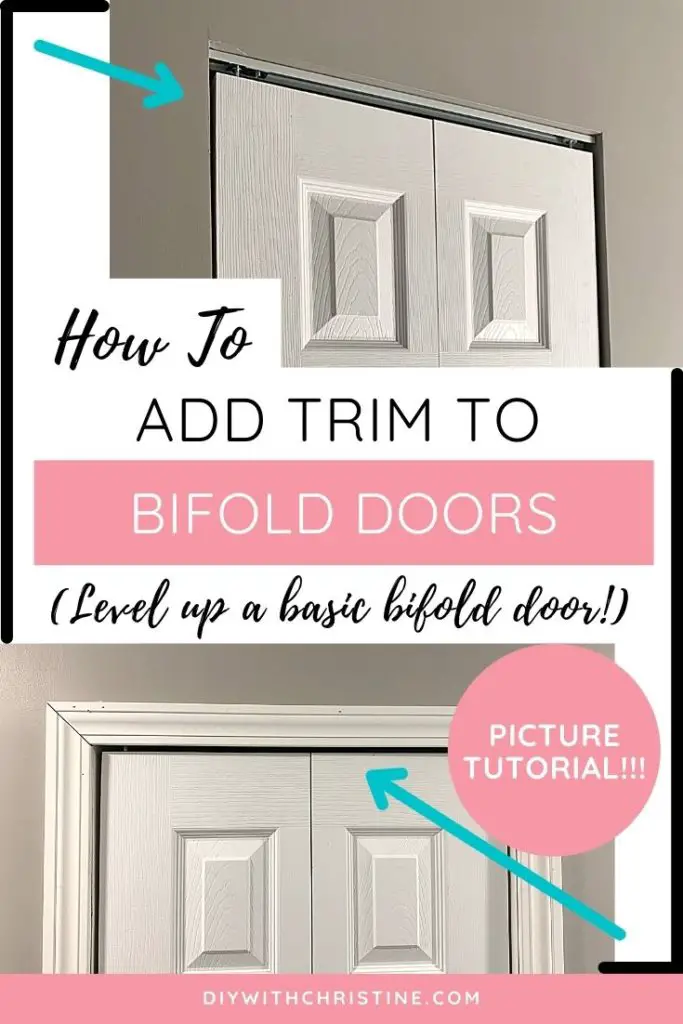
Bifold Door Trim Ideas To Finish Around The Door Opening
Installing bifold doors and wondering how you should finish around them? Well, look no further because I have your answer!
To trim around bifold doors, cut and install 1/4 inch plywood to frame out the inside of the door open before installing the bifold door track. Then install the track and door. Finally, install casing around the opening and slide the top piece of casing down a 1/2 inch to hide the bifold door track and caulk all seams.
Now that we’ve covered the general idea of how to accomplish this task, let’s break down the details further so that you can tackle this DIY project with ease.
Let’s dive in!
Quick Navigation: How To Install Bifold Door Trim
- Measure, Cut, & Install A Thin Panel On The Inside Of The Door Frame
- Measure, Cut, & Install Casing Around The Bifold Door
- Measure, Cut, & Install Baseboards Around The Bifold Door
- Caulk The Seams
- How To Install Baseboards Around Bifold Doors Without Casing
- Other FAQs About Finishing Trim Around Bifold Doors
- Final Thoughts
| Level Of Difficulty | Time To Complete |
|---|---|
| Easy | 1-2 Hours |
| Material List | Tool List |
|---|---|
| 1/4″ x 4′ x 8′ Handi-Panel or plywood | Table saw |
| Door Casing | Miter saw |
| Baseboard | Pneumatic nail gun |
| 1″ brad nails | Caulk gun |
| Painter’s caulk | Contractor Pencil |
| Tape measure |
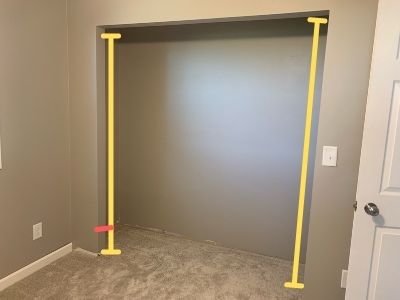
Step One: Measure, Cut, & Install A Thin Panel On The Inside Of The Door Frame
The first step to putting trim around bifold doors is to install a thin piece of paneling on the inside of the door frame.
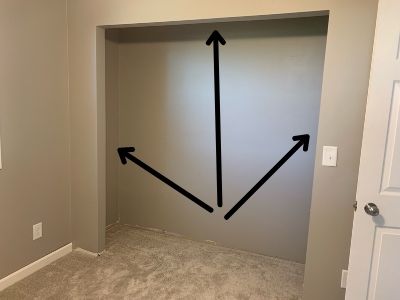
To really level up the look of your bifold doors, I recommend encasing the entire doorframe. It looks more elegant than a plain, drywalled edge looks and it’s more durable over time.
Regardless of whether you are installing bifold doors in a new construction or if you already have drywall installed around the door frame of your closet, you want to install a thin 1/4 inch sheet of wood inside the door frame.
(For example, 1/4″ x 4′ x 8′ Handi-panel or whatever is the cheapest type of wood paneling you can find will work perfectly here.)
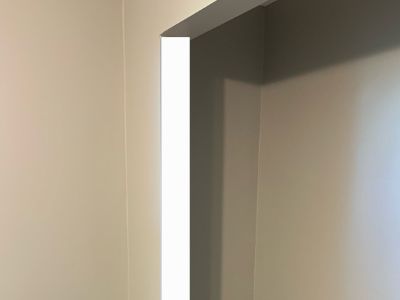
This thin sheet of wood, once ripped to the width of your door frame, will create a faux reveal and make it look like you have a thick piece of wood there.
Also, this material is cheaper and doesn’t cut into the valuable closet door space because it isn’t that thick.
Regardless of the type of material you choose to use, the goal is to rip these pieces down to size using a table saw to fit flush with the door frame.
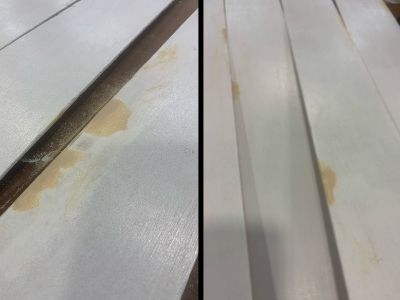
Note: The cheaper wood you use, the more likely it will have imperfections or chip out while cutting. Simply use some wood filler matching the color of your paint, sand, and paint.
As you can see, I didn’t use white wood filler, and I had a horrible time covering up the wood color on the white trim. It was doable, but it took several coats of paint and several hours to get it done.
If you are using a natural wood-colored trim and aren’t painting, find a wood filler that closely matches the color of your trim (or your stain color if you are staining). Otherwise, if you are painting your trim white then use this white wood filler found at Amazon to save some time.
Now, back to the tutorial!
First, take your tape measure and measure the top length and width of the door frame.
Then measure each side length and width of the door frame (and subtract 1/4″ to account for the width of the top piece of paneling once it’s installed.
Then take those measurements and mark and cut each piece out of the handi-panel using your table saw.
After all 3 pieces are cut, take your top piece and secure it to the door frame using a pneumatic nail gun and 1-inch brad nails.
Then take each side piece and nail them to the door frame using the nail gun as well.
Once all of the pieces of paneling are installed, you can move on to the next step.
Step Two: Measure, Cut, & Install Casing Around The Bifold Door
The next step to putting trim around bifold doors is to install casing around the bifold door.
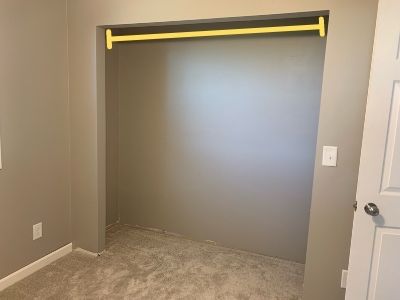
Bifold doors look nice, but their rails don’t look as nice when they’re showing. Luckily, there are two simple ways you can hide this track while putting trim around your bifold doors.
How To Easily Hide The Bifold Door Track
There are two ways to hide the rail on a bifold door track:
- Cheat The Casing Down
- Install Cove Moulding
One: Cheat The Casing Down
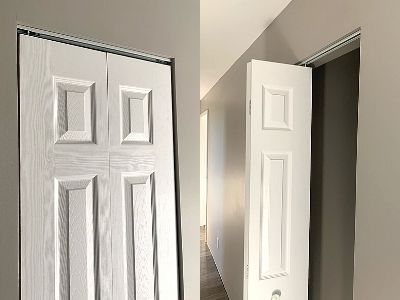
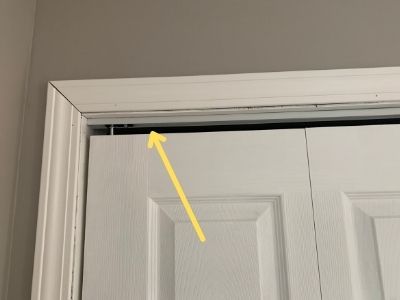
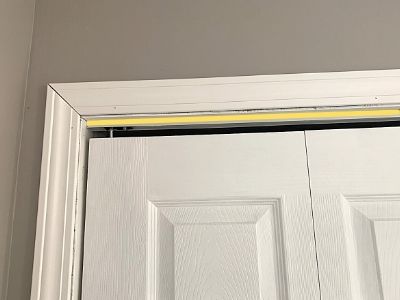
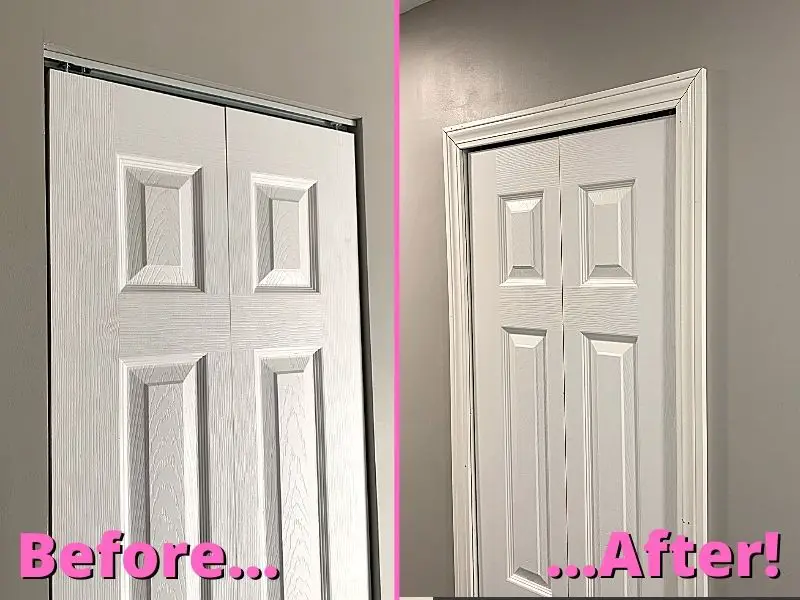
If you want to hide the bifold door track as cheaply and easily as possible, then you should just slide the top casing down until the track is hidden and nail it in place there.
This is what it looks like with the casing installed above the track and what it looks like when the casing is slid down to hide the track.
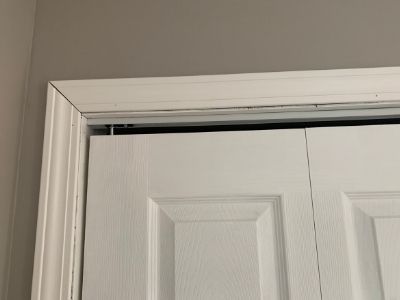
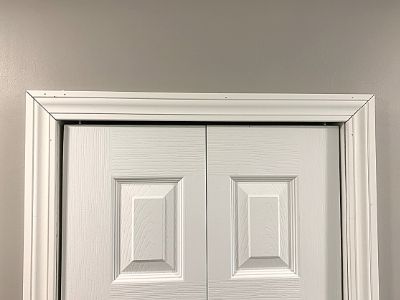
Looks better, right? And it’s simple enough.
Just make your side pieces of casing shorter so that they can line up properly with the new, lower top piece of casing.
Here’s what it looks like from underneath/the backside.
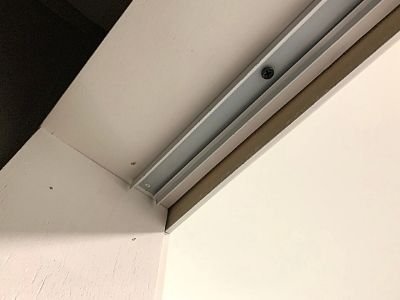
If you do this on a standard closet, then you will never notice it.
Two: Install Cove Moulding
The above method of hiding the bifold door track is a great way to install a new casing around a bifold door without spending any additional money on moulding.
However, if your casing is already installed and you don’t want to remove it and slide it down, you can simply buy some cove moulding.
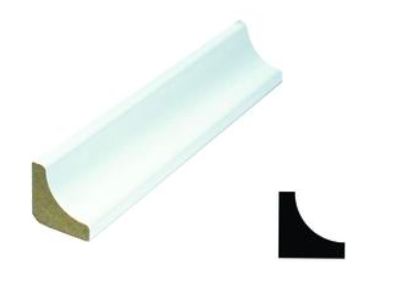
Cove molding is also referred to as inside corner molding.
If you cut and nail a piece of cove molding right where the track and bifold door casing meet, the track will be hidden with a pretty, decorative piece.
Use your pneumatic nail gun and 1-inch brad nails to secure the casing and cove moulding into place around the bifold doors.
Once you have all of your casing installed around your bifold door, it’s time to move on to the next step.
Step Three: Measure, Cut, & Install Baseboards Around The Bifold Door
The next step to putting trim around bifold doors is to install the baseboards.
On the outside of the bifold doors, installing baseboards is simple.
Simply measure the length you need and make a straight cut so the baseboard sits flush against the outside of the bifold door casing.
If you want to have the inside of your closet cased as well, then the baseboard installation on the inside is just as simple.
However, if you do not want to spend the extra money to case the inside of a closet that will never be seen, you should install the baseboard slightly differently.
Check out my article on how to easily install baseboards in closets that aren’t cased on the inside.
| When You Should Case The Inside Of A Closet | When You Should Not Case The Inside Of A Closet |
|---|---|
| Walk-in closets | Standard closets |
| Walk-in pantries | Standard pantries |
| Any time you can walk into the closet and clearly see the backside of the door | Any time you cannot walk into the closet and see the backside of the door |
Once all of the baseboards are installed on the inside and outside of the closet, it’s time to move on to the final step.
Step Four: Caulk The Seams
The final step to putting trim around bifold doors is to caulk the seams of the casing.
This step is completely personal preference, but it will help hide any imperfections in your doorframe trim, casing, or baseboard.
If you have white trim, then use paintable caulk and a caulk gun and run a bead over the seams of the paneling and the door casing to hide any gaps or unevenness.
(If you go with the cheaper paneling as we did, then the caulking step will be more important because the imperfections are more obvious.)
If your walls have a slight wave to them that creates a tiny gap between the casing or baseboard and the wall, then fill those gaps with caulk as well.
And finally, if you mitered the corners of the door casing and the miters aren’t perfect, then you should try my simple trick to make them look perfect. Check out that article here.
That trick uses white wood filler, but you can also fill those gaps in with the caulk you’ve been using as well.
That’s it! Your bifold door should look like an upgrade for a small amount of money.
How To Install Baseboards Around Bifold Doors Without Casing
If you’re looking to install baseboards around bifold doors without installing the casing then follow these steps:
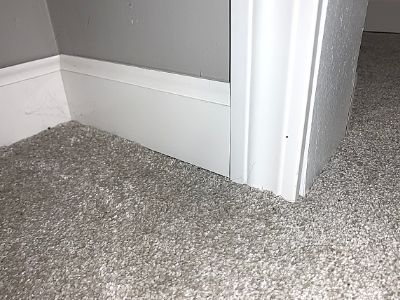
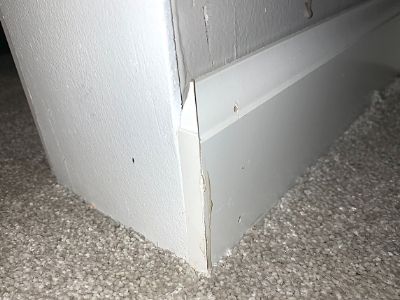
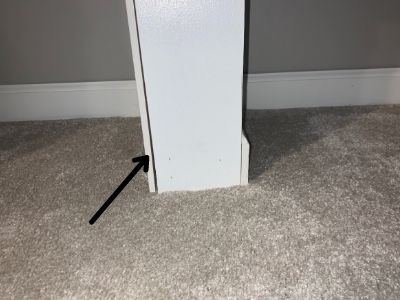
- Wrap the baseboard around the corner with an outside 45-degree cut
- Finish the end of the baseboard with a 45-degree angle cut backward and a finished piece glued together
- Make sure the door can still easily open and close without hitting this piece
Other FAQs About Finishing Trim Around Bifold Doors
Here are some other frequently asked questions about finishing around bifold doors to help you finish your closet like a pro.
How Do You Hide The Bifold Door Track?
To hide the bifold door track, you can either cheat the top piece of door casing down until it hides the track or you can install cove moulding (inside corner moulding) where the track and door frame meet to cover the track with a decorative piece of trim. Both options make the bifold door look more finished.
Click here to jump to the section of the article that describes how to accomplish this in more detail.
Do You Install Casing Around A Bifold Door?
You can install casing around bifold doors to make the door appear more finished and to add durability to the doorframe. To case a bifold door, install a thin panel inside the doorframe, then install casing overlapping the thin panel, and caulk along the seams.
Should Bifold Doors Have Trim?
Bifold doors can be finished with trim or drywall. Bifold doorframes that are finished with trim appear more high-end because of the clean edges and craftmanship that trim showcases around any door. Plus, bifold doors that have trim are more durable than doors with finished drywall around the frame only.
Final Thoughts On Hiding The Bifold Door Track
There you have it!
Installing trim on a bifold door and hiding the bifold door track is an easy and cheap way to make plain bifold doors appear more elegant and high-end.
Take these few extra steps to finish your bifold doors. You won’t regret it!
Catch you in my next post!

By Christine
Christine is a blogger and DIYer who tackles home renovation and decorating projects alongside her husband, Adam, for their personal residence and rental properties. Although she successfully tackles large renovation projects to avoid expensive contractor fees and bring her vision to life now, her path to success was not easy.
Go here to read her story, “From a Clueless First-Time Homebuyer To A Confident DIYer Creating Her Dream Home One Project At A Time“.
Popular Posts


DIY With Christine is a participant in the Amazon Services LLC Associates Program, an affiliate advertising program designed to provide a means for sites to earn advertising fees by advertising and linking to Amazon.com.