*My posts may contain affiliate links, which means I may receive a small commission, at no cost to you, if you make a purchase through a link! Thank you for supporting my website!*
Last updated on February 28th, 2024 at 04:27 pm
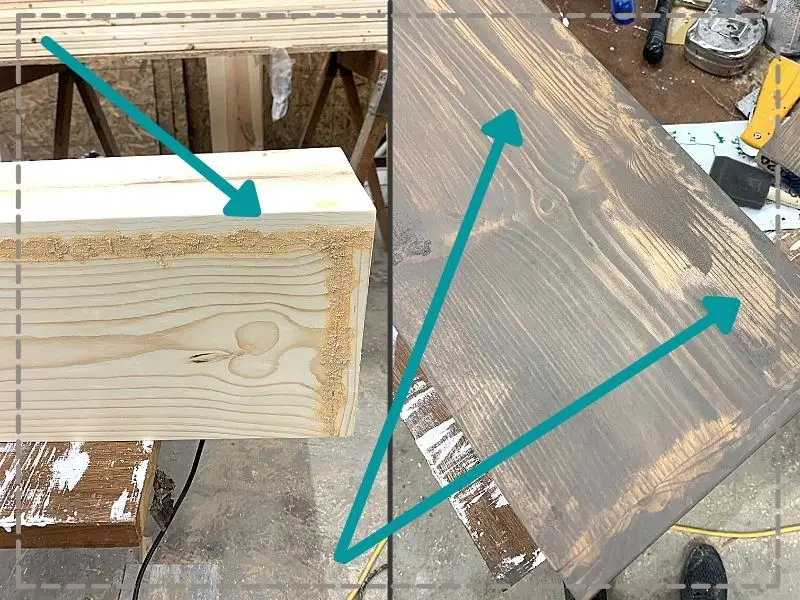
Did you stain over store-bought wood filler, and now you’re seeing blotchy results? I feel your pain… but no worries because I have the solution to fix your project!
To fix stained wood filler giving blotchy results, the stain and wood filler must be sanded off completely using 100 grit sandpaper, wiped down, and restained. For staining, it is better to mix sawdust from the existing wood project with wood glue to make a wood filler that matches the wood project exactly.
Unfortunately, I made this mistake and had to learn how to fix it the hard way. Below you’ll find exactly what I did to save my beautiful wood mantel and make it look like it never happened in the first place!
Let’s dive in!
Quick Navigation: Wood filler Showing Through Stain
- What Does Stain Look Like Over Wood Filler?
- How To Fix Stained Wood Filler Giving Blotchy Results
- How To Make Wood Filler Look Like Wood
- Other FAQs About Wood Filler Showing Through Stain
- Final Thoughts
| Level Of Difficulty | Time To Complete |
|---|---|
| Easy | 15 Minutes |
| Material List | Tool List |
|---|---|
| 100 grit sandpaper | Belt sander (better for flat projects that need a lot of material taken off) or mechanical sander |
| Multiple clean rags |
What Does Stain Look Like Over Wood Filler?
For those of you who haven’t made the wood filler mistake, but are curious how stainable “stainable” store-bought wood filler really is, let me show you what happened to my project.
I’m sure you’ve seen around the internet, as I have, to use wood filler whenever you have a tiny gap or tiny nail hole to fill in a wood build or wood furniture. Heck, even the wood filler itself says stainable and paintable, so it makes sense to use it while staining.
Don’t get me wrong, I’ve used wood filler before. It kinda feels like wet, sticky sawdust in my opinion. When I used it last, I used it to fill the holes in cabinet drawers, so I could put a pull handle on instead of a knob handle.
I was amazed at how nicely the wood filler covered the old holes and made the cabinet drawer look new again! However, I did PAINT during that project, not stain.
(For these two particular projects, the store-bought wood filler I used was this Minwax stainable wood filler. It is excellent for painted projects, but not so much for stained projects.)
Well surprise, surprise.
I used the same stuff on our wood mantel to cover the tiny gaps and the holes from the brad nails. Then I sanded the entire mantel cover down and stained it. LOW AND BEHOLD, “stainable” wood filler does stain, but not the same color as the rest of your wood!!!
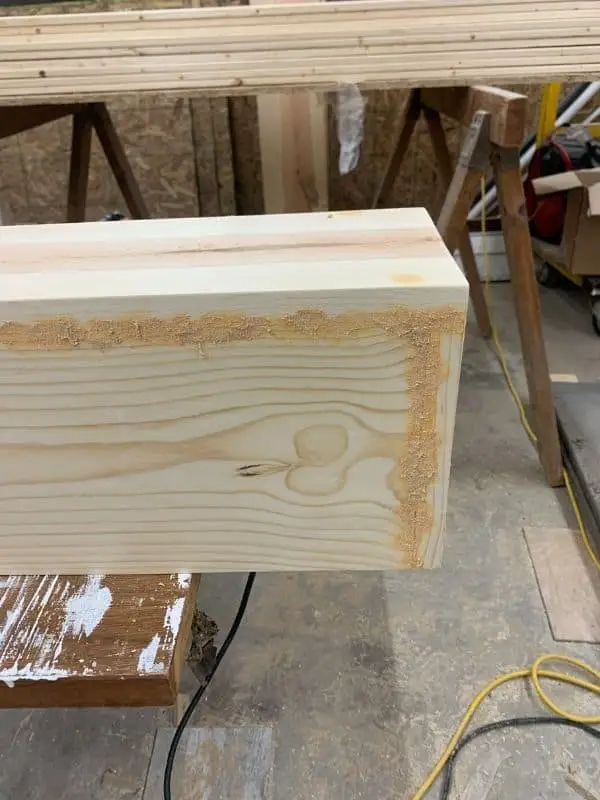
Since I’ve worked with this product before, I didn’t hold back on the amount I put on my latest project.
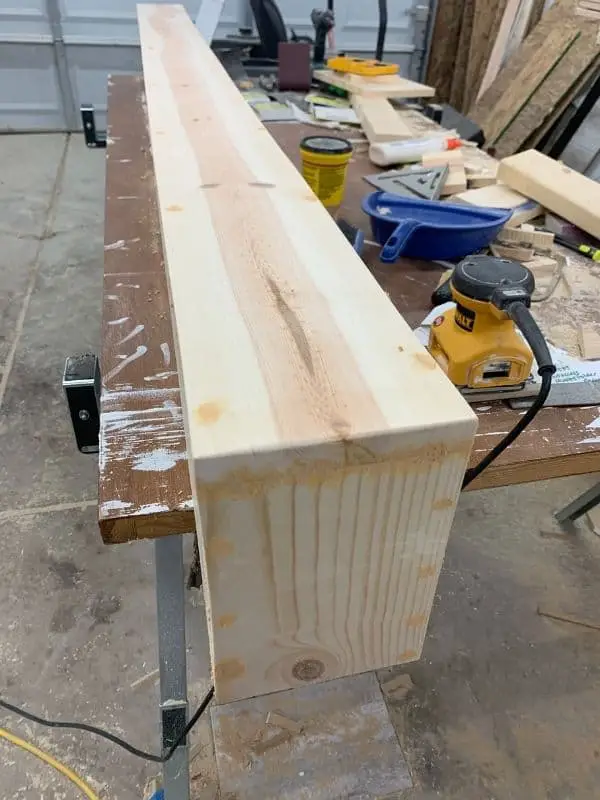
Then I sanded it all down until it was smooth and wiped my custom stain mix over my gorgeous pine mantel. (P.S. If you’re loving this stain color and much as I do and want the recipe, you can find it in my article here.
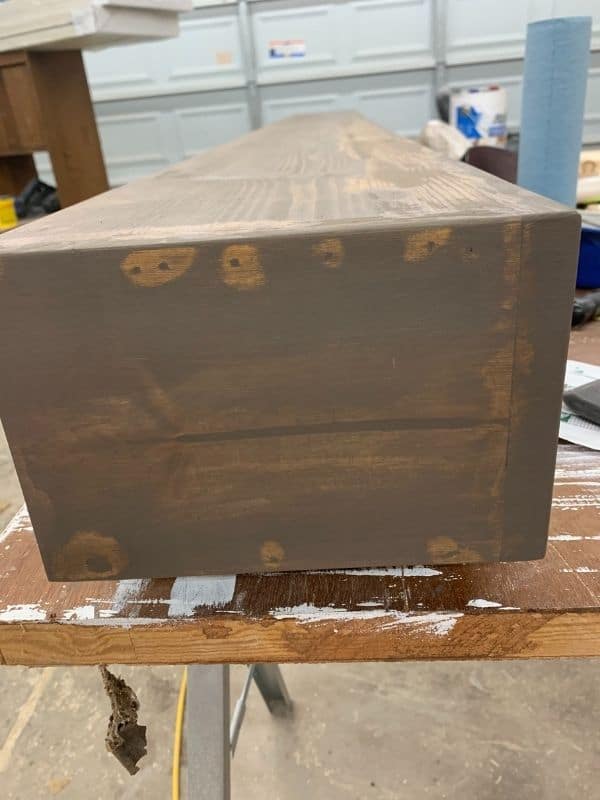
As you can see in these pictures, there was still wood filler residue that I didn’t sand off completely from the surface.
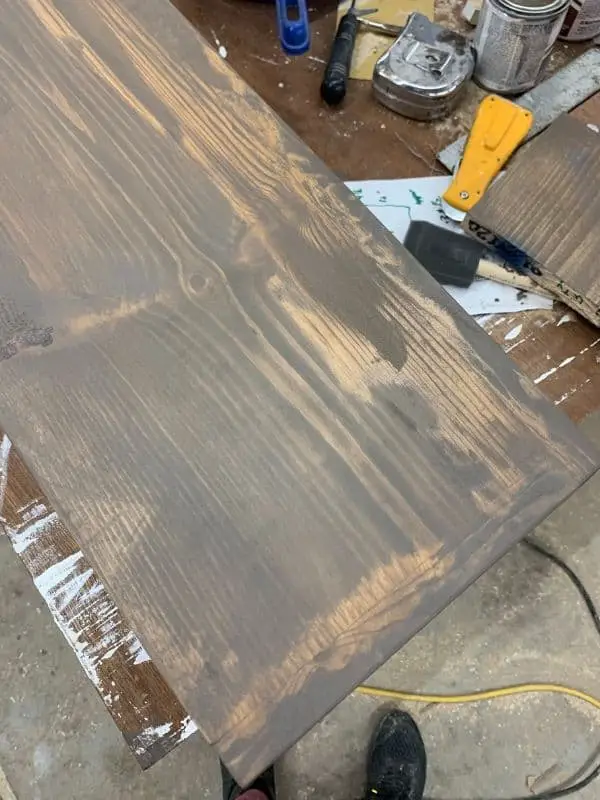
Needless to say, I was devastated because, at the time, I thought my only option was to start over and rebuild the mantel completely with new wood.
Luckily, I was able to save it using the steps below.
How To Fix Stained Wood Filler Giving Splotchy Results
Now that we’ve seen how that disaster turns out, let’s go over how you can fix it and save your beautiful wood build.
The only way to save a wood project that’s succumbed to this fate is to sand all of the stain and all of the wood filler off of the surface completely.
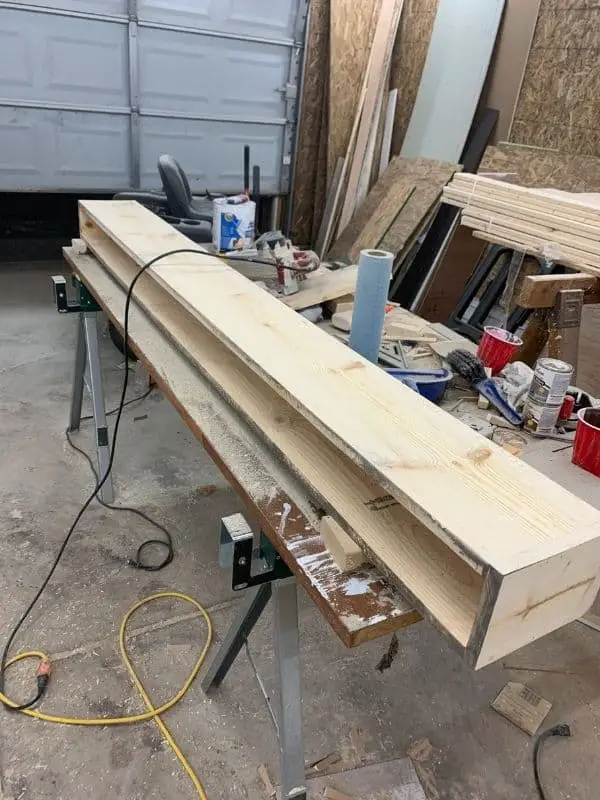
To do this, I waited until the stain dried then took my belt sander and 100 grit sandpaper to take it all off.
For a project like this where there are large, flat areas and where you need to take a decent amount of material off, a belt sander is much more effective than a mechanical sander.
My Dewalt mechanical sander would have taken me hours to get this much stain and wood filler off, but the belt sander cut it down to only 15 minutes or so.
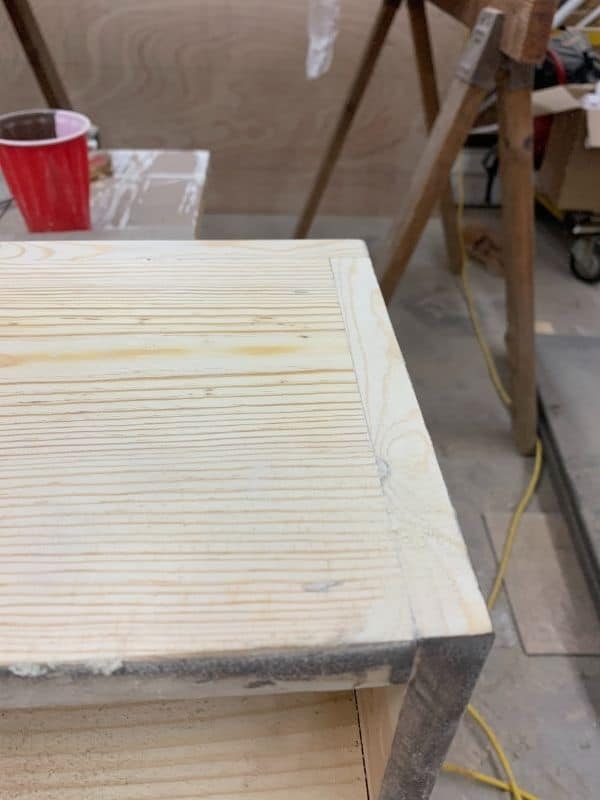
As you can see, I sanded the wood filler off completely this time. Yes, it is still in the tiny gaps and cracks that I wanted it to fill, but now, there is not even the tiniest bit of residue on the top to make the stain appear blotchy.
After the wood filler is removed, wipe down the entire project with a clean rag and restain.
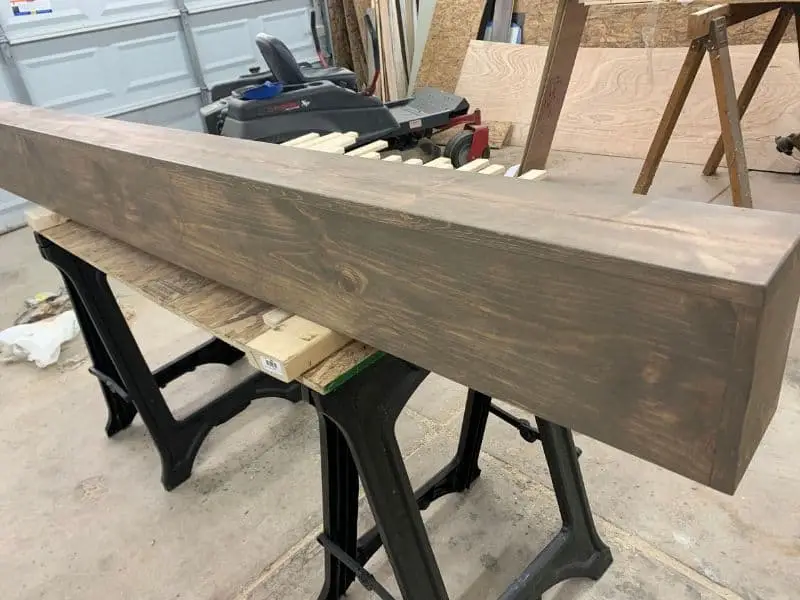

As heartbreaking as it was to have to sand and restain, I can honestly say it would have been worse to have to construct the entire mantel again from fresh wood. And I sanded better this time, so I guess it wasn’t a disaster after all.
Luckily, you can avoid this mistake in the future by using one of the techniques below!
How To Make Wood Filler Look Like Wood
There are a few options you have to avoid this problem:
- Make your own wood filler using clean sawdust from your current wood project and wood glue (this is the best for staining)
- Don’t use wood filler at all (I know you’re saying “Duh, Christine!” to this one)
- Use store-bought stainable wood filler sparingly then sand the entire board down, so the wood filler is gone everywhere besides directly in the crack or the hole (this is what I did)
If you’re at all in doubt, test it on a scrap piece of wood. It’s better to wait a day to stain and know it’s going to turn out great than to stain the whole project and find out the next day you have to sand it all off and start over!
Other FAQs About Wood Filler Showing Through Stain
Here are some other frequently asked questions about staining wood filler that might help you on your journey!
Can You Stain Over Wood Filler?
Wood filler is stainable, but it does not accept stain to the same degree as the rest of the wood project likely will due to the age, porosity, and/or moisture content of the surrounding wood. To avoid wood filler making wood appear splotchy, use wood filler sparingly and remove as much excess wood filler off the top layer of the wood project as possible before staining.
Can You Sand Wood Filler?
Wood filler is supposed to be sanded. Use wood filler to fill gaps, nail holes, or cracks in the wood. Apply excess wood filler so that when you sand, the wood filler sands down to be flush with the rest of the wood project and you achieve a perfectly smooth finish.
How Do You Remove Excess Wood Filler?
To remove the excess wood filler, use 120 grit sandpaper and a mechanical sander. Sand until all wood filler residue is removed from the top of the wood project and the surface feels smooth while running your full hand over it.
Final thoughts On Fixing Stained Wood Filler With Blotchy Results
There you have it! While this wood filler mistake was a small setback, I learned a lot, and will definitely be able to avoid this problem again in the future.
Hopefully, some of the tips I’ve shared will help you salvage your wood project and help you become a better woodworker along the way!


By Christine
Christine is a blogger and DIYer who tackles home renovation and decorating projects alongside her husband, Adam, for their personal residence and rental properties. Although she successfully tackles large renovation projects to avoid expensive contractor fees and bring her vision to life now, her path to success was not easy.
Go here to read her story, “From a Clueless First-Time Homebuyer To A Confident DIYer Creating Her Dream Home One Project At A Time“.
Popular Posts
DIY With Christine is a participant in the Amazon Services LLC Associates Program, an affiliate advertising program designed to provide a means for sites to earn advertising fees by advertising and linking to Amazon.com.

