*My posts may contain affiliate links, which means I may receive a small commission, at no cost to you, if you make a purchase through a link! Thank you for supporting my website!*
Last updated on September 18th, 2024 at 12:20 pm
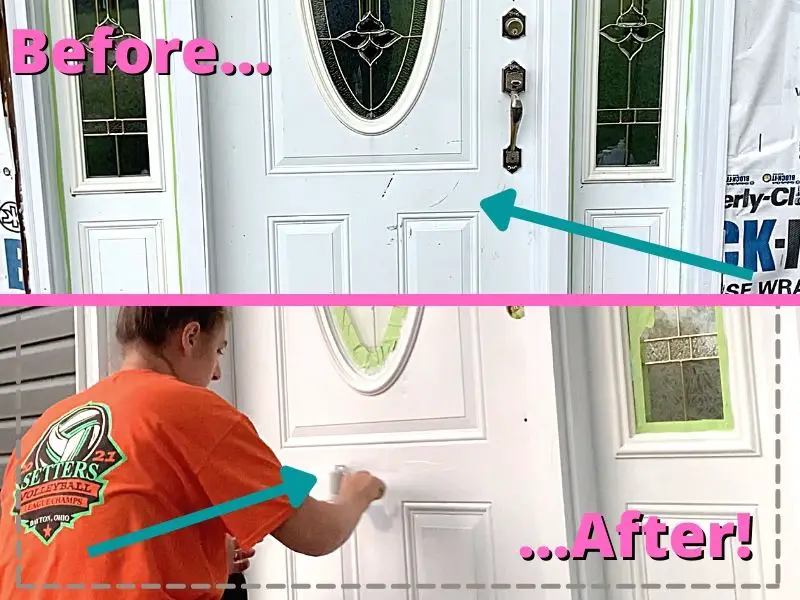
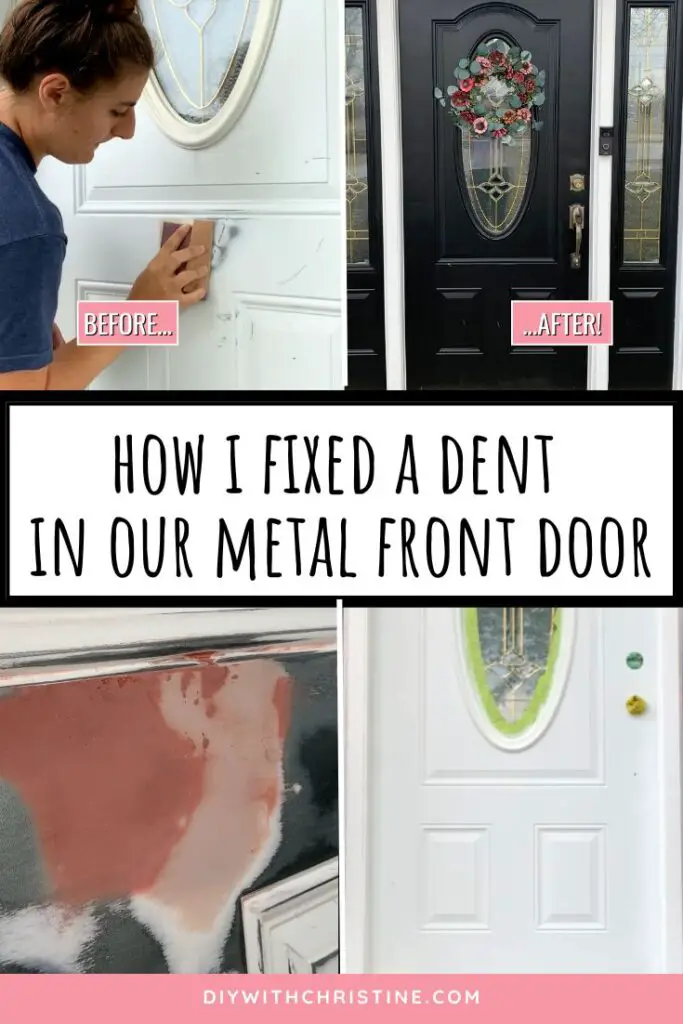
Wondering if you can repair a dent in a metal door? Well, look no further because I have your answer!
Bondo is an excellent way to repair a dented metal or wood door. The body filler and red cream hardener mixed together quickly fill any-sized dents in a door and are easy to sand and blend in with the rest of the door. The glazing and spot putty easily fills tiny scratches to make a dented door look brand new.
Now that we’ve got that covered, let’s dive into how you can fix your metal door with ease using the Bondo Dent Repair Kit.
Let’s dive in!
Quick Navigation: Fix Dents in Your Metal Door with Bondo in 6 Easy Steps
- Clean, Sand, & Mix Bondo Body Filler With Red Cream Hardener
- Spread The Mixed Bondo Filler Across The Dent
- Sand The Dried Bondo Filler Mixture
- Spread The Bondo Glazing & Spot Putty Over Any Remaining Imperfections
- Sand The Dried Glazing & Spot Putty
- Prime & Paint The Door
- Common Mistakes To Avoid While Using The Bondo Dent Repair Kit
- FAQ’s About Repairing A Dent In A Metal Door
- Final Thoughts
| Level Of Difficulty | Time To Complete |
|---|---|
| Medium | 2-3 Days |
How I Fixed A Dent In Our Metal Front Door – Video Tutorial

See the full tutorial on my YouTube Channel – DIY With Christine!
Why Use The Bondo Dent Repair Kit To Fix A Dent In A Steel Door?
This Bondo Dent Repair Kit found at Amazon makes repairing dents and scratches in metal extremely easy.
The kit comes with all of the required tools and materials needed to successfully repair dents like a professional.
In addition, the kit comes with Exact Mixture pouches, so there’s no messing up how much harder to mix into the filler.
(Speaking from experience, this is the hardest part about using Bondo in my opinion. When I repaired our door, I tried to mix my own amounts and epically failed more than once until I dialed in the correct mixture and was able to finish repairing our front door.)
Using this kit will save you tons of time and money while repairing and painting a steel door.
Now, let’s go over how to use this repair kit!
Step One: Clean, Sand, & Mix Bondo Body Filler With Red Cream Hardener
The first step to repairing a metal door with Bondo is to clean, sand, and mix the body filler and red cream hardener.
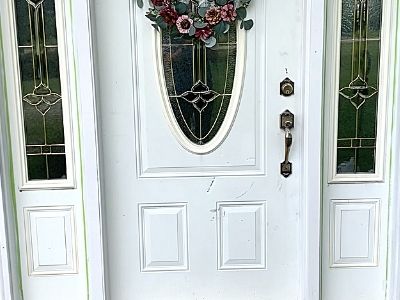
First, you need to properly prep the surface. Clean the area around the dent thoroughly with soap, water, and a clean microfiber rag.

After the door has dried, use the 80 grit sandpaper that comes in the kit and fully sand the entire dent and surrounding area until all that is left is bare metal.
After the area is sanded, wipe down the area again with a clean, damp microfiber rag to remove any dust particles on the door.
Now, it is time to start using the Bondo filler. This kit makes it super easy for you to mix the correct amounts.
On your clean, flat mixing surface (such as a drywall hawk or equivalent), squeeze out the entire packet of the Exact Mixture body filler.
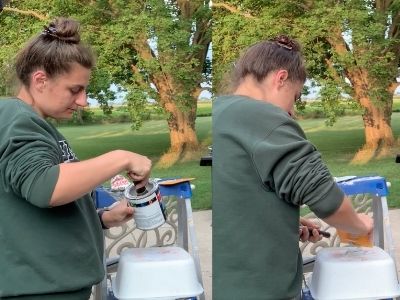
Then, also squeeze out the entire packet of Red Cream Hardener onto the mixing surface next to the body filler.
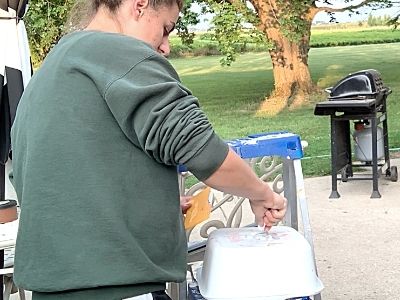
Use the plastic, yellow spreader tool/putty knife that comes with the kit and quickly mix the two creams together using a chopping and squishing/pulling motion.
The key thing to remember with Bondo is that it only has a working time of 3-5 minutes. That is plenty of time to cover the dent, but not so much time that you can spend forever trying to mix the creams together.
Once you have the mixture a consistent pink color on your mixing surface, it’s time to move on to the next step.
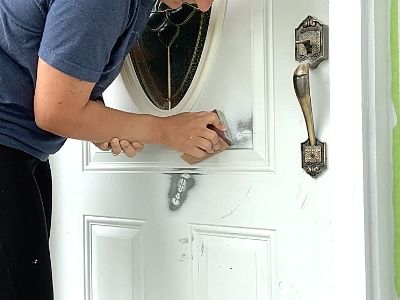
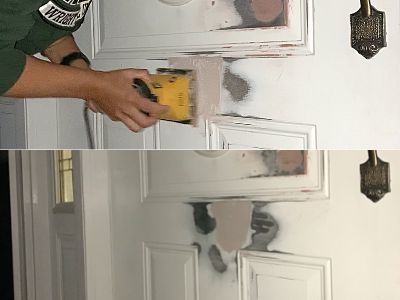
Step Two: Spread The Mixed Bondo Filler Across The Dent
The next step to repairing a metal door with Bondo is to spread the mixture across the dent.
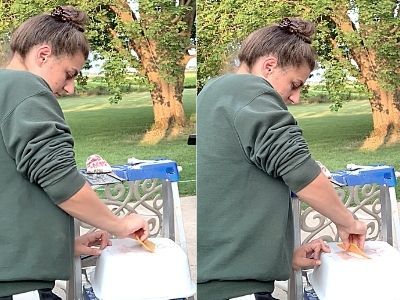
Use the yellow spreader tool to swipe a thick layer of the mixture across the entire dent.
Be sure to wipe it a little farther than the dent actually is so when you sand, you can make it flush to the surrounding area.
Try not to overwork the mixture. The fewer swipes you can do and still cover the entire area, the better.
It will be sanded, so having more mixture on there is better than not enough.
Once the mixture is spread, let it dry fully before moving on to the next step.
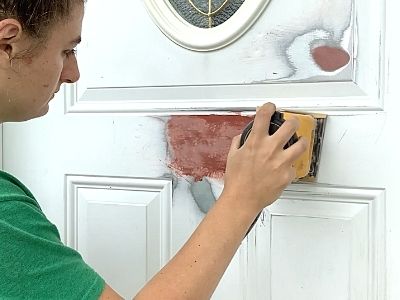
Step Three: Sand The Dried Bondo Filler Mixture
The next step to repairing a metal door with Bondo is to sand the dried mixture.
Start sanding with the 80 grit sandpaper that comes in the kit until the filler is almost flush with the surrounding area.
Then sand a little bit more with the 180 grit sandpaper until the entire damaged area is blended with the surrounding area.
Don’t worry if there are tiny imperfections quite yet, we will address those in the next step.
Using a mechanical sander such as this DeWalt palm sander found at Amazon to sand a large dented area makes this step go much faster. You will have to purchase separate sandpaper from the kit to go this route, however.
There will likely still be tiny imperfections in the Bondo filler after sanding. Don’t worry about them because the red glazing and spot putty will help fill those in.
Once you are satisfied with the sanding, use a clean, damp microfiber rag to wipe down the entire area.
Removing the dust particles is crucial for the Bondo and future paint to adhere to the door properly.
Once the door is clean again, it’s time to move on to the next step.
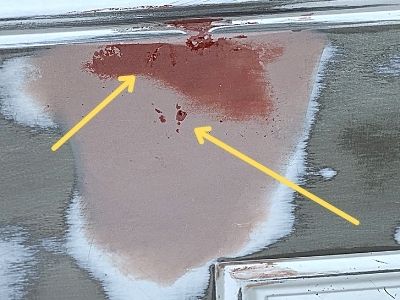
Step Four: Spread The Bondo Glazing & Spot Putty Over Any Remaining Imperfections
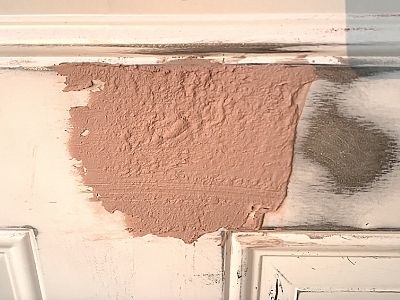
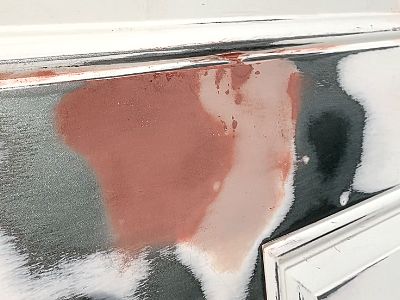
The next step to repairing a metal door with Bondo is to use the glazing and spot putty to fill in any tiny imperfections.
The red glazing and spot putty is already premixed and is an excellent way to fix any of the tiny imperfections that are likely still there after sanding.
The putty is extremely easy to sand and fills in any tiny scratches or knicks that might be remaining.
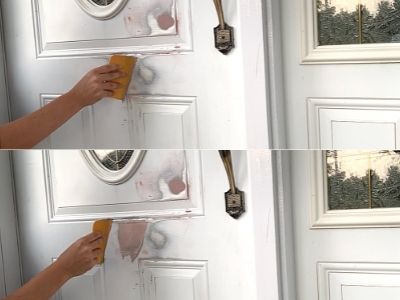
Squeeze a tiny amount of the putty onto the cleaned yellow spreader tool and swipe it across the remaining imperfections.
Again, be sure the apply it farther out than the scratch you are trying to cover so that you can sand it smooth with the surrounding area.
Once you are happy with the spread glaze and spot putty, let it dry fully before moving on to the next step.
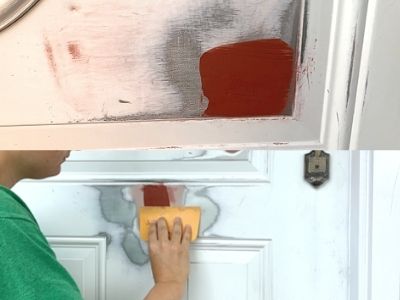
Step Five: Sand The Dried Glazing & Spot Putty
The next step to repairing a metal door with Bondo is to sand the dried glazing and spot putty.
This is the final step that uses the Bondo Repair Kit. Use the 320 grit sandpaper from the kit and sand the entire area until it is flawlessly smooth.
If you find any more tiny imperfections, just use more red glaze and spot putty, let it dry, and sand again.
To check whether the entire area is smooth enough, run your entire hand over the area (not just your fingers). You will feel any imperfections or high spots easier this way.
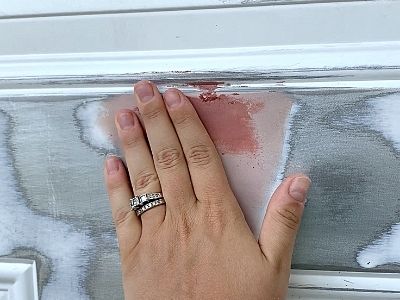
Once you are satisfied with the smoothness of your repair, use a clean, wet microfiber rag to do the final cleaning of the entire area.
Your dent should be successfully repaired and beautifully smooth!
Now, the final step to protect the newly repaired area is to prime and paint.
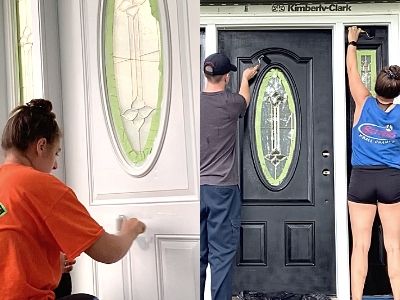
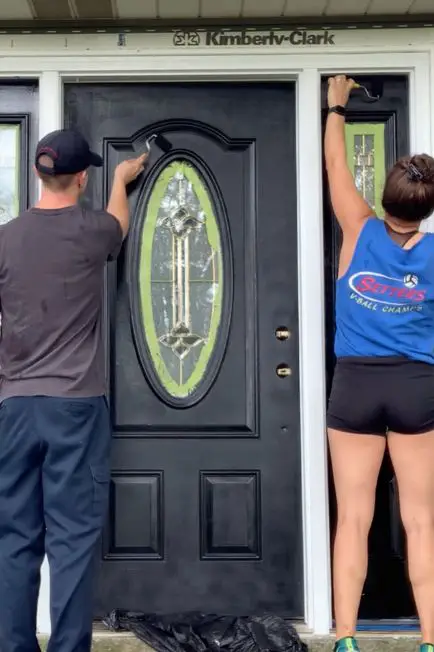
Step Six: Prime & Paint The Door
The final step to repairing a metal door with Bondo is to prime and paint the door.
The Bondo and exposed metal on the door must be covered with a metal primer to help protect it and help the new paint adhere to it properly.
This Rustoleum Metal Primer and this Rustoleum Front Door paint will help you finish out repairing your front door like a pro. Both paints can be found at Amazon.
To help you make sure you get the best paint finish on your metal door, check out my full tutorial on how to paint a metal front door without removing it here.
I learned some things the hard way, so hopefully, you can avoid some of my painting mistakes!
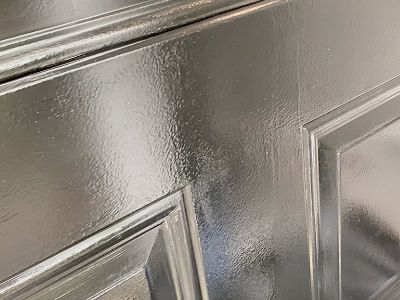
That’s it! Your door should look brand new once it is fully painted!
Common Mistakes To Avoid While Using The Bondo Dent Repair Kit
There are several mistakes that I (and most people) ran into during my first try using the Bondo Dent Repair Kit.
- Skipping Surface Prep: Failing to clean and sand the dented area can lead to poor adhesion and a rough finish – I made sure to sand around the dent down to the bare metal to help the Bondo adhere fully to the surface.
- Using Too Much Filler: Over-applying Bondo makes sanding harder and can cause cracking later – I tried to only put a thin layer on, but Bondo sets up way quicker than I was expecting, so my coat was a little thicker and more uneven than I meant it to be. Luckily, it still sanded down okay, but I did have to do more sanding than necessary. When they say the Bondo has a working time of 3-5 minutes, they aren’t kidding. Mix fast, swipe the coat on, and leave it alone.
- Rushing Cure Time: Not allowing enough time for the filler to properly cure can result in weak, unstable repairs – I made this mistake the first time around (not shown in the video above) and had to sand/scrape the entire thing off. My mixture ratio was off (not enough hardener), so the first coat was runny, didn’t cure, and left a sticky/semi-hard mess. The second mixture ratio (shown in the video) was probably perfect, but I took too long to mix it, so it started hardening on me as I applied it to the door. If I had a do-over, I’d recommend testing your mixture on a scrap piece of wood before applying it to your door.
- Poor Sanding: Not sanding the filler properly can leave the surface uneven and noticeable after painting – I made sure to sand the Bondo until it was flush with the door. The best way to make sure you sand enough? Run your flat hand over the door/filler, and if you feel any bumps or unevenness, you need to sand more because you will see them after painting.
- Skipping Primer: Not priming before painting can lead to poor paint adhesion and an uneven finish – I was so proud of how smooth I got my door looking, I didn’t want to risk skipping the basic step of priming before painting. The primer helped the entire door have the same texture and appear more uniform, and it helped the front door paint stick to the door and the filler better as well. It’s worth the extra little bit of time!
Hopefully, I can help you avoid some of the struggles I experienced so you can have a better outcome!
FAQ’s About Repairing A Dent In A Metal Door
Still not sure about some aspects of repairing your metal door? Here are some frequently asked questions that might help clarify some smaller details for you!
- Can I use Bondo on any type of metal door? Yes, Bondo works on most metal surfaces, including steel and aluminum doors.
- How long does the Bondo take to dry? Bondo usually takes 15-20 minutes to cure, but this can vary based on temperature and humidity.
- Do I need special tools to apply Bondo? Basic tools like a putty knife, sandpaper, sanding block, and a flat board or plate to mix on top of are typically enough. The Bondo Dent Repair Kit found at Amazon comes with everything you need besides the flax mixing surface.
- Can I paint over Bondo? Yes, once sanded and primed, you can paint over Bondo to match the door’s color. It is recommended that the filler be painted over to seal it in and protect the repair from the weather.
- Will the repair be noticeable after painting? If done correctly (proper sanding and priming), the repair should blend seamlessly. (See my pictures and video above for reference)
- Do I need to sand the entire door or just the damaged area? You only need to sand the damaged area where the Bondo will be applied. If there is any peeling or chipping paint elsewhere on the door, sand those areas as well before painting.
- What grit sandpaper should I use for sanding Bondo? Start with 80-grit sandpaper to shape the filler, then move to finer grits like 180-220 for smoothing.
- Can Bondo withstand outdoor elements? Yes, Bondo is durable and can withstand weather when properly primed and painted.
- Is Bondo safe to use indoors? Bondo releases fumes during application, so it’s recommended to work in a well-ventilated area.
- How thick can I apply Bondo? Ideally, Bondo should be applied in thin layers (no more than 1/4 inch thick) to ensure proper curing and avoid cracking.
Final Thoughts On Using The Bondo Dent Repair Kit
There you have it!
Using Bondo to repair dents takes a little bit of finesse and speed, but it’s definitely doable even for the beginner DIYer.
Thankfully, any mistake you might make can easily be sanded off and re-done.
Good luck with your door repair project. May it come out super smooth!
Catch you in my next post!
The Best Paint Supplies I’ve Used
Wooster Shortcut Angle Sash Paintbrush (2-Inch)
This is my all-time favorite paintbrush because it is so lightweight! The short handle takes the pressure off your wrist and creates an extremely comfortable grip, so you can paint longer without feeling the weight on your wrist. I use this paintbrush on 99% of my paint projects. You can find this paintbrush here on Amazon.
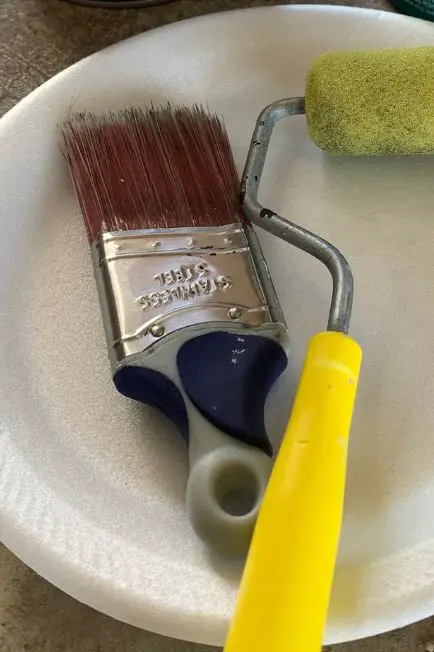
FoamPRO 164 Fine Finish Roller (4-Inch)
If you want the least amount of paint texture left from a roller (such as on metal or furniture), then this is the best roller you can use. The fine finish in the foam leaves the tiniest bit of texture that can easily be sanded between coats to get a finish almost as good as a sprayed finish. You can find this awesome foam roller here on Amazon.
If you’ve been curious about how we are decorating our 1950s Ranch, you should check out our “Shop Our Home” page. You can find products that we’ve personally bought to decorate our home.

By Christine
Christine is a blogger and DIYer who tackles home renovation and decorating projects alongside her husband, Adam, for their personal residence and rental properties. Although she successfully tackles large renovation projects to avoid expensive contractor fees and bring her vision to life now, her path to success was not easy.
Go here to read her story, “From a Clueless First-Time Homebuyer To A Confident DIYer Creating Her Dream Home One Project At A Time“.
Popular Posts


DIY With Christine is a participant in the Amazon Services LLC Associates Program, an affiliate advertising program designed to provide a means for sites to earn advertising fees by advertising and linking to Amazon.com.