*My posts may contain affiliate links, which means I may receive a small commission, at no cost to you, if you make a purchase through a link! Thank you for supporting my website!*
Last updated on February 28th, 2024 at 04:18 pm
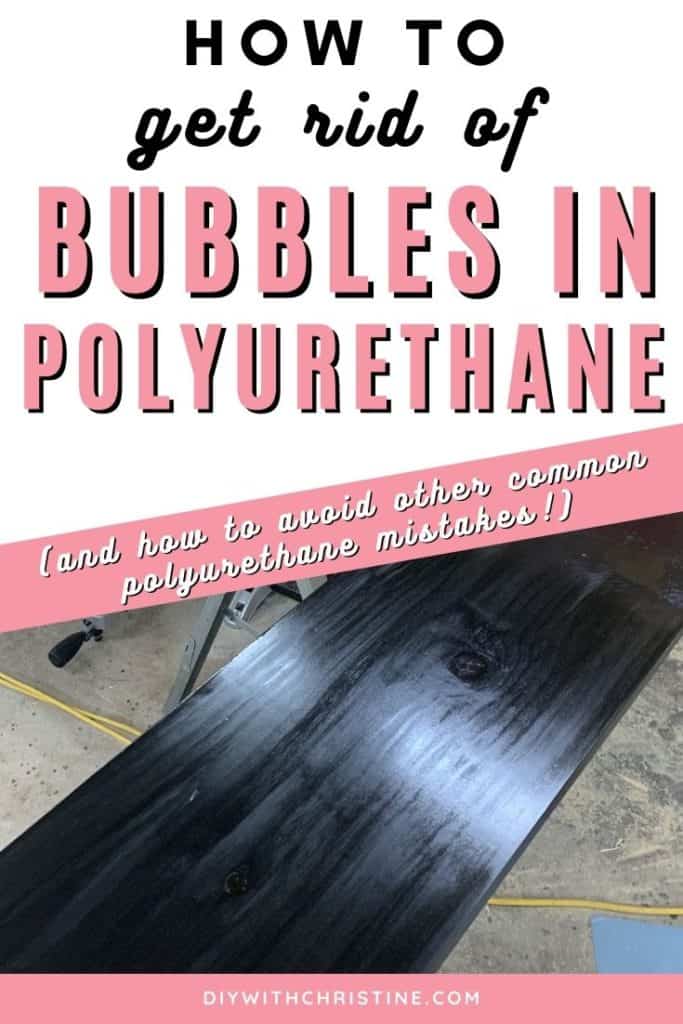
Have you built this gorgeous wooden DIY project, stained it perfectly, and somehow gotten terrible bubbles in your polyurethane?
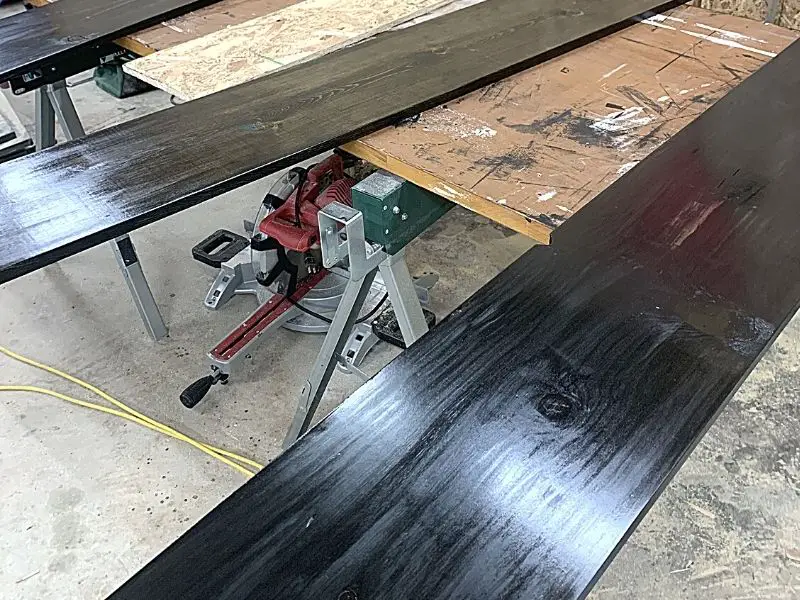
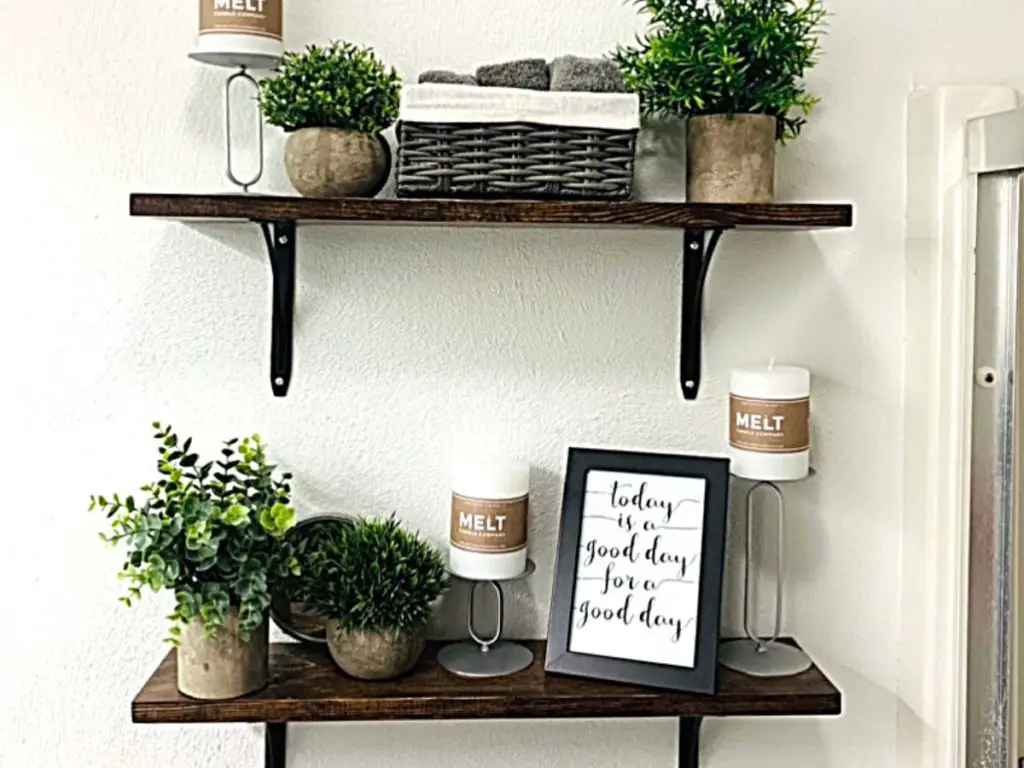
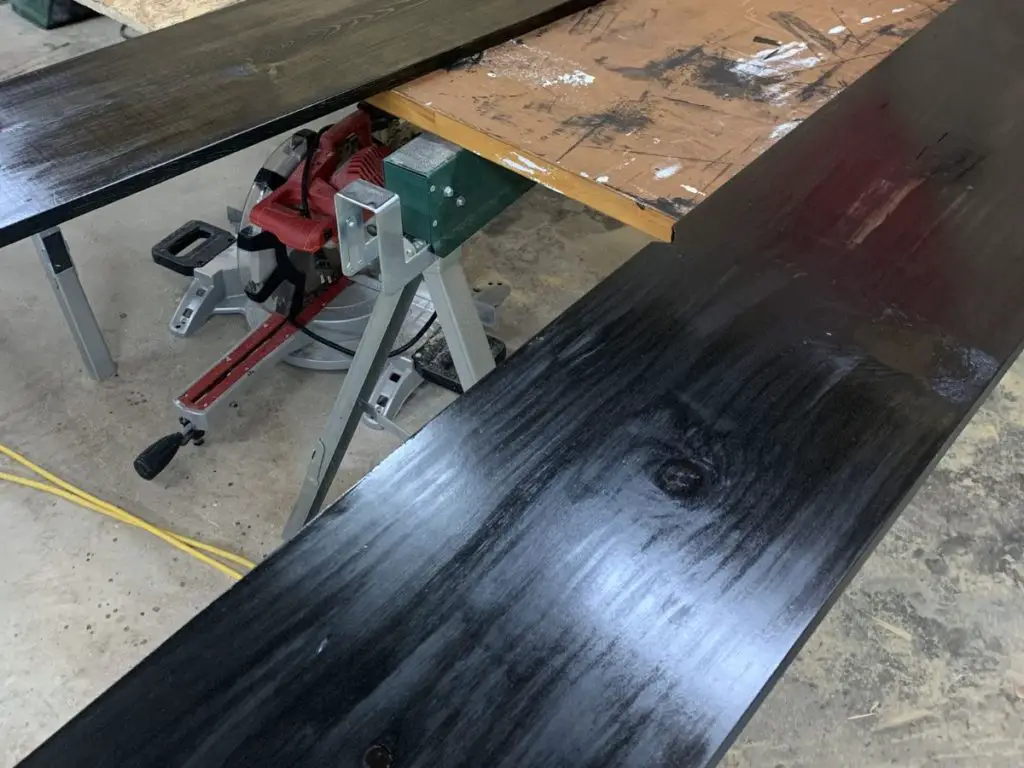
No worries, we’ve all been there. In fact, in my very first project (DIY wood shelves for your bathroom), I totally messed up the polyurethane application.
I made every single one of these mistakes in that project, which was super discouraging as I was making them as a gift for my mom. (Sorry mama, haha!)
Luckily, I figured out how to fix polyurethane bubbles in my projects and completely avoid them from happening in the first place!
I know you’ve put some time and effort into your awesome DIY project. You’re so close to being done and having a beautiful project to show off!
Follow this simple tutorial to fix these annoying polyurethane bubbles, then you’ll be on your way again!
Let’s dive in!
Why Am I Getting Bubbles In My Polyurethane?
First off, let’s discuss why you are most likely getting bubbles in your polyurethane.
Most likely, the bubbles are coming either from the can being shaken (instead of stirred), the wrong type of applicator (brush/roller) being used, or foreign objects getting stuck in the polyurethane while it’s drying.
Other causes of bubbles in polyurethane are:
- Overbrushing the polyurethane
- Applying too thick of a coat of polyurethane
- Using a foam roller
- Too much humidity/moisture (in the air or in the wood)
- Wiping the brush on the side of the can to remove the excess polyurethane before brushing
Will Polyurethane Bubbles Go Away?
If you see polyurethane bubbles on your project as you are applying it, most of them will go away within 5 minutes.
However, if there are large bubbles after 5 minutes, those bubbles will not go away after the polyurethane has dried.
Attempt to pop the bubbles before the polyurethane dries to avoid needing to sand it off later.
Wet water-based polyurethane bubbles can be popped with a heat gun or blow torch. Wet oil-based polyurethane bubbles should be left alone and sanded down after they dry.
How To Fix Polyurethane Mistakes And Avoid Them From Happening Again
- Sand The Polyurethane Bubbles Away
- Stir The Polyurethane (Don’t Shake!)
- Apply Polyurethane With A Foam Brush
- Let The Polyurethane Dry In A Dust-Free Environment
- Apply 2-3 Coats (Lightly Sand Between!)
- Other FAQs About Bubbles In Dried Polyurethane
- Final Thoughts
| Level Of Difficulty | Time To Complete |
|---|---|
| Medium | 15 minutes to 1 hour (project size dependent) |
| Material List | Tool List |
|---|---|
| Sandpaper (80 grit, 320 grit) | Foam brush |
| Paint stir stick | (Maybe) Mechanical sander |
| Tack cloth |
Step One: Sand The Polyurethane Bubbles Away
The first step to getting rid of polyurethane bubbles and avoiding making them again is to sand the polyurethane bubbles away.
I would first try hand-sanding the bubbles with 320 grit sandpaper to get rid of the bubbles only (and avoid having to re-apply both stain and polyurethane).
Using a mechanical sander would be too hard on the finish and end up stripping off most of it. So gently sand the dried bubbles by hand to remove them.
However, if the bubbles are actually dust particles trapped in the polyurethane, the only solution is to sand off all polyurethane and start over.
In that case, use 80-100 grit sandpaper and a mechanical sander to remove the polyurethane layer back down to the stain. Most likely, you’ll want to sand all of the polyurethane and stain off and reapply both.
That’s the best way to get that beautiful stained wood finish that I know you really want!
I also came across this awesome tutorial on how to remove polyurethane from wood without using harsh chemicals. If your project needs a full-blown restart, then this homemade varnish removal mixture might help you out!
Just make sure to wipe down your project completely after sanding and before re-applying polyurethane as any extra dust left behind could also leave bubbles!
Once you have the polyurethane bubbles sanded off (and stain reapplied if necessary), then you can move on to the next step to reapply the polyurethane and avoid these bubbles in the first place!
Step Two: Stir The Polyurethane (Don’t Shake!)
The next step to getting rid of polyurethane bubbles and avoiding making them again is to stir the polyurethane with a paint-stirring stick.
If you just do this step, you most likely won’t get bubbles in your polyurethane because this is one of the biggest causes of the dreaded bubbles!
YES, it’s that simple act of shaking the can that can totally ruin a perfectly good DIY project.
When you shake the can, little air bubbles form, which will show up all over your beautiful project.
To add insult to injury, I’m pretty sure it says somewhere on the can to stir the contents instead of shaking them. And as you can tell when I was completing my wooden shelves project, I apparently skipped over that section when I was reading the instructions.
Sigh.
And I was lazy so I just shook the can to mix it instead of finding and dirtying up a perfectly clean stirring stick.
I let that project dry, so the only way I could fix this mistake was to sand off all of the bumpy polyurethane and start over.
Believe me, it’s a huge time-waster, so skip the pain I went through and stir the can!
However, if you already shook the can before reading the instructions (or reading this blog post) as I did, it’s okay. You can just let the can sit still for a few hours, and you will be able to use it like normal again.
Now that you have stirred your polyurethane instead of shaking it, it’s time to move on to the next step!
Step Three: Apply Polyurethane With A Foam Brush
The next step to getting rid of polyurethane bubbles and avoiding making them again is to apply polyurethane with a foam brush found at Amazon.
Yes, the type of brush you use to apply the polyurethane can make a huge difference in whether there will be bubbles in your finish or not.
What Is The Best Applicator For Polyurethane?
Foam brushes are one of the best applicators for polyurethane (oil- or water-based). They are cheap and will give your project a smooth finish (unlike some other brushes that might leave brush marks).
I would avoid using foam rollers though. They tend to create air bubbles in the polyurethane as well (especially water-based polyurethane).
As you apply polyurethane, apply a thin, even layer.
Try to avoid slathering the polyurethane on your project (especially on vertical parts) because it will most likely leave drip marks that you will need to sand out later.
(Again, that’s just extra work we are trying to avoid!)
Applying too thick of a polyurethane coat is another reason why air bubbles might form.
If you are having a hard time thinning out the polyurethane using only the brush, then you can thin it out before applying your next coat.
Mix a small amount of mineral spirits (for oil-based) or water (for water-based) into the polyurethane to thin it out before brushing on.
This video does a fantastic job of showing you exactly how to apply polyurethane using a foam brush for a smooth finish.

Once you have your polyurethane applied evenly to your entire project, you can move on to the next step.
Step Four: Let The Polyurethane Dry In A Dust-Free Environment
The next step to getting rid of polyurethane bubbles and avoiding making them again is to let the polyurethane dry in a dust-free (and bug-free) environment.
This probably goes without saying, but if foreign objects get in your smooth finish, they could create bubbles (or what appears to be bubbles) and mess up your beautiful finish.
If you had success applying the first coat of polyurethane, but keep getting bubbles in your second and third coat, then you are likely experiencing dust clumps in your dried finish instead of bubbles.
It is impossible to get a completely dust-free environment, but we can minimize the amount of dust so you won’t get these noticeable “dust nibs” in your finish.
Whenever you sand, be sure to fully wipe down the project with a tack cloth to remove any excess dust. These tack cloths found at Amazon are awesome and get the job done fast.
If you recently sanded and wiped down the project, wait 15-20 minutes to let the dust settle then wipe it down again to get rid of a little bit more dust.
Then apply the next coat.
How Long Should You Let Polyurethane Dry Between Coats?
Varathane Ultimate Interior Oil-Based Polyurethane found at Amazon is my favorite polyurethane for most of my DIY projects. It has a dry time of 4 hours before your project can be recoated.
The Varathane oil-based polyurethane will be fully cured in 72 hours.
With a minimum of only two coats needing to be applied, you can have all coats of polyurethane applied in one day so it’s dry and ready for use the next day!
That being said, I know it’s hard to have an area stay “dust-free” for 8+ hours at a time. I recommend choosing a day when you can apply the topcoat in your garage and leave the door shut for several hours at a time.
Once your first coat of polyurethane has dried, you can move on to the next step.
Step Five: Apply 2-3 Coats (Lightly Sand Between!)
The last step to getting rid of polyurethane bubbles and avoiding making them again is to apply at least 2 coats to your project.
Do You Really Need 3 Coats Of Polyurethane?
On the can, it recommends 3 coats of polyurethane, but the minimum is 2 coats. The reason why you want more coats of polyurethane is that every coat makes your project finish thicker, smoother, more durable, and more clear.
Every additional coat of polyurethane adds one more layer of protection. That is more crucial for projects that might take a beating (like tables or chairs or hardwood floors).
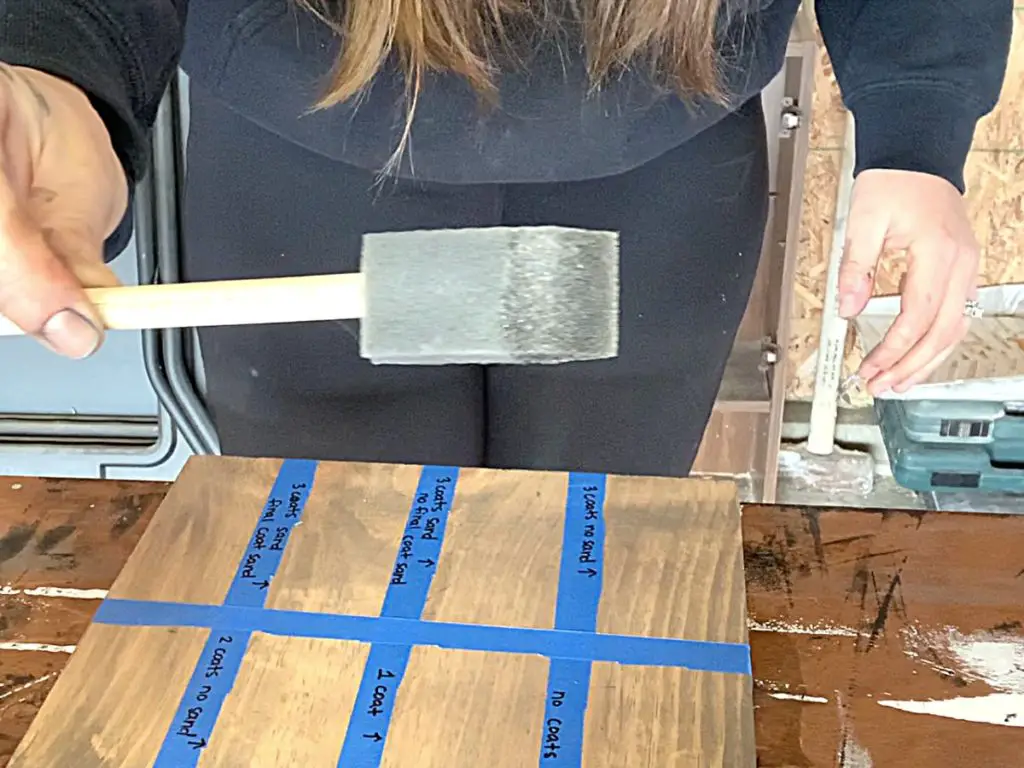
Also, if you lightly sand with 320 grit sandpaper between coats, you can get rid of any tiny bubbles or imperfections before adding another coat of polyurethane, which will give your project an even smoother finish.
I’ve found that each coat of polyurethane I add makes the final project shinier and more clear. With only one coat of polyurethane, the wood looks cloudy and feels rough.
Although, you do not have to sand between coats of polyurethane to get a good finish though.
In fact, I ran an entire experiment to see what happens if you don’t sand between coats and what happens if you do. You can check out that experiment here to determine if your project needs it.
For the final coat of polyurethane, there could be the tiniest dust nibs remaining. To smooth those out, use a brown paper bag and buff the entire project. Otherwise, you do not sand the final coat.
I also ran an experiment to see what happens if you do sand the final coat. You can see the results here.
Other FAQs About Removing Bubbles From Dried Polyurethane
Here are some other frequently asked questions about bubbles in dried polyurethane to help you get a smoother finish!
Can You Buff Bubbles Out Of Dried Polyurethane?
Buffing is used for tiny dust nibs remaining in the final coat of dried polyurethane. Bubbles in dried polyurethane are often large air pockets or large pieces of dust trapped in the polyurethane. Bubbles are often too thick for buffing, so they must be sanded out with 320 grit sandpaper.
Can You Use A Torch To Get Bubbles Out Of Polyurethane?
Wet water-based polyurethane with bubbles can be heated using a blow torch or heat gun to remove bubbles before the finish dries. Heating wet oil-based polyurethane does not remove bubbles.
Final Thoughts On How To Get Rid Of Bubbles In Polyurethane
There you have it!
I truly believe there is very little in the world of DIY that we can’t figure out how to fix and salvage.
So whether this is your first DIY project or your 100th, you can always learn a little more and create something a little better the next time!
That’s why I love DIY so much. And I hope you also find the same joy and empowerment in it!
Catch you in my next post!

By Christine
Christine is a blogger and DIYer who tackles home renovation and decorating projects alongside her husband, Adam, for their personal residence and rental properties. Although she successfully tackles large renovation projects to avoid expensive contractor fees and bring her vision to life now, her path to success was not easy.
Go here to read her story, “From a Clueless First-Time Homebuyer To A Confident DIYer Creating Her Dream Home One Project At A Time“.
Popular Posts


DIY With Christine is a participant in the Amazon Services LLC Associates Program, an affiliate advertising program designed to provide a means for sites to earn advertising fees by advertising and linking to Amazon.com.