*My posts may contain affiliate links, which means I may receive a small commission, at no cost to you, if you make a purchase through a link! Thank you for supporting my website!*
Last updated on March 16th, 2024 at 12:41 pm
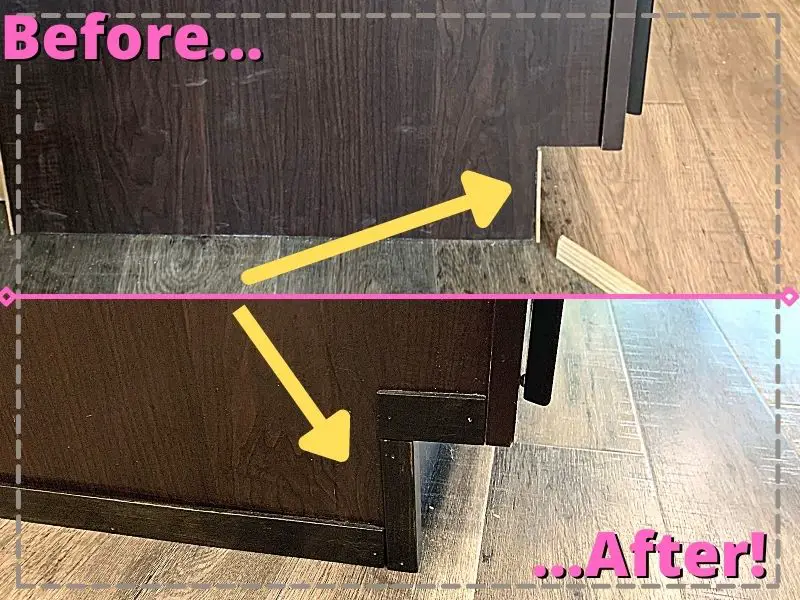
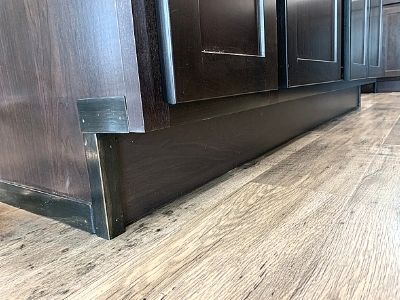
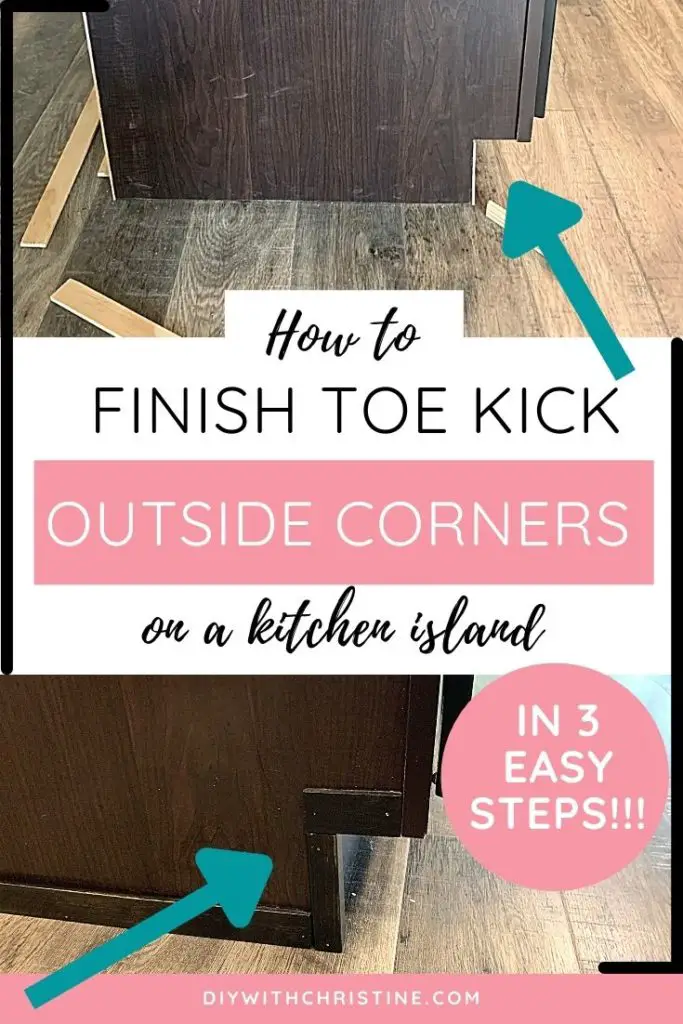
Wondering how to finish the toe kick outside corners on your kitchen island? No worries, I’ve got your answer right here!
To finish toe kick outside corners, use 1/4″ x 1/4″ wood outside corner trim stained or painted to match the color of your cabinets and toe kick. Simply measure and cut the trim, paint or stain it, and install it overtop the toe kick outside corners with brad nails or glue for a clean finish.
Yes, it really is that simple! But keep reading so I can further break down the steps that you need to take to finish the ends of the toe kicks beautifully (and cheaply!) on your kitchen island.
Let’s dive in!
Quick Navigation: How To Finish Toe Kick Ends On A Kitchen Island
- Measure The Toe Kick Outside Corners & Cut
- Stain/Paint The Toe Kick Outside Corner Trim To Match The Kitchen Island
- Nail The Toe Kick Outside Corner Trim In Place
- Final Thoughts
- Related Kitchen Island Articles
| Level Of Difficulty | Time To Complete |
|---|---|
| Easy | 2 Days |
| Material List | Tool List |
|---|---|
| Paint or Stain in your chosen color (I used Ebony from Varathane on this project because it matched our cabinets) | Miter saw or circular saw |
| Polyurethane in your chosen sheen (I used satin) | Pneumatic nail gun and air compressor |
| 1” brad nails | Tape Measure |
| 1 piece of ¼” thick corner trim in matching width and wood type (I used 1-1/16” x 1-1/16” pine corner trim) | Mechanical Sander (optional) |
| Table saw (optional) | |
| Paint tray | |
| Two 2” Foam Brushes |
Step One: Measure The Toe Kick Outside Corners & Cut
The first step to finishing toe kick outside corners is to measure & cut the trim.
First, take your tape measure and measure the distance between your floor and the top of the toe kick.

Second, make your measurement mark on the outside corner trim, and cut it to size with a miter saw or circular saw.
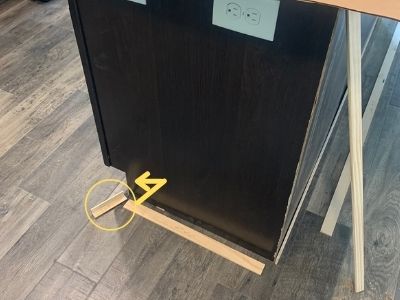
After each piece is cut, test that it fits perfectly over the toe kick outside corners on your island. If they’re a good fit, then it’s time to move on to the next step!
P.S. If you’re in need of finishing the back panel of your kitchen island along with the toe kick outside corners, then you will want to check out my other tutorial here.
It’s a similar process as this tutorial, but it has a few more measurements you might need to make first!
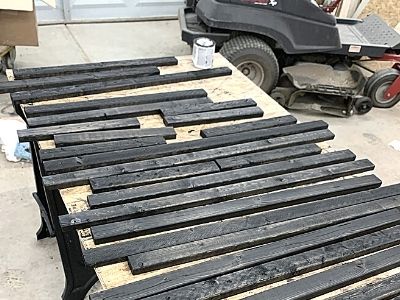
Step Two: Stain/Paint The Toe Kick Outside Corner Trim To Match The Kitchen Island
The next step to finishing toe kick outside corners is to paint or stain the trim to match the cabinets.
Toe kicks are supposed to seamlessly blend in with the cabinets, so we want the outside corner trim to blend in as well.
To do this, you can either buy pre-finished outside corner trim that matches your toe kick finishing panel color OR you can paint or stain your own trim to match.
If you paint or stain as I did, then I recommend doing this part on some cardboard and sawhorses. Speaking from experience, it’s much easier to work while standing up than hunched over for a while.
Tips For Painting Or Staining Toe Kick Outside Corner Trim
First, sand any edges that you cut to make sure there aren’t any splinters or rough patches. I’d also run the sandpaper over the rest of the trim that’ll be the “show parts” to make sure the paint or stain adheres really well.
Next, wipe all the pieces down with a clean rag, then break out your foam brush if you’re staining or your small foam roller if you’re painting. (Foam is the best for wood – it doesn’t leave annoying fuzzies in the paint or stain like other rollers will.)
Do the edges first, then brush or roll the face. If you’re painting, try to brush in one direction pulling the paint as far as possible before picking it up.
If you’re staining, swipe the stain on then immediately wipe it off with a clean rag. The longer the stain sits on the wood, the deeper the color. For my trim, it went on so dark, I had to wipe it off immediately to let the wood grains shine through still.
For paint, 3 coats should do. I recommend one coat of this Zinsser primer found at Amazon then 2 coats of Cabinet, Door, and Trim paint in your chosen color. If you use Cabinet, Door, and Trim paint, it’s meant to be glossy and durable, so an additional topcoat shouldn’t be necessary.
For stain, after the dry time listed on the can, apply 3 coats of polyurethane. I know, 3 coats seem like a lot, but your trim will appear foggy until you apply the 3rd coat. Take the time to do it now, so you can have a beautifully trimmed island for years to come!
For either application, if at any point, there are bubbles or unevenness, then sand out the blemish and apply another coat. You’ll be having a smooth, professional finish on your trim in no time!
Paint vs Stain Application
Here’s a quick reference of everything we just discussed, laid out in an easy-to-read table format for you!
| Category | For Stain | For Paint |
|---|---|---|
| Type of brush | Foam brush | Foam roller |
| Application | Brush the edges and face, then immediately wipe it off with a clean rag (let sit if a darker color is preferred) | Roll the edges, then roll the face |
| # of coats | 1 coat of stain, 3 coats of polyurethane | 3 coats |
| Topcoat required | Yes, 3 coats minimum | Optional |
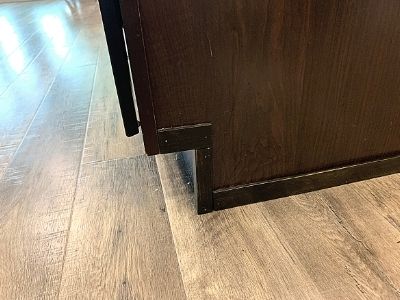
Step Three: Nail The Toe Kick Outside Corner Trim In Place
The last step to finishing toe kick outside corners is to nail the finished trim in place!
Hold each painted or stained outside corner piece in place against the toe kick outside corner and use a pneumatic nail gun and air compressor with 1″ brad nails to secure each piece to the island.
Alternatively, instead of nailing the corner pieces, you could use Loctite Power Grab adhesive and glue the corners in place.
If you are using white trim and don’t want to see nailheads (and don’t want to take the time to fill them in later), then gluing might be your best option.
For our island, the Ebony stain color is so dark, it hides the nailheads, so we did not need to take an extra step to fill them in.
Once all of your trim pieces are installed, your toe kick outside corners will be complete!
Final Thoughts On Finishing Toe Kick Outside Corners
There you have it! This is such a simple way to finish the cut edges of toe kicks, and yet, it packs a big punch!
Even though it took me a couple of days longer to finish my kitchen island, I’m glad I took this extra step to really make it look professionally finished.
Catch you in my next post!
The Best Kitchen Tools & Products I’ve Used
Ravinte Cabinet Handle Installation Template (For Doors & Drawers)
This is my all-time favorite handle installation template because it has two templates (one for drawers and one for doors) with multiple pull sizes & knob placements! These templates make installing cabinet handles a breeze because you always know your handles will be installed in the same spot on all of your drawers and doors. The kit also comes with a drill bit so you can guarantee you’re using the correct size. I used this template on my entire kitchen and both bathrooms to cut the installation time in half. You can find this hardware template here on Amazon.
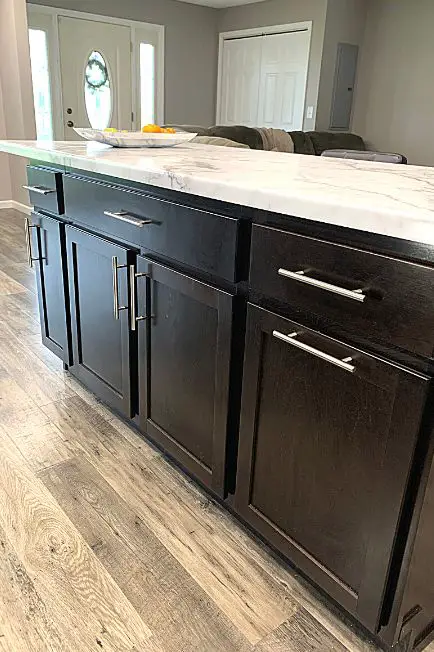
Franklin Brass 5-1/16 Inch (128mm) Center Bar Pull (Stainless Steel)
If you want to immediately modernize your kitchen island, then these cabinet pulls are a must. They are heavy-duty feeling, durable, easy to install, and are a large size for a great price. We put these pulls on all of our kitchen and island doors and drawers along with our bathroom doors and drawers. You can find these gorgeous cabinet pulls here on Amazon.
P.S. Use the hardware installation template I mentioned above to install these new pulls in record time!
If you’ve been curious about how we are decorating our 1950s Ranch, you should check out our “Shop Our Home” page. You can find products that we’ve personally bought to decorate our home.

By Christine
Christine is a blogger and DIYer who tackles home renovation and decorating projects alongside her husband, Adam, for their personal residence and rental properties. Although she successfully tackles large renovation projects to avoid expensive contractor fees and bring her vision to life now, her path to success was not easy.
Go here to read her story, “From a Clueless First-Time Homebuyer To A Confident DIYer Creating Her Dream Home One Project At A Time“.
Popular Posts


DIY With Christine is a participant in the Amazon Services LLC Associates Program, an affiliate advertising program designed to provide a means for sites to earn advertising fees by advertising and linking to Amazon.com.
