*My posts may contain affiliate links, which means I may receive a small commission, at no cost to you, if you make a purchase through a link! Thank you for supporting my website!*
Last updated on March 16th, 2024 at 12:18 pm
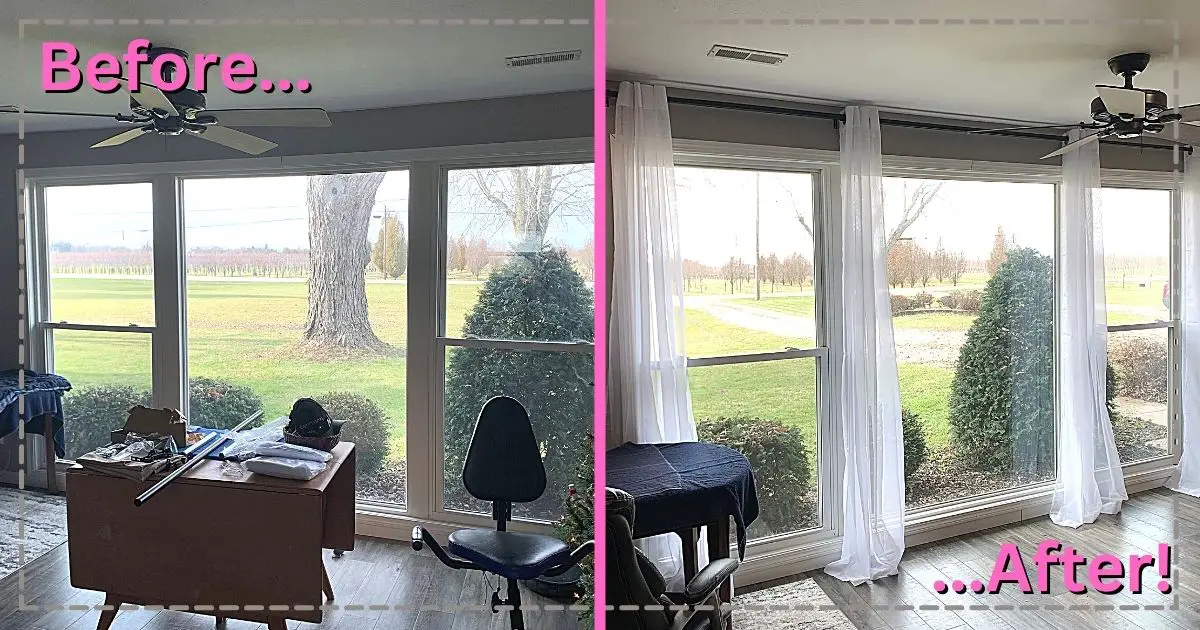
Wondering how to hang curtains on extra-wide windows? Well, look no further because I have your answer!
To install curtains on wide windows, use 1-inch or thicker curtain rods hung 8-16 inches wider than the window trim and 4 inches below the ceiling. Hang 4-6 curtain panels as wide as each window panel to span the wide window easier.
Now that we’ve got the basics out of the way, let’s break into the details further so you can easily install your curtains for maximum beauty.
Let’s dive in!
Quick Navigation: How To Hang Multiple Curtain Panels For Wide Windows
- Calculate The Curtain Rod & Panel Dimensions
- Install The Curtain Rod Brackets
- Put Together The Curtain Rod
- Hang Your Curtain Panels Onto The Rod
- Other FAQs About Hanging Curtains On Wide Windows
- Final Thoughts
| Level Of Difficulty | Time To Complete |
|---|---|
| Easy | 30-45 Minutes |
| Material List | Tool List |
|---|---|
| Curtain rod | Contractor pencil |
| Curtain panels | Drill |
| Curtain rings with clips (optional) | Impact driver |
| Tape measure | |
| Stud finder |
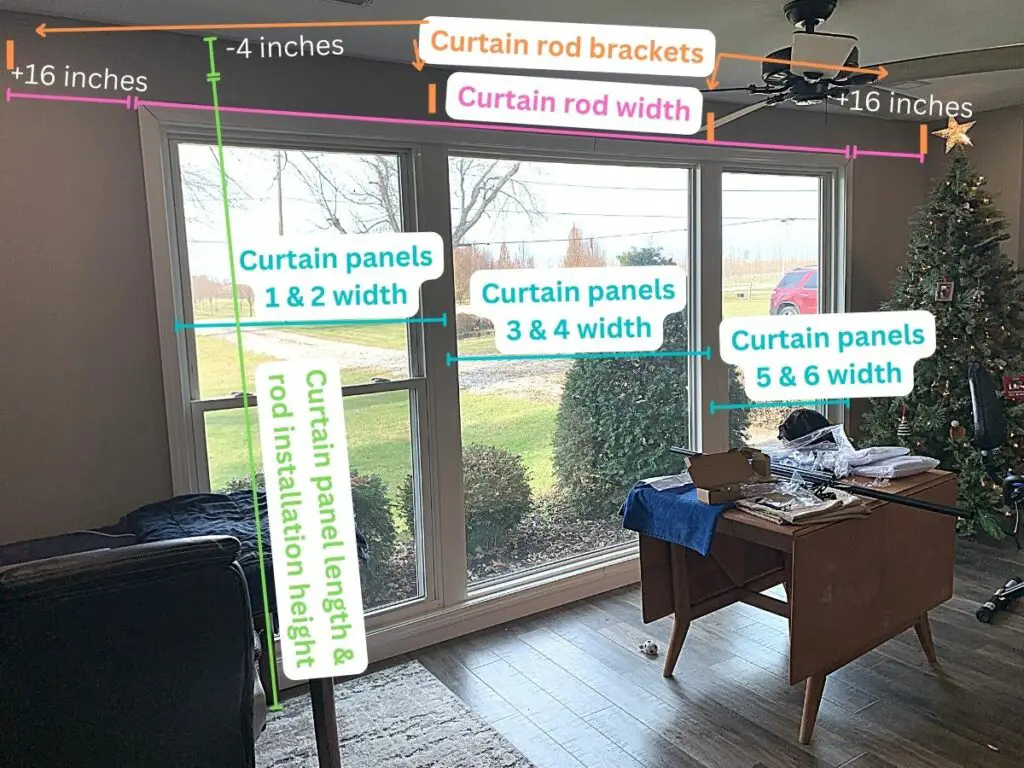
Step One: Calculate The Curtain Rod & Panel Dimensions
The first step to hanging multiple curtain panels over a wide window is to calculate all of the dimensions needed.
Contrary to popular belief, most of the work when installing curtains happens before you ever purchase the curtains or rod.
Here are a few of the recommended dimensions for wide windows.
- Recommended Curtain Rod Width For Wide Windows – Measure the width of your window and use that measurement or you can add 32 inches to get the total length of the curtain rod
- Recommended Curtain Rod Thickness For Wide Windows – Choose a 1-inch or thicker curtain rod so that it can easily support the weight of multiple curtain panels
- Recommended Curtain Panel Width For Wide Windows – Measure the width of each “window panel” within your extra wide window and double the measurement to get the width of each curtain panel
- Recommended Curtain Rod Installation Height For Wide Windows – Measure from the floor to the ceiling and subtract 4 inches to get the best height to install the curtain rod brackets
- Recommended Curtain Panel Height For Wide Windows – Measure from the floor to the curtain rod bracket and add 2 inches to get the minimum curtain panel height (longer is better than shorter because it can always be hemmed)
Now that you’ve got all of the dimensions you need, let’s move on to the next step.
Step Two: Install The Curtain Rod Brackets
The next step to installing curtain panels over a wide window is to install the curtain rod brackets.
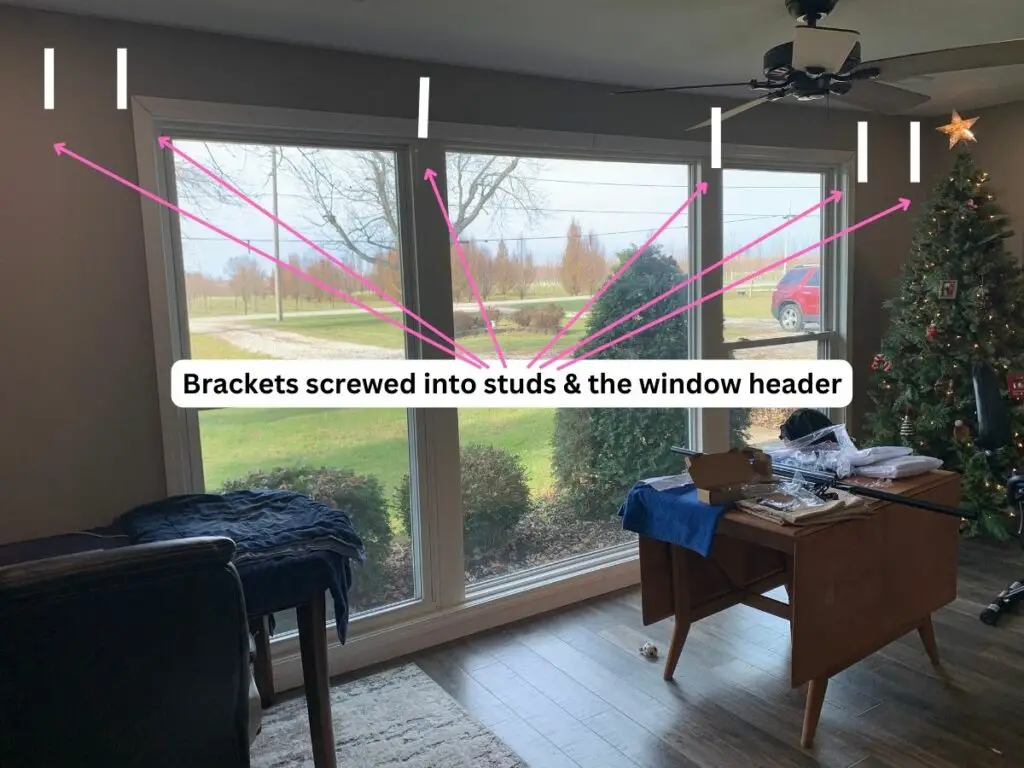
Hold one of your curtain rod brackets against the wall at the height of your rod installation measurement (the floor-to-ceiling measurement minus 4 inches) and at the width beyond the window (either in the stud directly next to the window frame or in the next stud out from the window).
If you are using the stud beyond the window frame, then you’ll need to use a stud finder to help you locate the studs you want to screw into. Otherwise, the stud next to the window frame is easy to find because it’s what the window and window trim is nailed into.
(For wide windows, I highly recommend screwing as many brackets into studs or the window header as you can so that the full weight of the curtain rod and panels can easily be supported. This is more important for wide windows because the rod has to span such a large distance and support heavier curtains.)
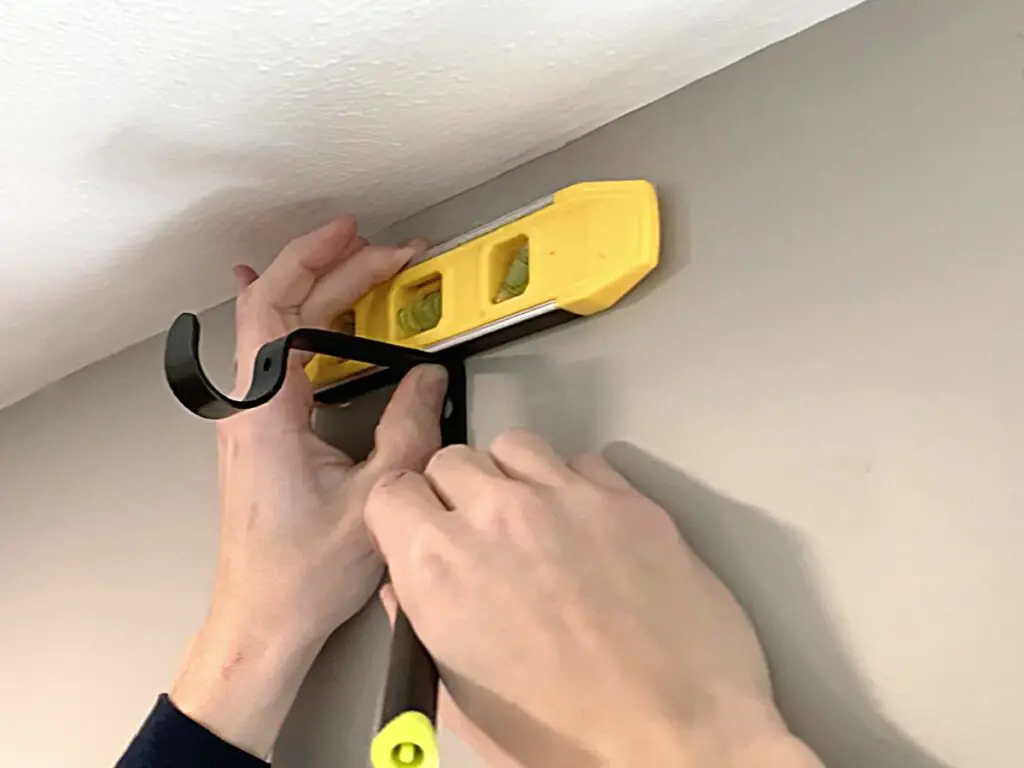
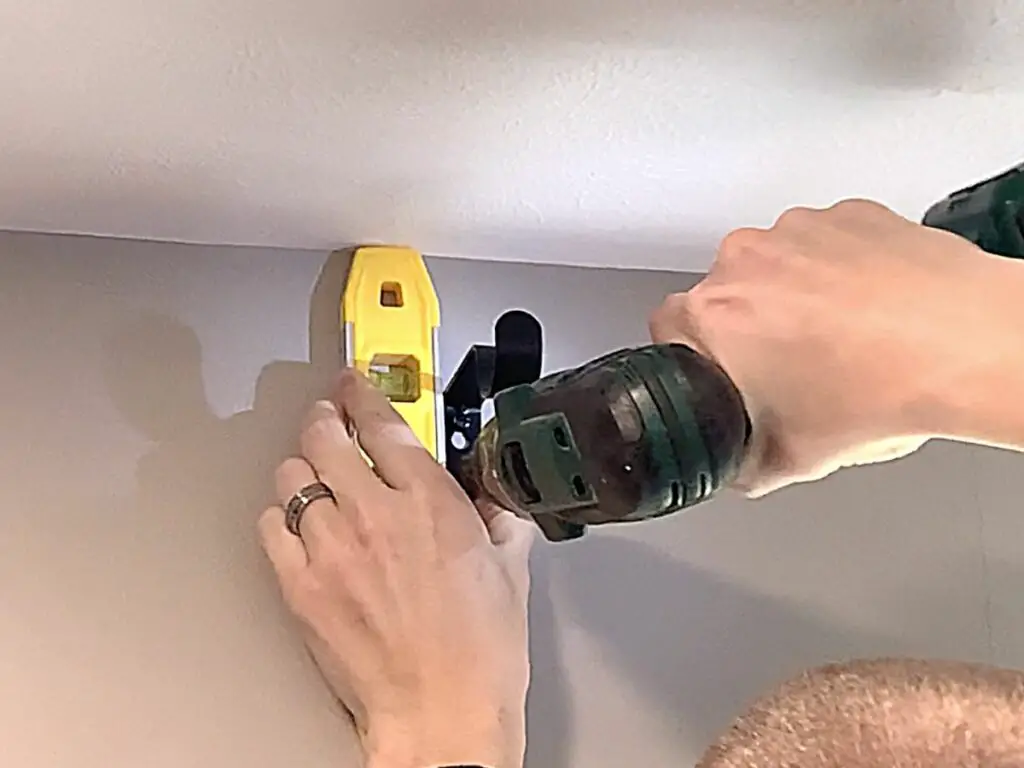
Set a level on top of the bracket to make sure the back will be sitting level, then use a pencil to mark the holes where the screws will go.
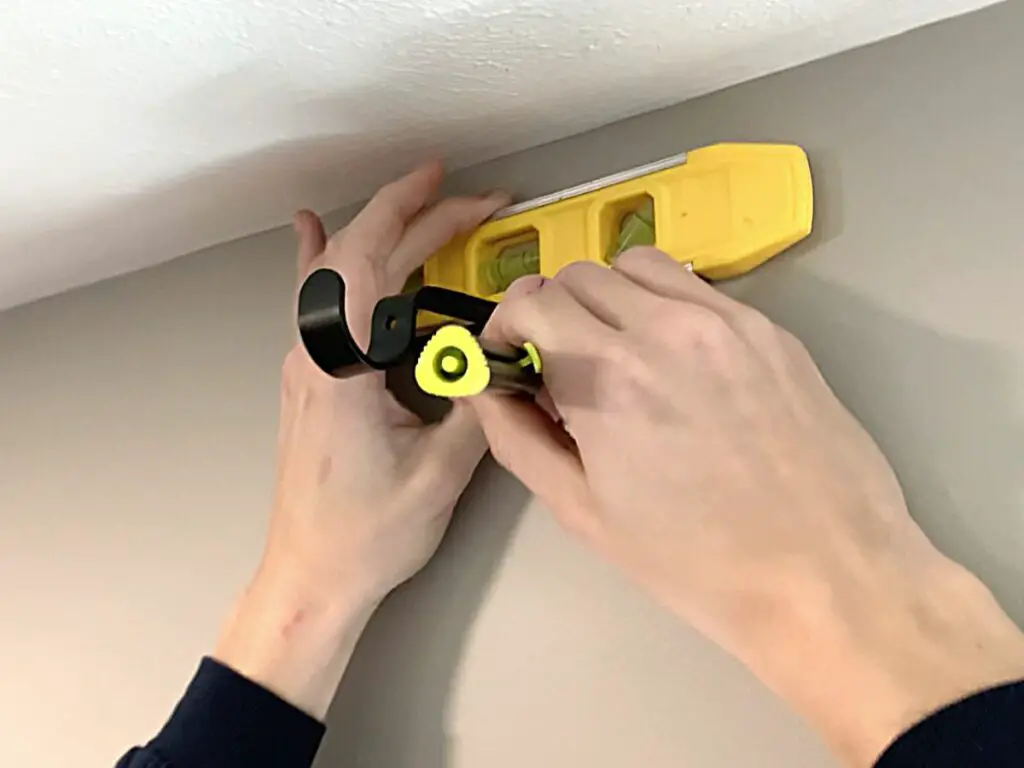
Now, use a drill and drillbit smaller than the screw threads to pre-drill the holes.
After both holes are drilled, screw the bracket into the stud with your drill or impact driver.
Repeat those steps for all of the other brackets you have. For windows with width measurements (window width plus 32 inches to extend the rod beyond the edges):
- 48 inches or less, use 2 brackets (one on each side of the window frame)
- 49-86 inches, use 3 brackets (one on each side of the window frame and one in the middle)
- 87-144 inches, use 4 brackets (spaced out evenly between each side of the window frame)
- 145-240 inches, use 6 brackets (spaced out evenly between each side of the window frame)
If you have multiple window panels then you want to install a bracket into the section of the window header that’s between each panel. This is because that will be the resting spot for each curtain panel you have.
Pro Tip: While you are installing each bracket, I recommend putting part of the rod up so you can level the entire rod (which also will level each bracket to the previous one). Doing this extra step will make your life so much easier because you’re constantly making sure the entire rod will sit level across 3, 4, or even 6 brackets.
Once you have all of the curtain rod brackets installed into studs, it’s time to move on to the next step.
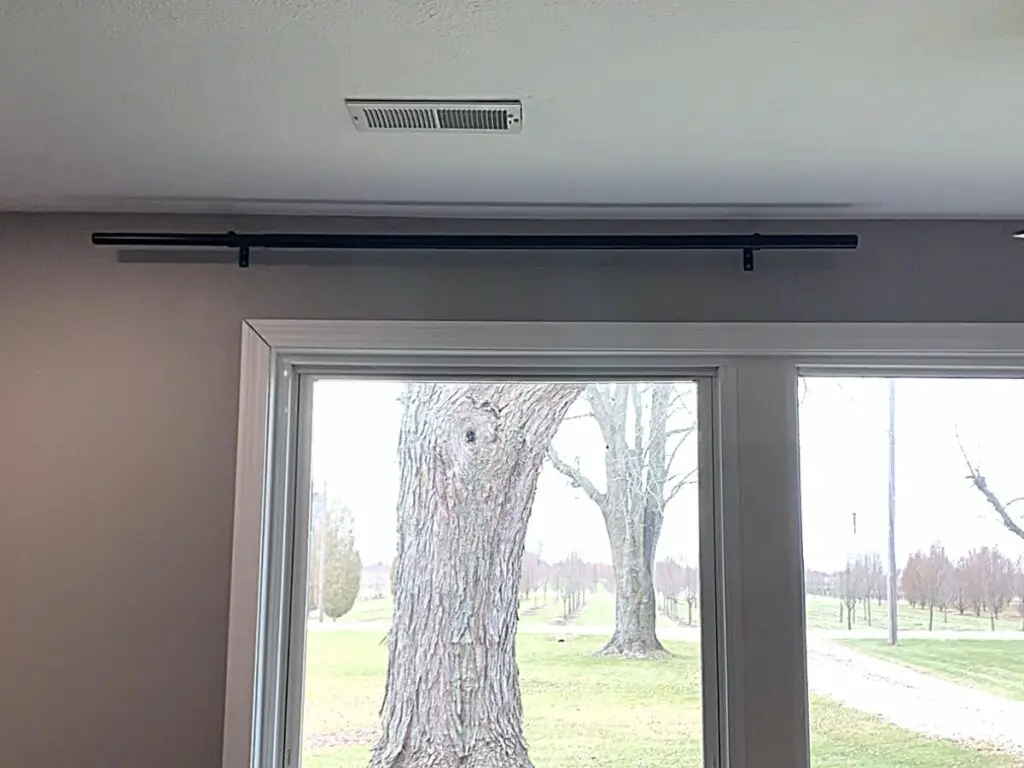
Step Three: Put Together The Curtain Rod
The next step to hanging multiple curtain panels over a wide window is to assemble and hang the curtain rod.
If you bought a rod that is extendable, then it probably came in several pieces. Slide and lock each piece together until the rod is long enough to sit on all of the brackets.
Then set the rod onto the brackets to make sure the entire rod is level and sits into all of the brackets evenly. If you notice one of the brackets is way out of line compared to the others, then now is the time to unscrew it and move it into alignment.
Step Four: Hang Your Curtain Panels Onto The Rod
The final step to installing multiple curtain panels over a wide window is to hang the curtain panels on the rod.
You’re almost done! Take the rod back down and slide all of the curtain panels onto the rod. Position each curtain panel on the rod so when you hang it back up, each panel will be between the correct brackets.
Then put the curtain rod with the curtain panels back onto the brackets and step back and admire your work!
Here’s what our extra wide window looks like with 4 curtain panels on one window. Ideally, we would have 6 panels (2 per window panel) so that there’s a little more “bunch” when they’re fully closed.
But I’ve just been lazy and haven’t bought the other two panels yet. Adding those two panels will just add to the elegance of this window!
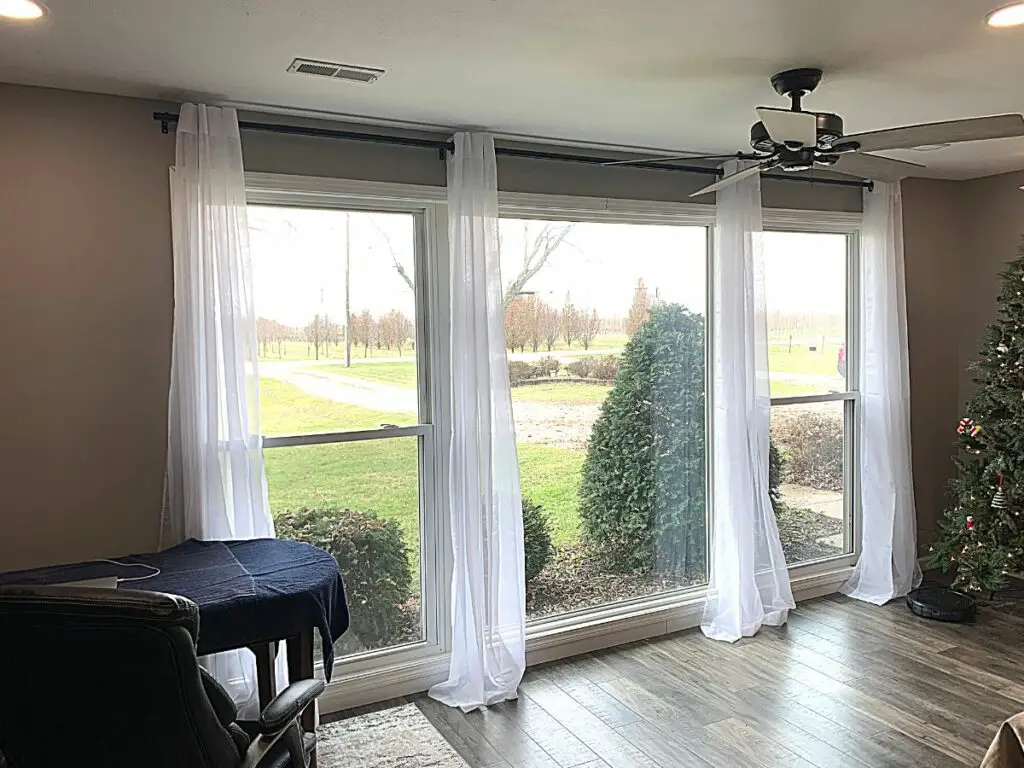
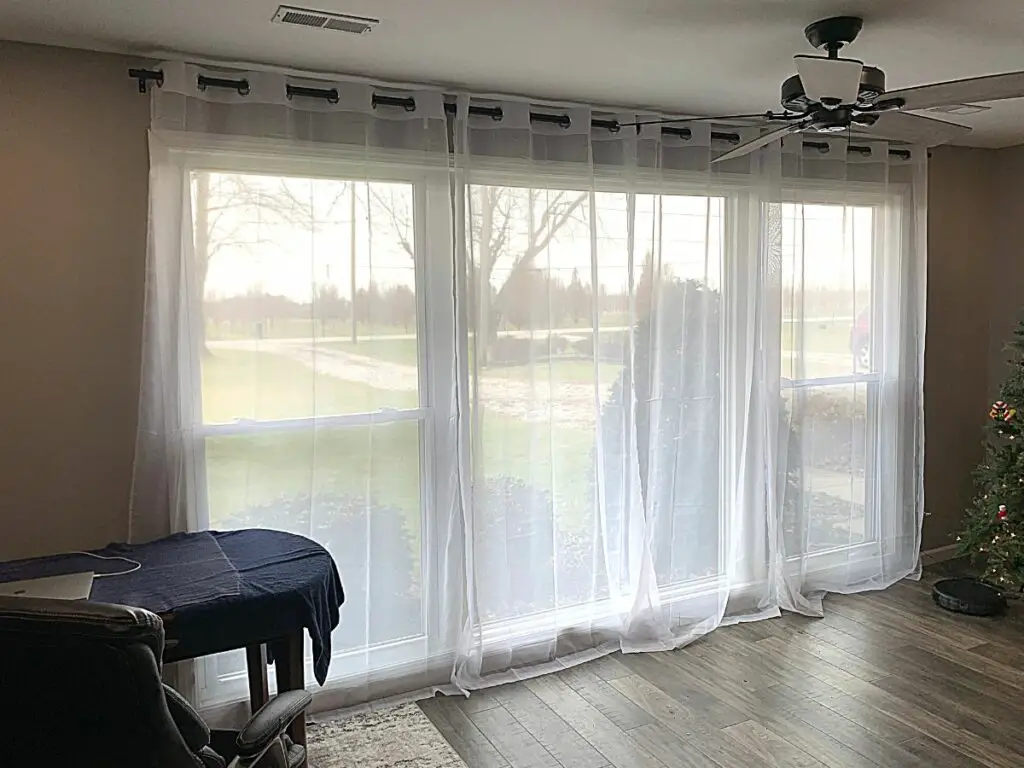
I wanted all of the light to filter into this room even when the curtains were shut. So I chose these gorgeous sheer curtains found at Amazon.
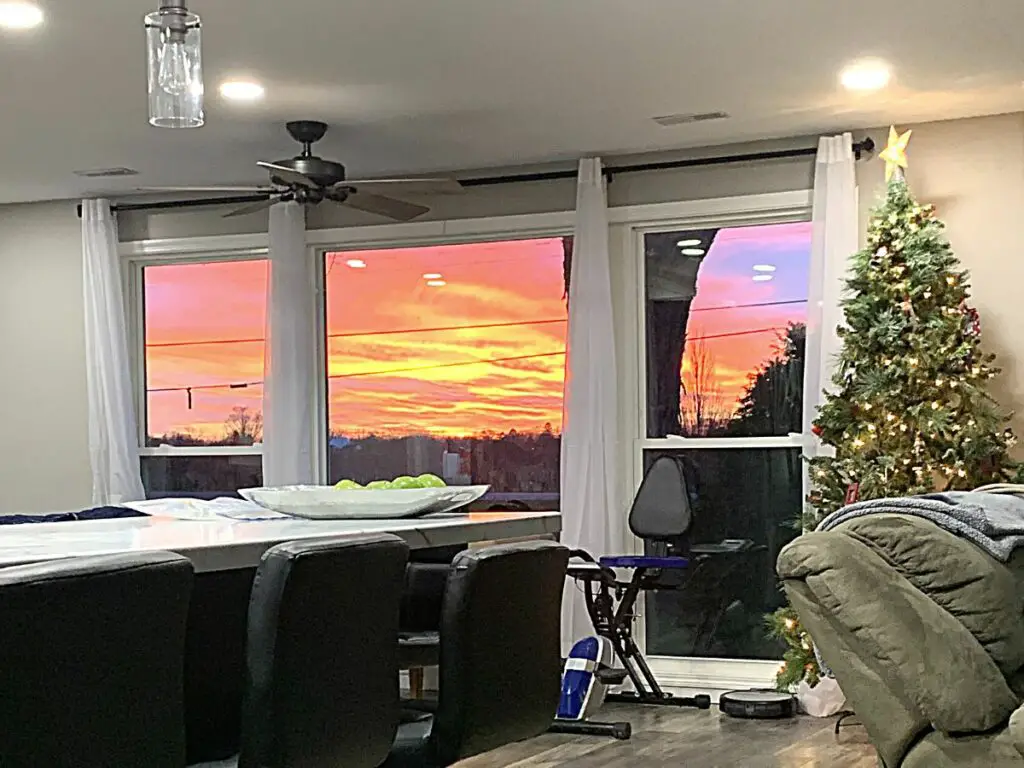
I mean, look at this sunset!! We pretty much never shut these curtains because that view is just breathtaking!
Other FAQs About Hanging Curtains On Wide Windows
Here are some other frequently asked questions about hanging curtains on wide windows to help you put them in the correct placement.
Should Curtains Be Hung Above The Window Frame?
Curtains should be hung above and wider than the window frame. Hang the curtains 4 inches below the ceiling and 16 inches wider on either side of the window to make your curtains look grand and elegant.
Final Thoughts On Hanging Curtains Over Wide Windows
There you have it!
Hanging curtains over wide windows are slightly different from smaller windows, but still relatively simple to accomplish. Plus they pack a huge punch in the design department!
Hopefully, this tutorial helped you hang your curtains with ease.
Catch you in my next post!

By Christine
Christine is a blogger and DIYer who tackles home renovation and decorating projects alongside her husband, Adam, for their personal residence and rental properties. Although she successfully tackles large renovation projects to avoid expensive contractor fees and bring her vision to life now, her path to success was not easy.
Go here to read her story, “From a Clueless First-Time Homebuyer To A Confident DIYer Creating Her Dream Home One Project At A Time“.
Popular Posts


DIY With Christine is a participant in the Amazon Services LLC Associates Program, an affiliate advertising program designed to provide a means for sites to earn advertising fees by advertising and linking to Amazon.com.